EXTOSEAL ENCORS
Installation steps: Externally mounted windows
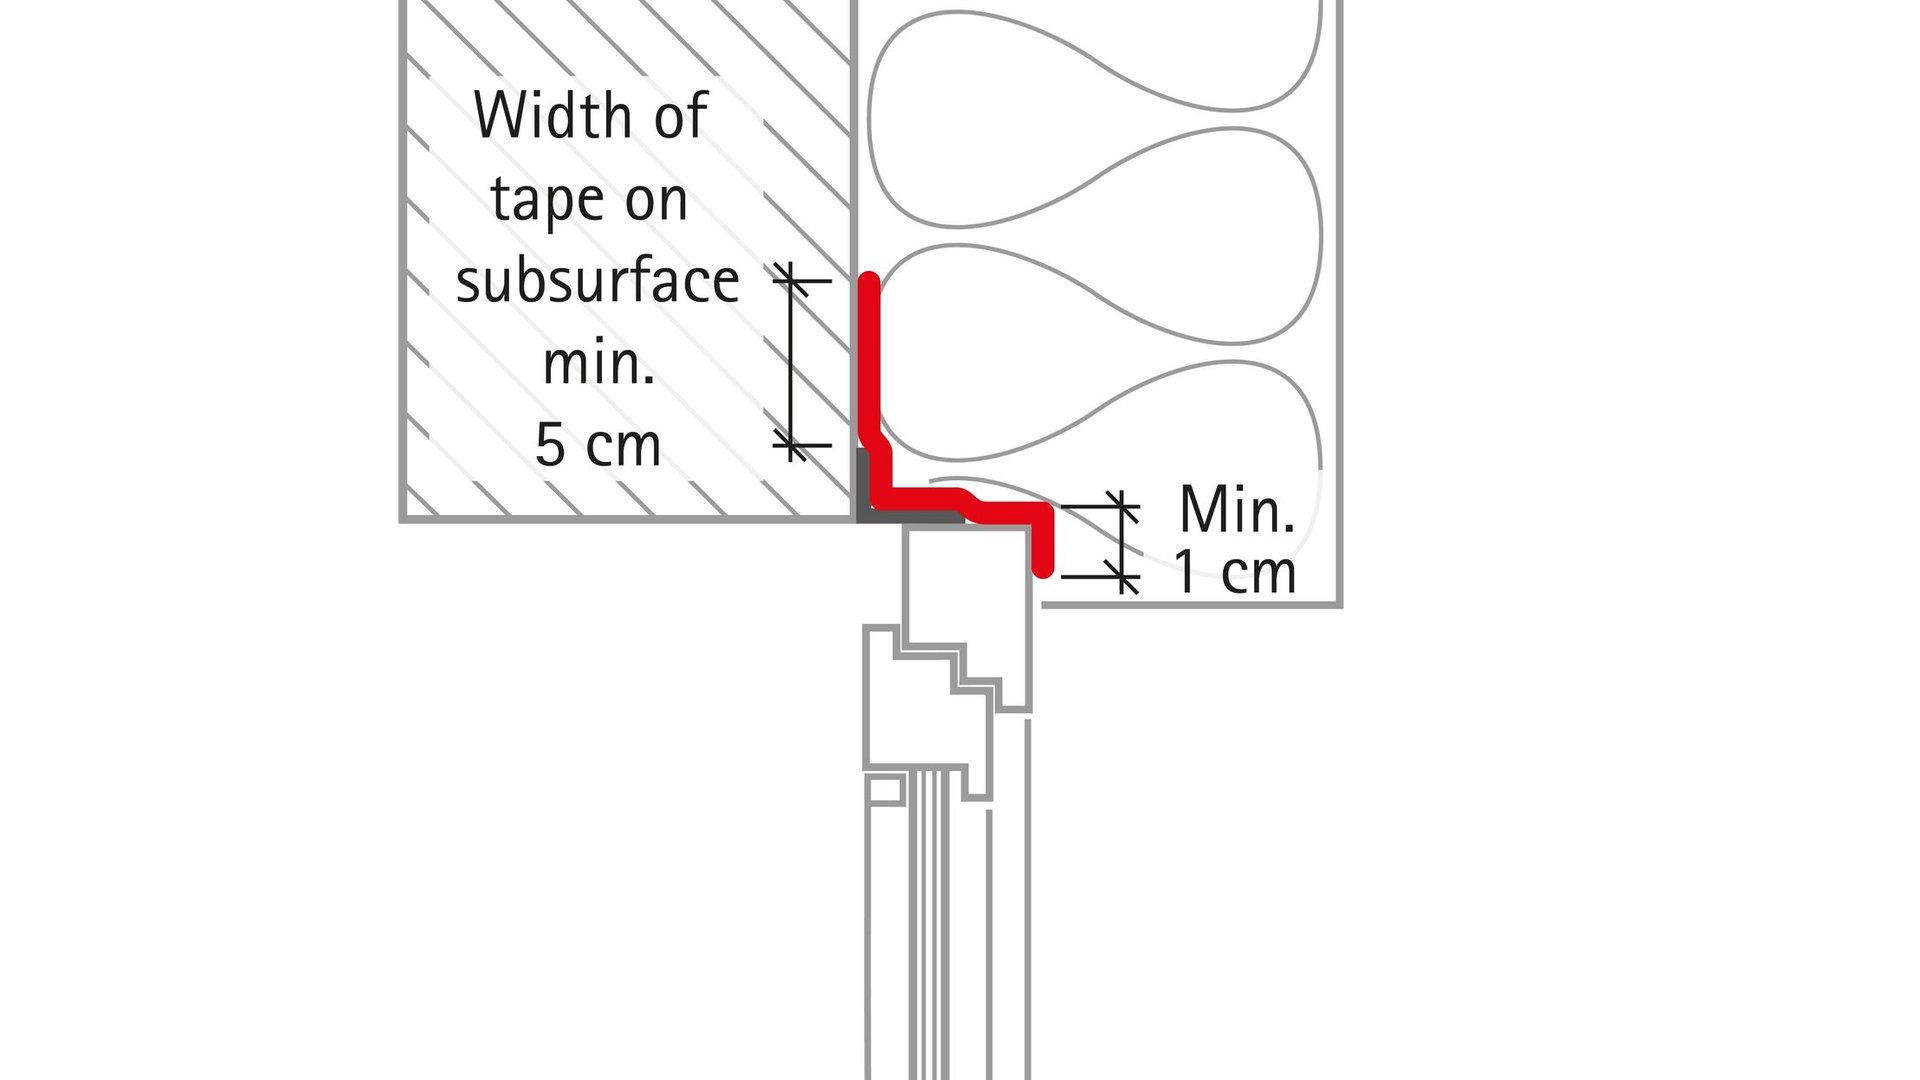
1. Preparation
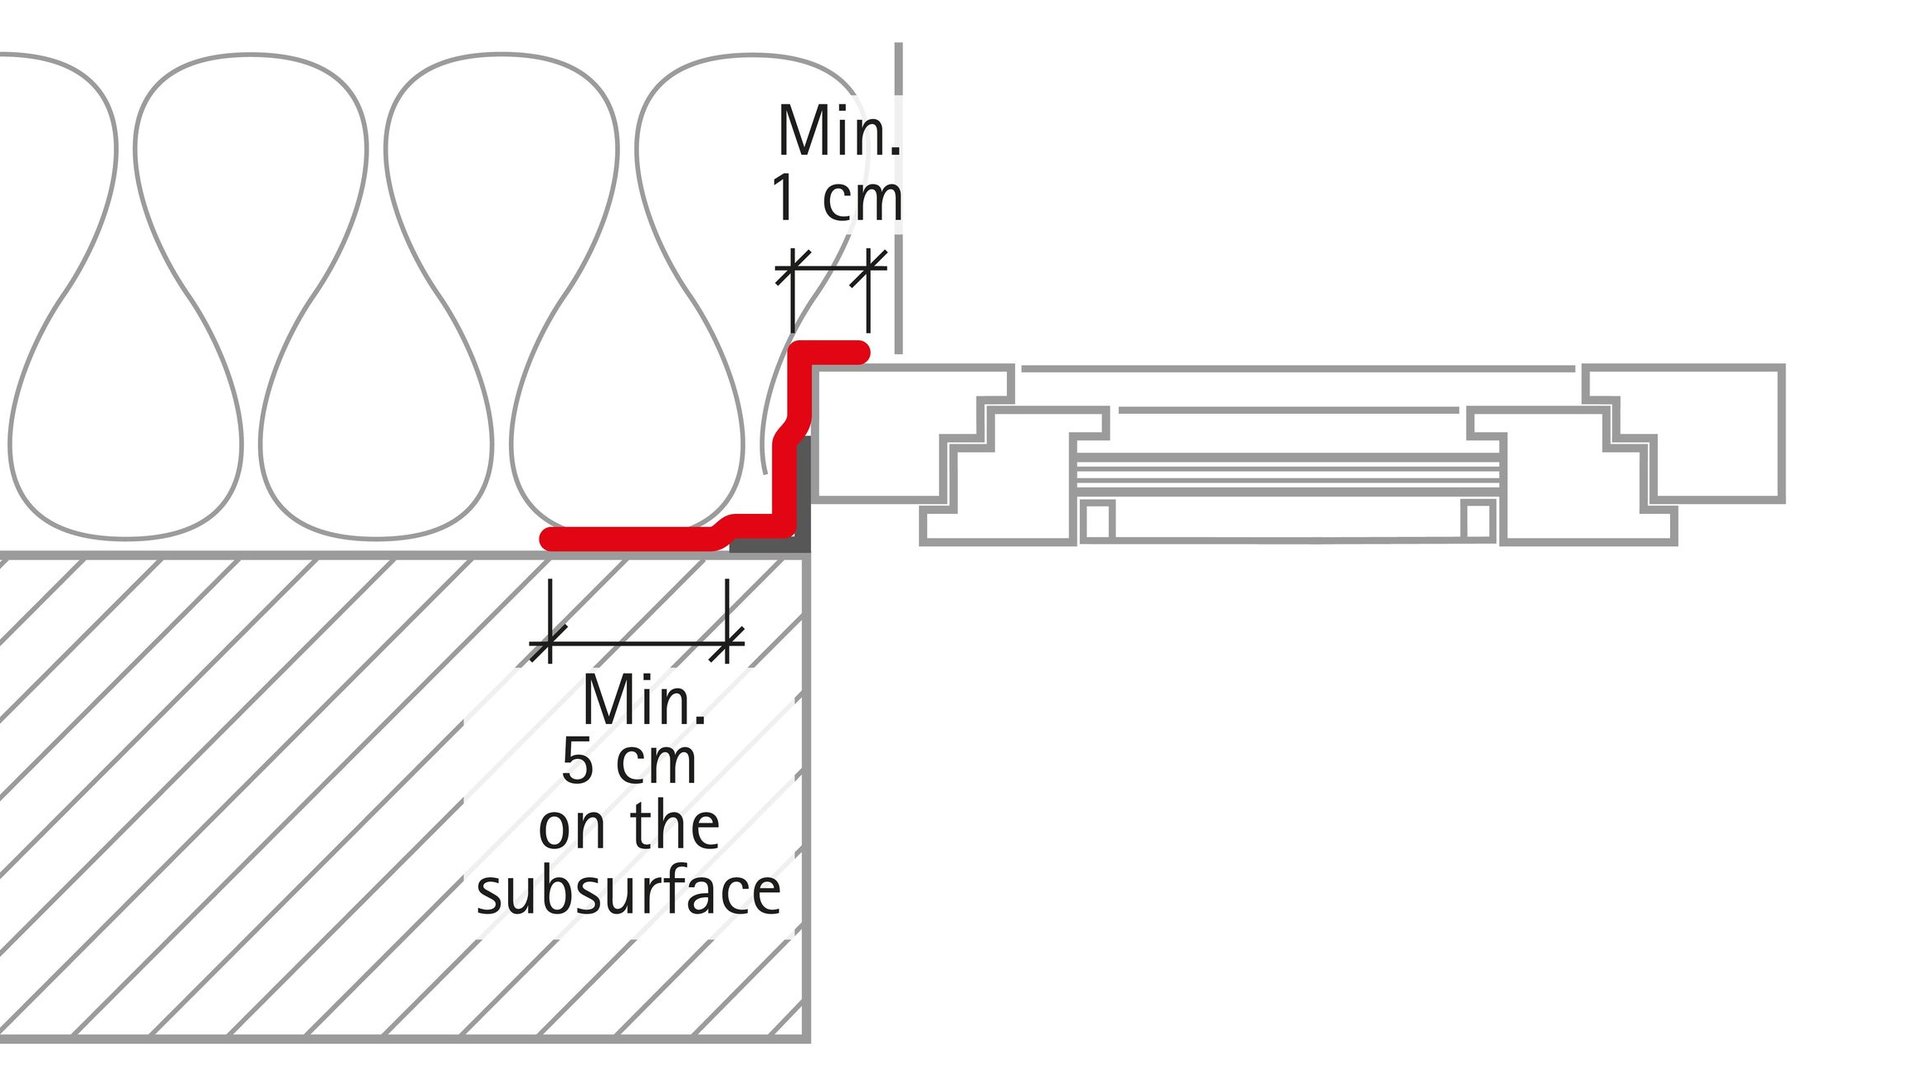
EXTOSEAL ENCORS should be stuck to window frames and the building structure in a waterproof manner. The tape width should be selected based on the minimum lengths shown here and on the separation distance between the front edge of the window and the wall. Applying tape to the front of the window frame can improve rain protection in the case of very ‘jagged’ window profiles, e.g. those made of plastic. If tape is continued onto the front of the window frame, the width of the taped area there must be at least 1 cm (3/8").
1. Preparation
EXTOSEAL ENCORS should be stuck to window frames and the building structure in a waterproof manner. The tape width should be selected based on the minimum lengths shown here and on the separation distance between the front edge of the window and the wall. Applying tape to the front of the window frame can improve rain protection in the case of very ‘jagged’ window profiles, e.g. those made of plastic. If tape is continued onto the front of the window frame, the width of the taped area there must be at least 1 cm (3/8").
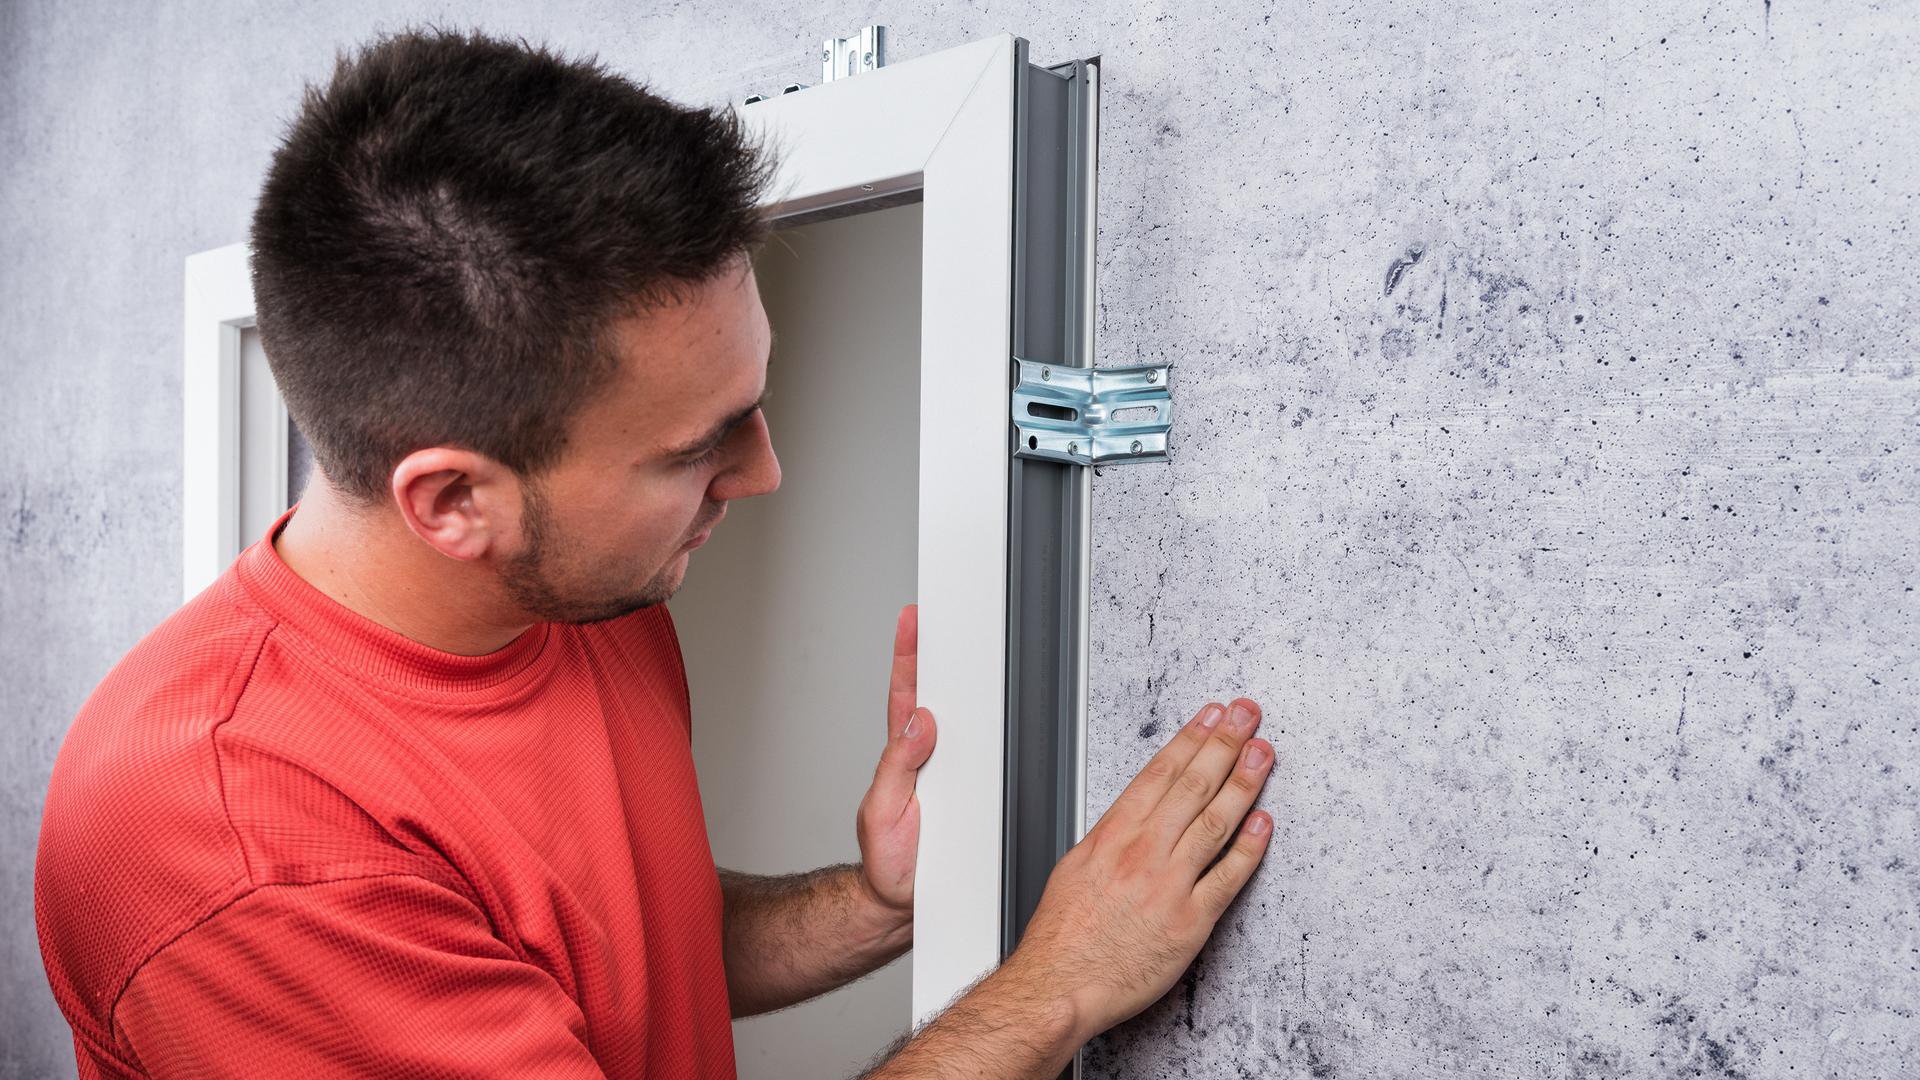
2. Assess the initial situation
The windows and all fasteners must be installed correctly.
2. Assess the initial situation
The windows and all fasteners must be installed correctly.

3. Clean the subsurface
Remove any loose material using a brush or vacuum cleaner. Strengthen unstable (e.g. crumbling) subsurfaces with TESCON PRIMER, if necessary.
3. Clean the subsurface
Remove any loose material using a brush or vacuum cleaner. Strengthen unstable (e.g. crumbling) subsurfaces with TESCON PRIMER, if necessary.
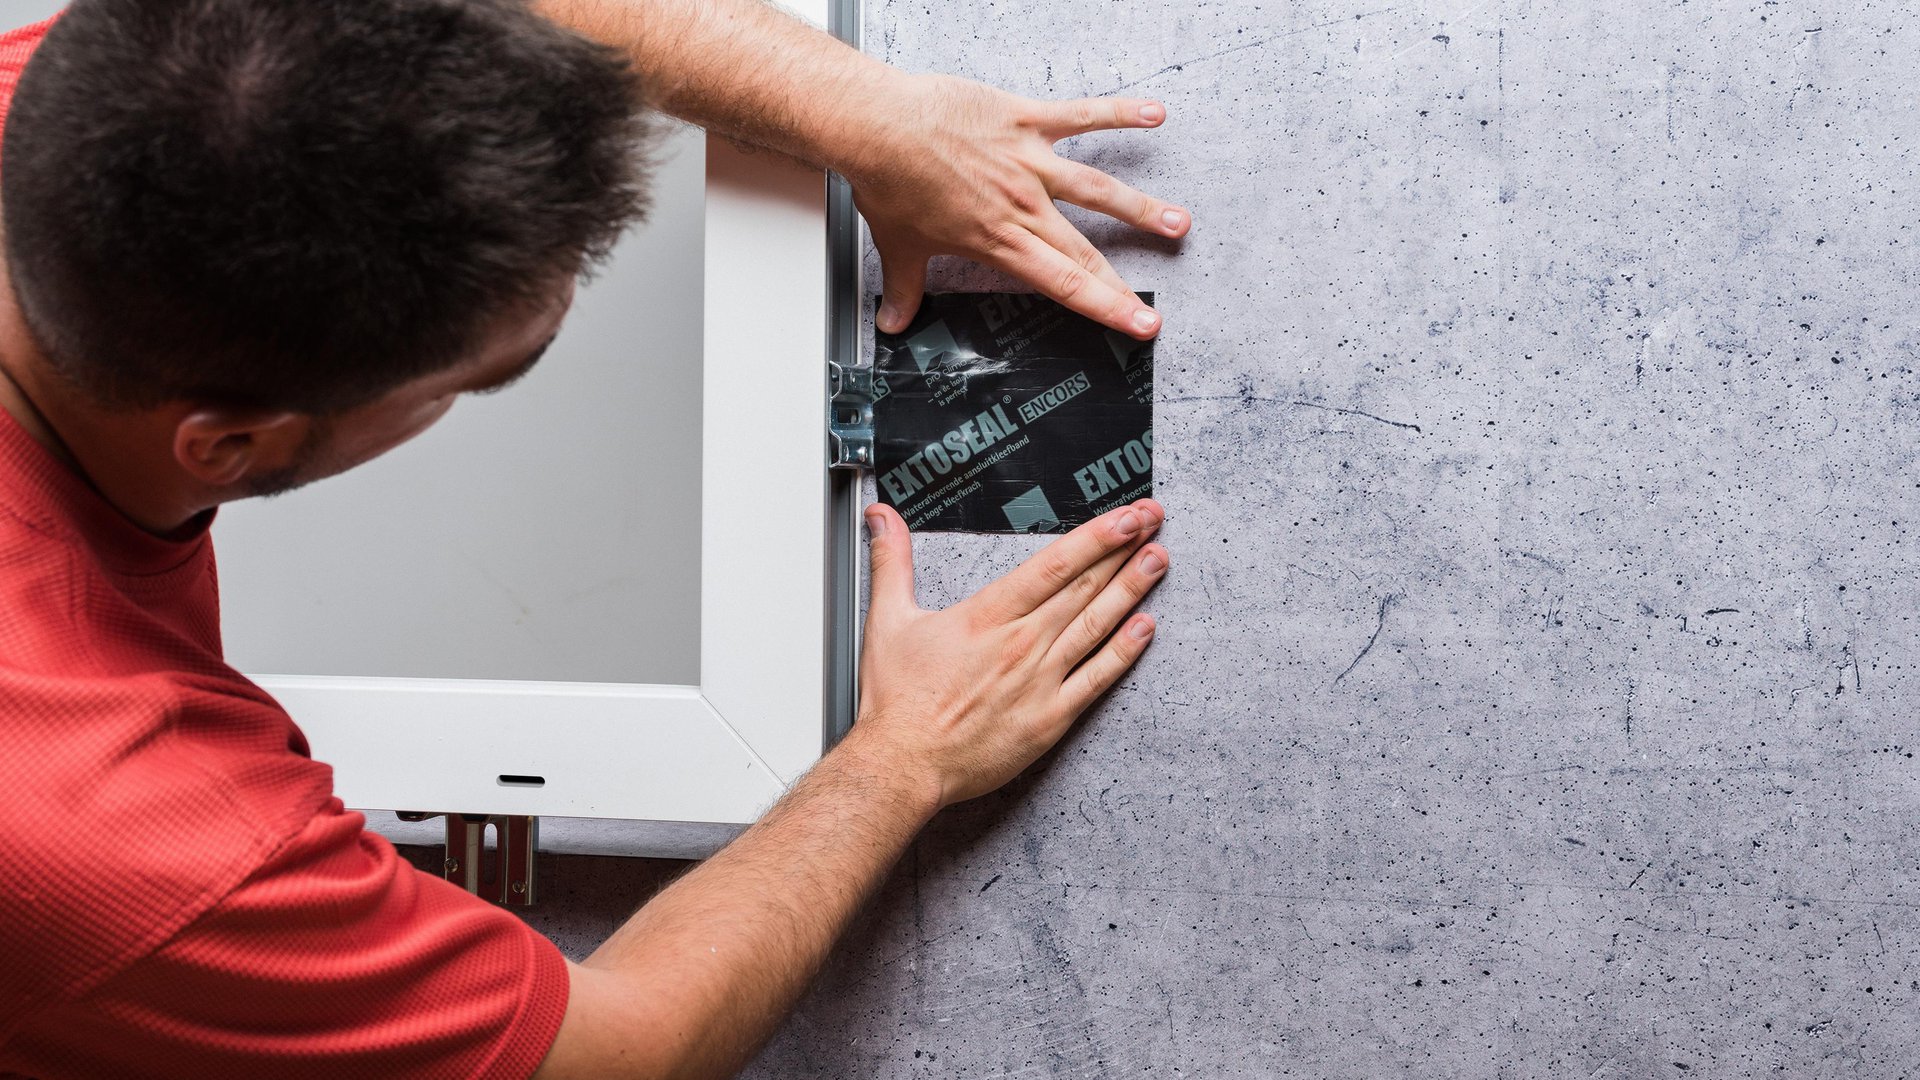
4. Tape over brackets
Brackets should be taped in such a way that a minimum width of 5 cm (2") is achieved for adhesion to the subsurface. In this case, EXTOSEAL ENCORS may be applied in a number of sections, which must overlap by at least 2 cm (3/4").
4. Tape over brackets
Brackets should be taped in such a way that a minimum width of 5 cm (2") is achieved for adhesion to the subsurface. In this case, EXTOSEAL ENCORS may be applied in a number of sections, which must overlap by at least 2 cm (3/4").
Practical tip
Mark out the centre of the window in order to ensure that EXTOSEAL ENCORS extends by the same length on either side.
Practical tip
Mark out the centre of the window in order to ensure that EXTOSEAL ENCORS extends by the same length on either side.

Practical tip
Apply markings 1 cm (3/8") from the outer edge of the window frame to ensure the tape is applied straight to the front of the frame.
Practical tip
Apply markings 1 cm (3/8") from the outer edge of the window frame to ensure the tape is applied straight to the front of the frame.
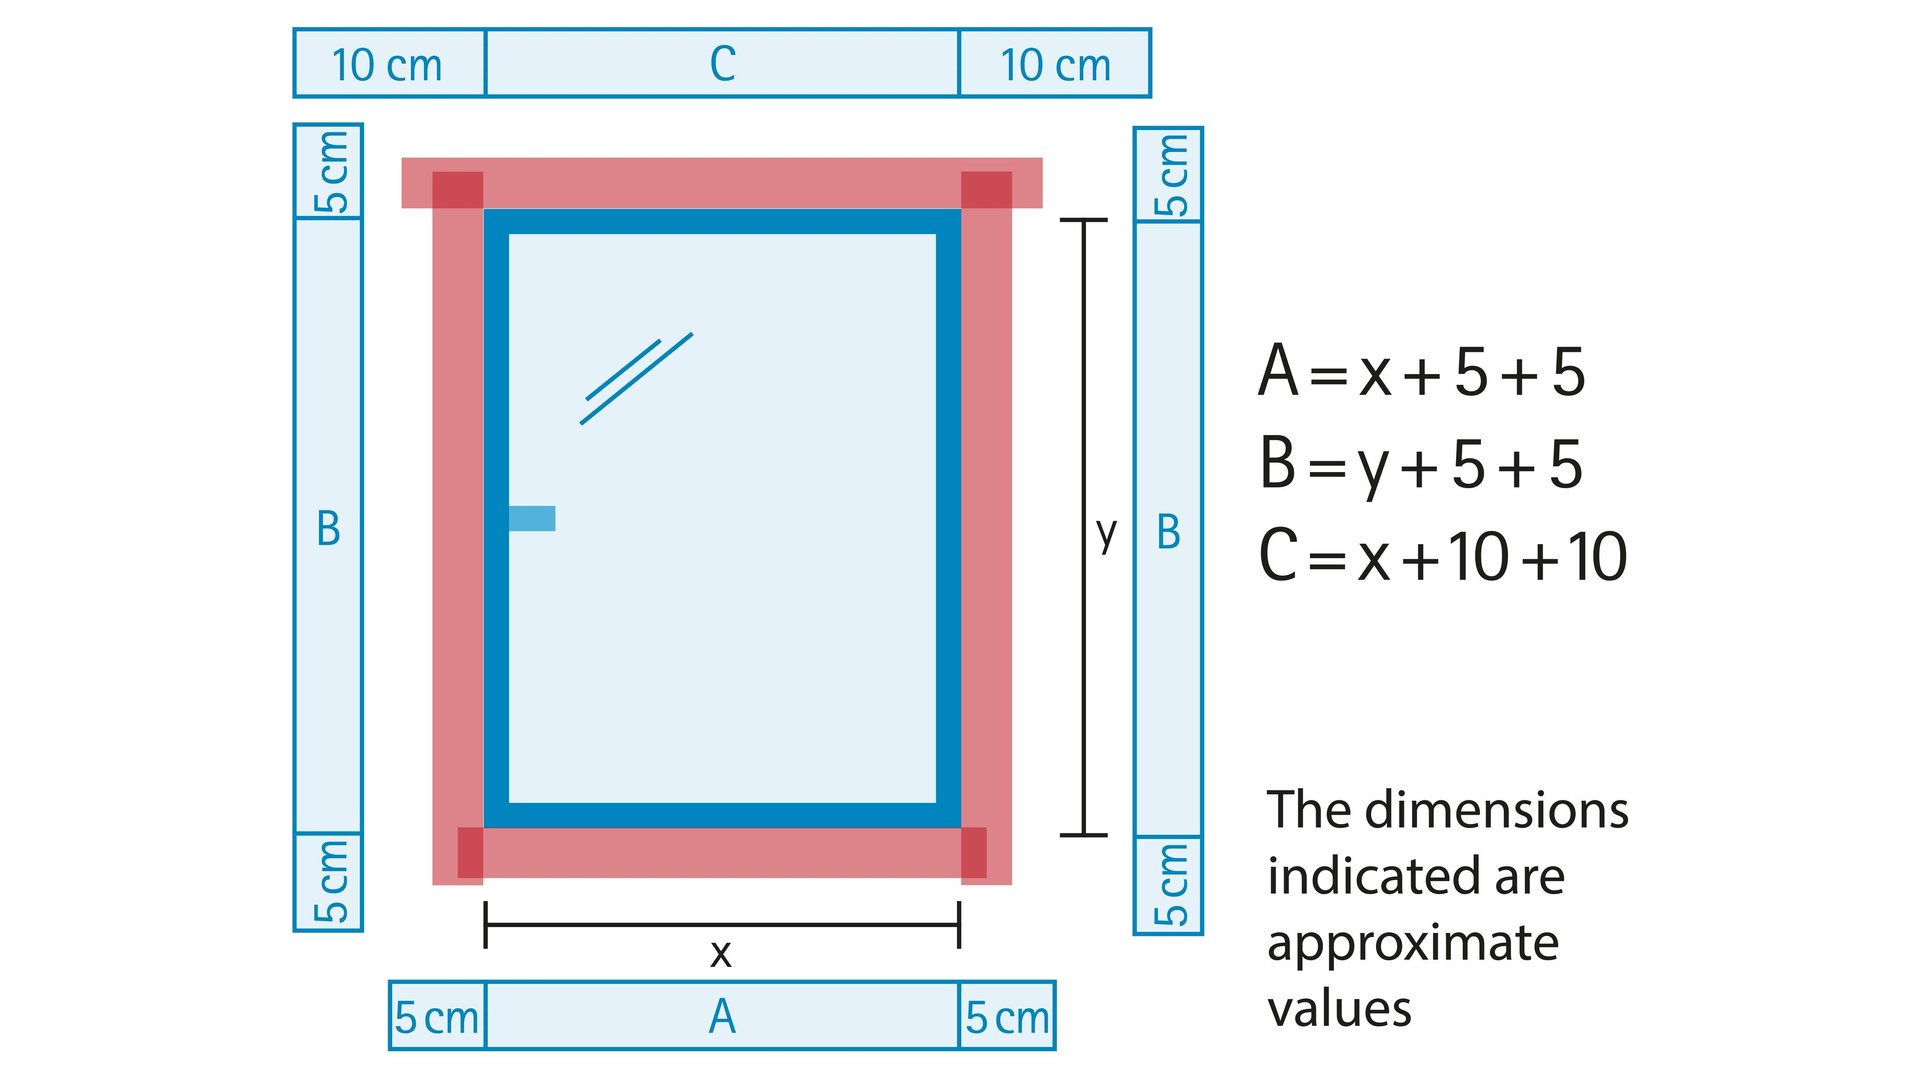
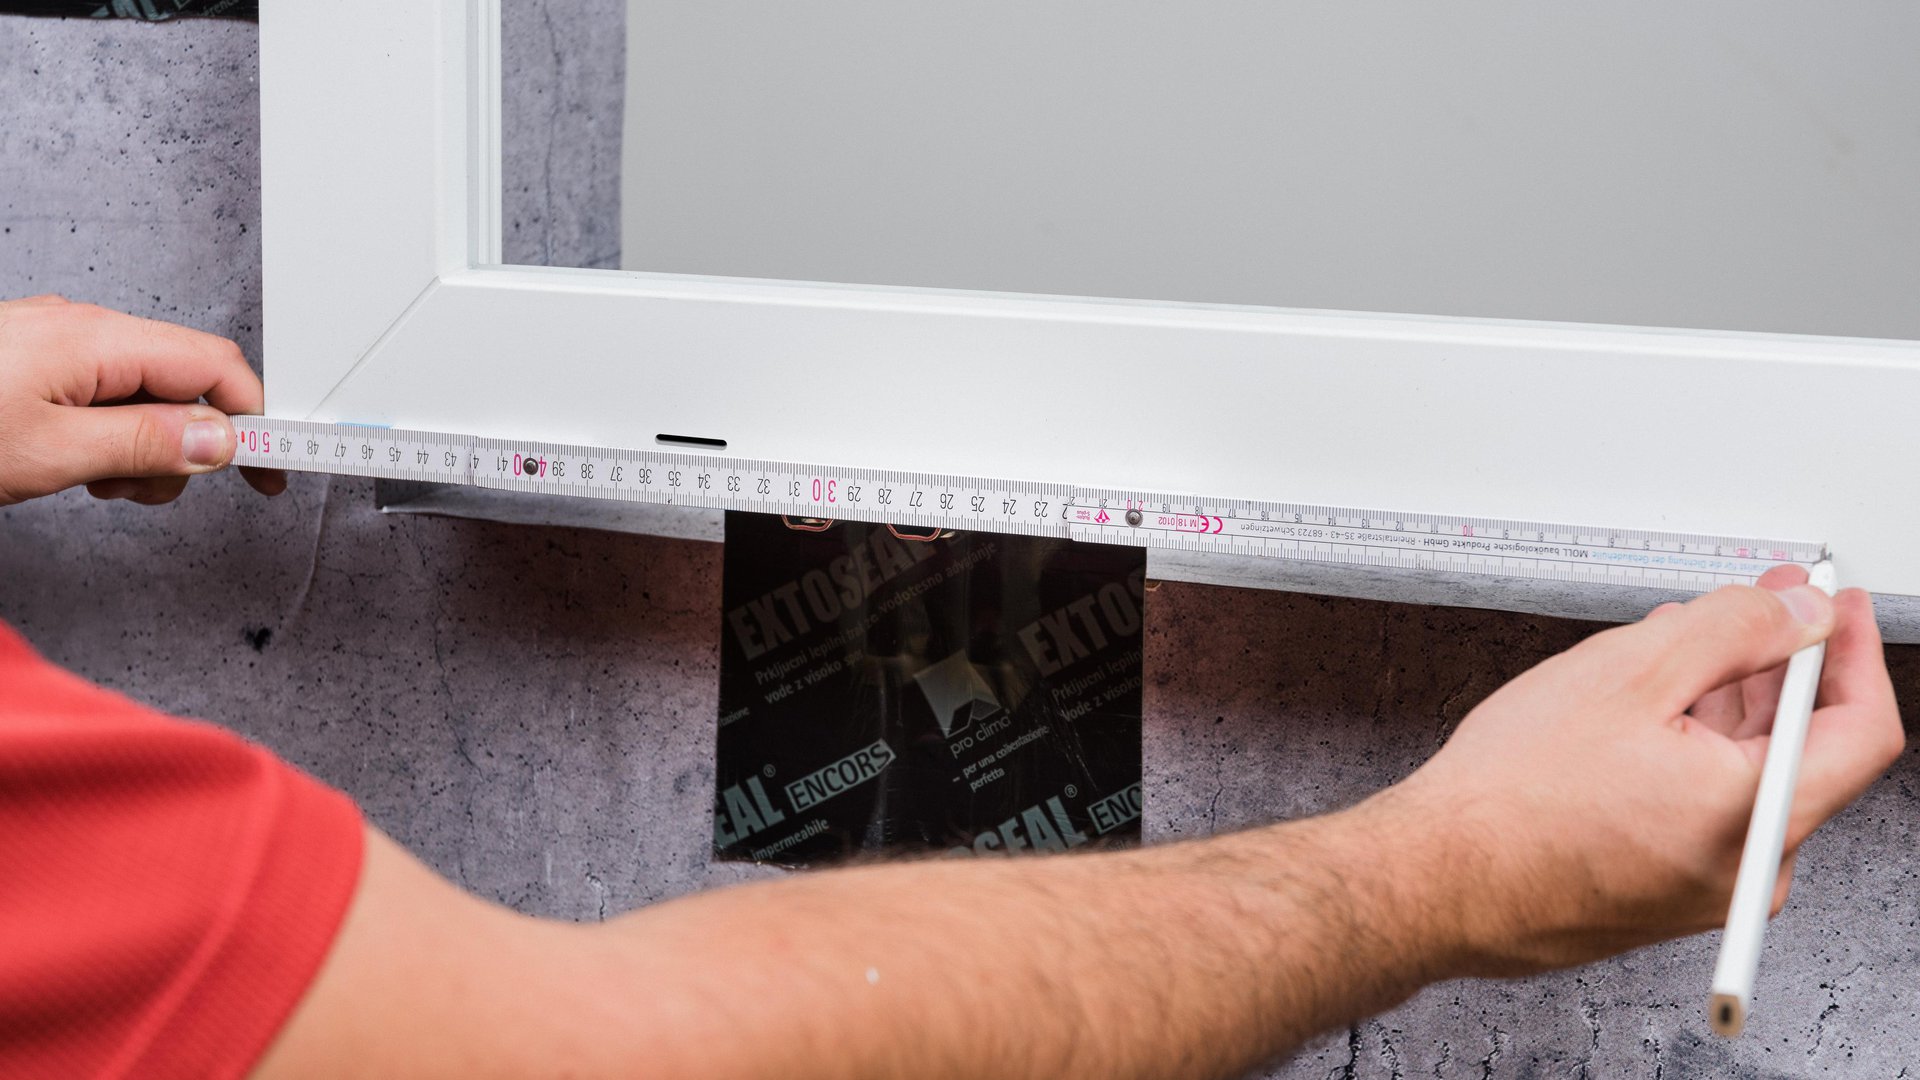
5. Cut the tape to size
When cutting tape lengths for the bottom and side sections, add 2 x 5 cm (2 x 2") to the relevant frame dimension, and add 2 x 10 cm (2 x 4") for the top tape length so that waterproof adhesive joints can be created at the corners later on. If the adhesive joints are created using a number of shorter lengths of tape for a particular side, the tape overlap must always be at least 2 cm (3/4") at tape joints.
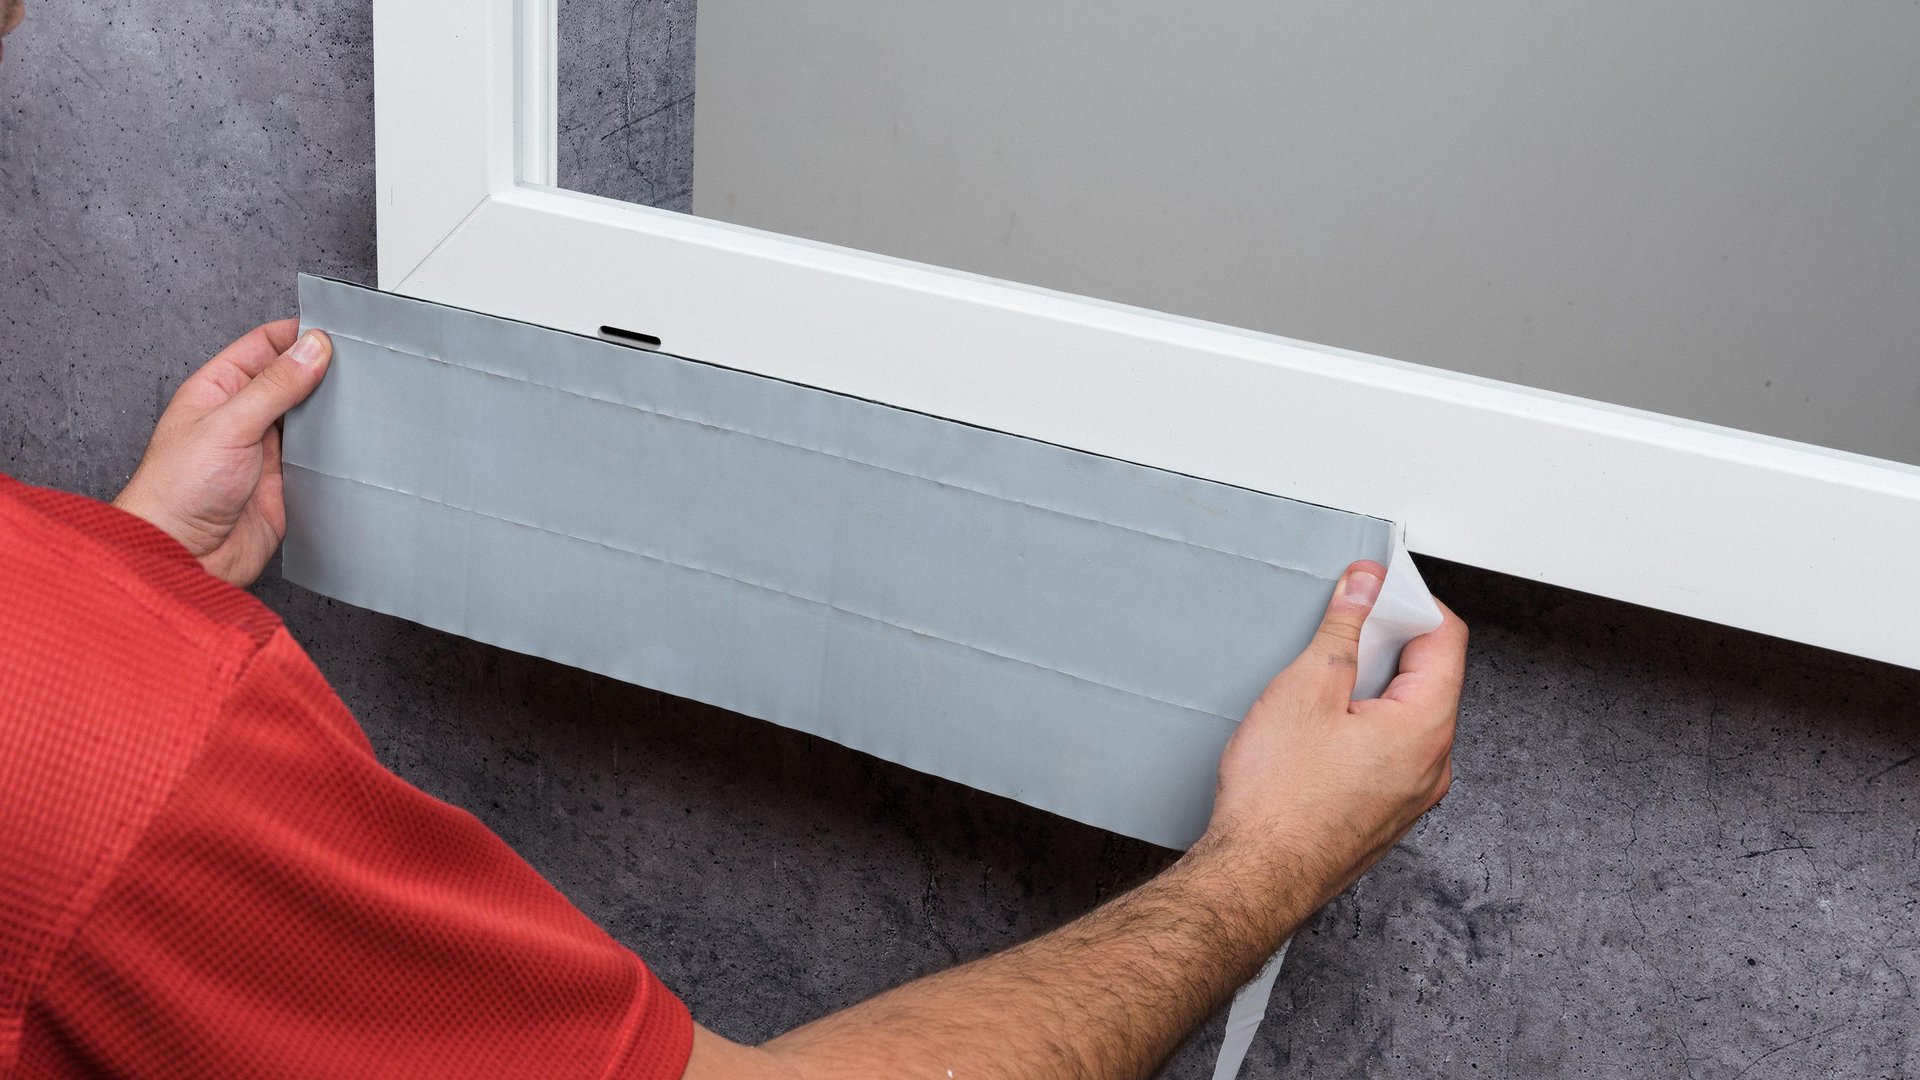
6. Stick to the window
Apply the tape in a waterproof manner, starting at the bottom of the window and working up. Fold the tape to half of its total length and remove the narrow release film strip on one side. Position the tape at the marking at the centre of the window and stick in place. Remove the rest of the narrow release film strip, unfold the adhesive tape and stick it to the window frame. The excess length at each side will then be the same.
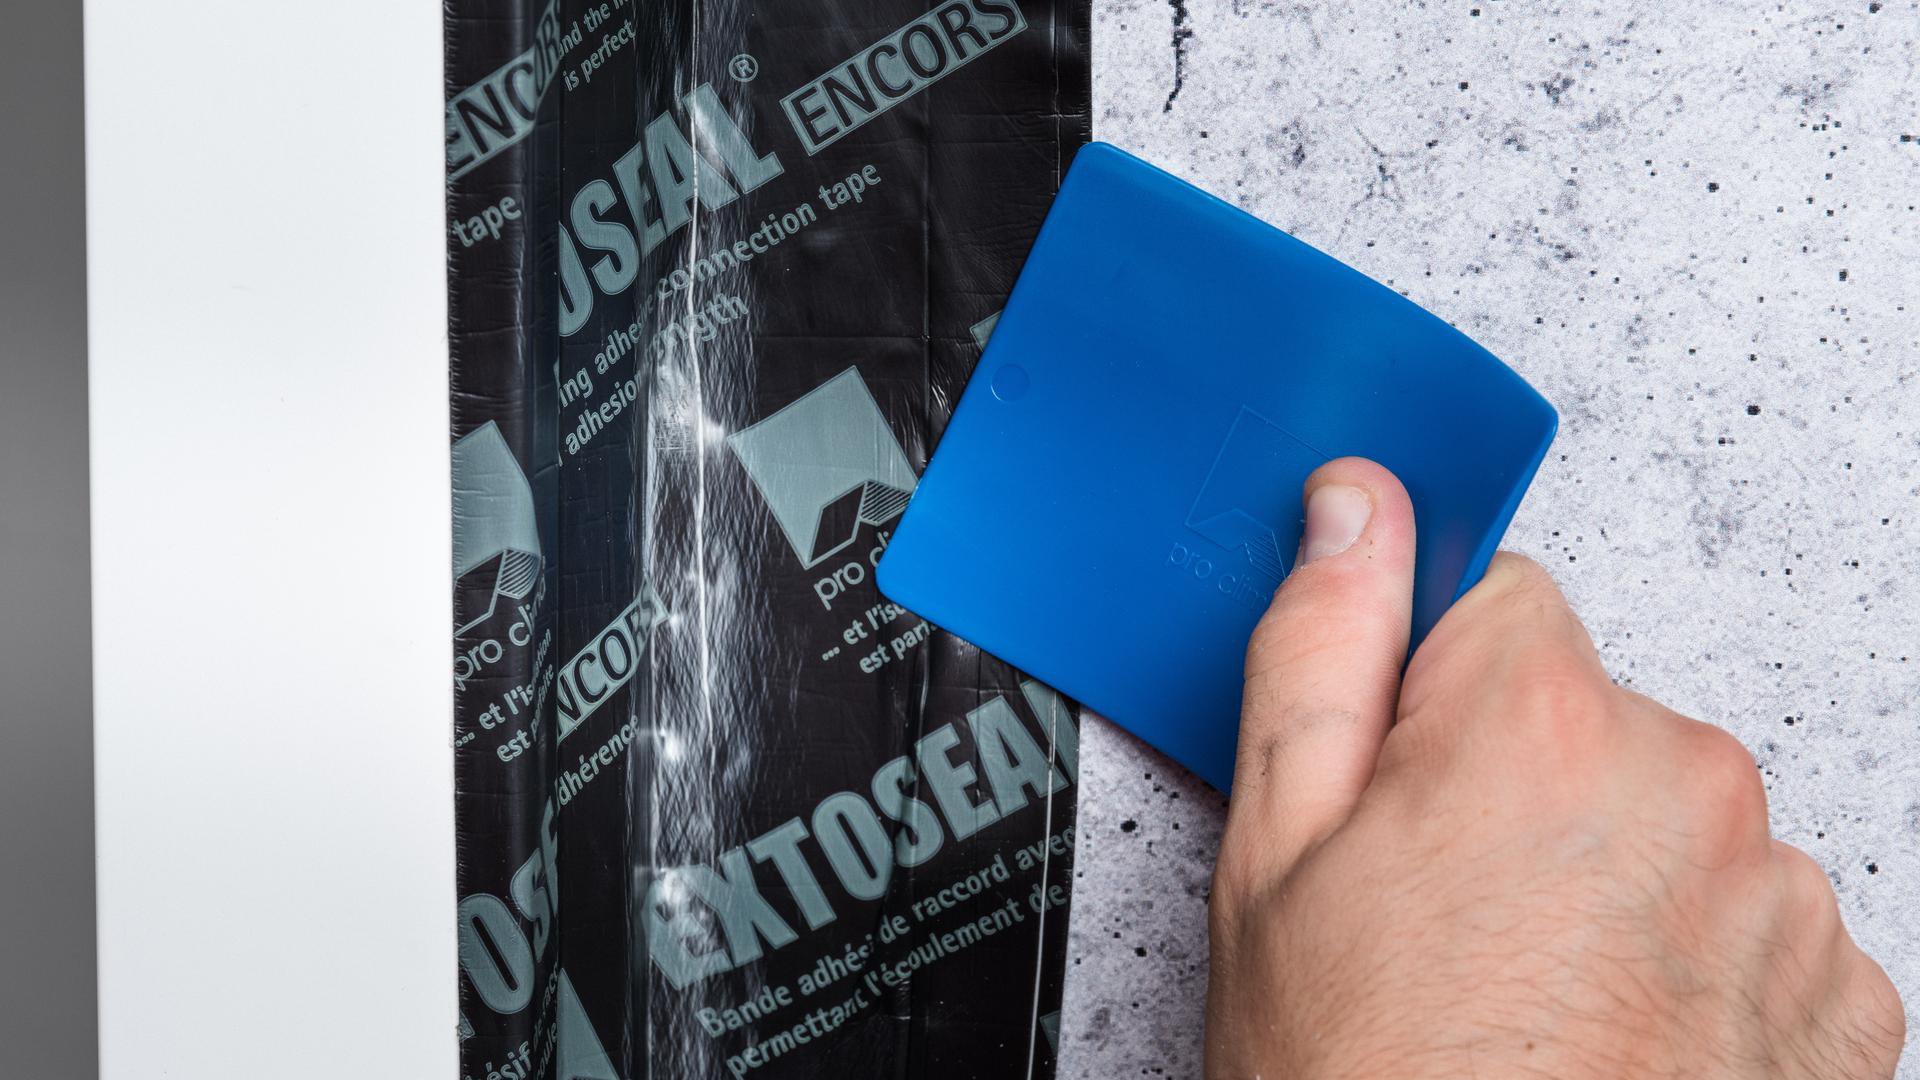
7. Stick to the wall
When applying the tape to the wall, remove the remaining release film strips and stick the tape to the frame and/or the masonry subsurface. Avoid hollows between the window frame and the masonry/concrete subsurface so that the thermal insulation material can be pushed right up to the window frame. Rub the adhesive tape using the PRESSFIX application tool to secure the adhesive bond.

8. Tape application at the corners
Pre-stretch EXTOSEAL ENCORS uniformly so that the adhesive tape can be stuck around the corners of the window frame – both to the frame and to the masonry/concrete – without any tension. After sticking, rub the tape firmly into place using the PRESSFIX application tool.
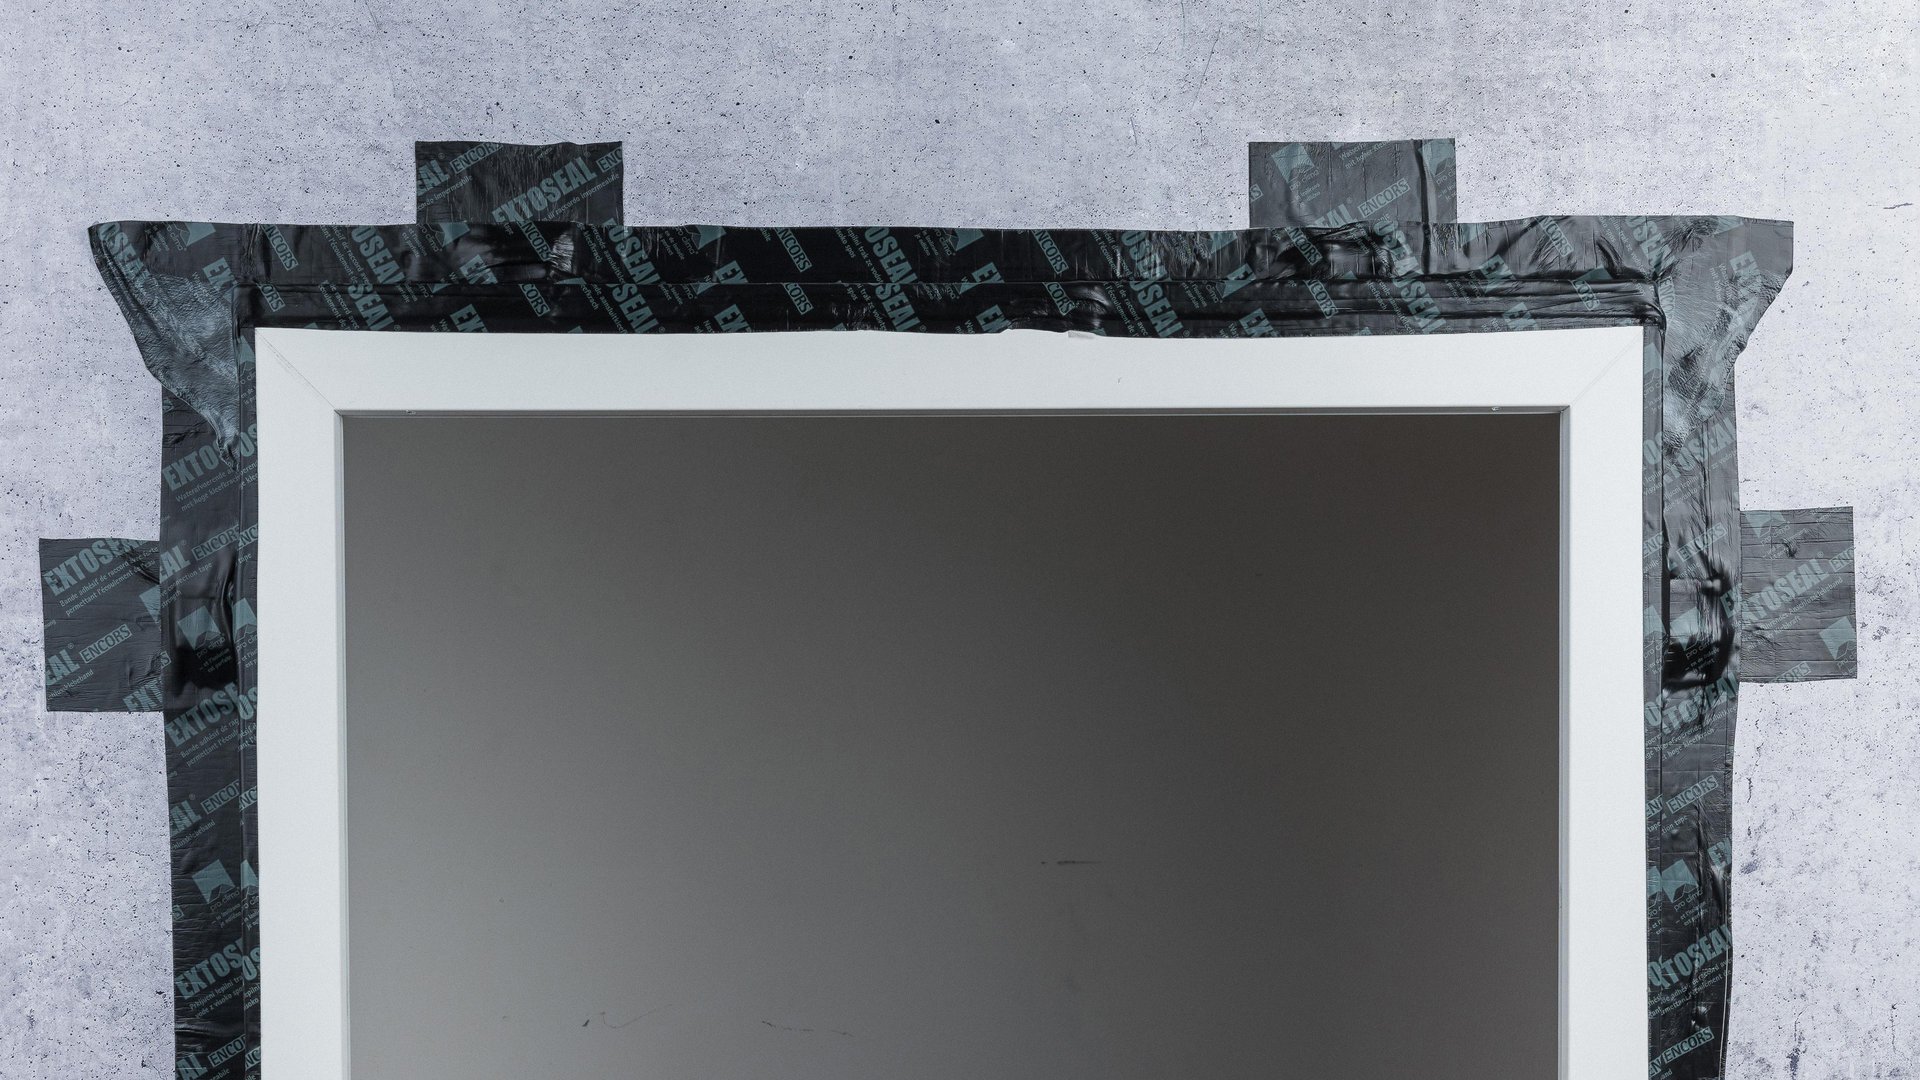
9. Tape application at the top
Applying tape to the front of the window frame can improve rain protection in the case of ‘jagged’ window profiles, e.g. those made of plastic. The width of the taped area on the front of the window frame must be at least 1 cm (3/8"). To ensure reliable run-off of water, it is recommended to provide an inclined run-off (e.g. use an insulation wedge) in the case of separation distances of greater than 50 mm (2") between the front edge of the window frame and the wall.