Installation steps

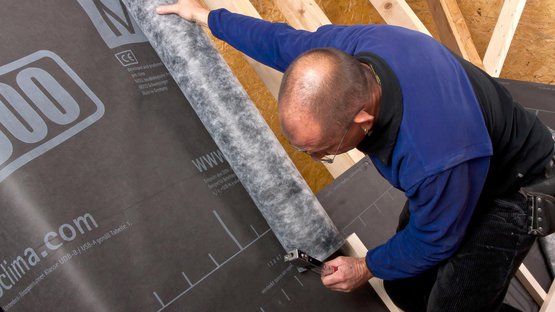
1. Install the membrane
Roll out the membrane parallel to the eave and use galvanised staples that are at least 10 mm (⅜″) wide by 8 mm (⁵⁄₁₆″) long to fasten the membrane in the overlap area in a manner that protects against moisture entry. Install the membrane leaving an additional 4 cm (1⅝″) overlap at adjacent building structures so that an airtight bond can be applied here subsequently.

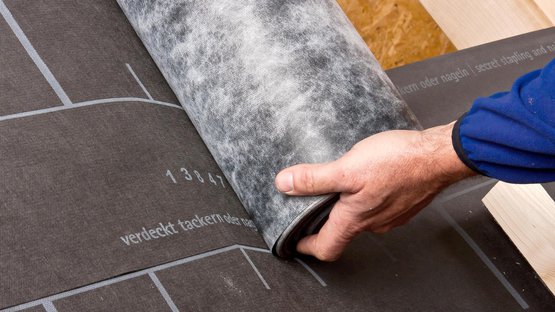
2. Overlap the membranes
Allow for an overlap for at least 10 cm (4″) between the membranes. The marking that is printed onto the membrane will serve as a guide here.
2. Overlap the membranes
Allow for an overlap for at least 10 cm (4″) between the membranes. The marking that is printed onto the membrane will serve as a guide here.

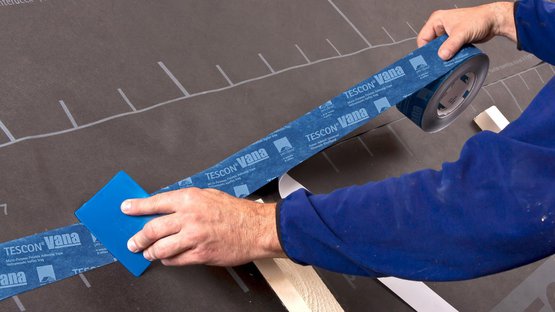
3. Tape the overlap
Clean the subsurface (dry and free of dust, silicone and grease) before taping; carry out an adhesion test, if necessary.
Centre the TESCON VANA system adhesive tape on the overlap and gradually stick it in place, ensuring that there are no folds or tension. Rub the tape firmly using the PRESSFIX to secure the adhesive bond. Ensure that there is sufficient resistance pressure.

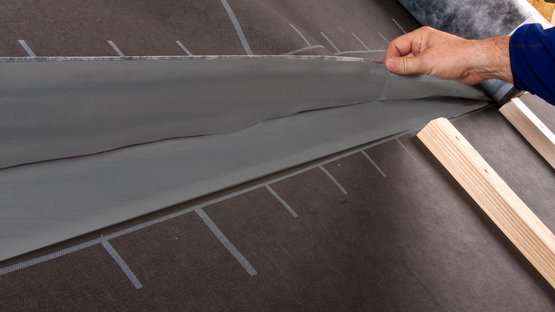
4a. 'connect' adhesion
Sticking of membrane overlaps using 'connect' membranes with two integrated self-adhesive strips.
4a. 'connect' adhesion
Sticking of membrane overlaps using 'connect' membranes with two integrated self-adhesive strips.

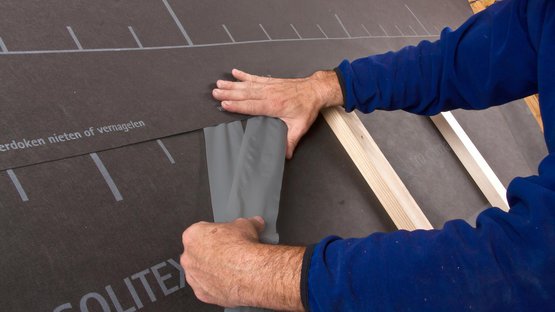
4b. 'connect' adhesion
Rub the resultant adhesive joint firmly using the PRESSFIX to secure the adhesive bond. Ensure that there is sufficient resistance pressure.
4b. 'connect' adhesion
Rub the resultant adhesive joint firmly using the PRESSFIX to secure the adhesive bond. Ensure that there is sufficient resistance pressure.

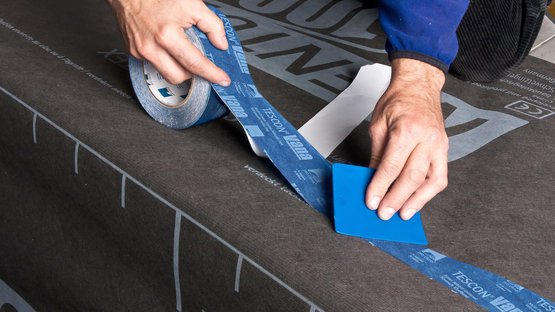
5a. Ridge / hip formation
In the case of fully insulated cross sections, place membranes over the ridge/hip and attach in place using staples in the area of the counter batten. Overlap relative to the membrane underneath of at least 10–15 cm (4″-6″).
5a. Ridge / hip formation
In the case of fully insulated cross sections, place membranes over the ridge/hip and attach in place using staples in the area of the counter batten. Overlap relative to the membrane underneath of at least 10–15 cm (4″-6″).

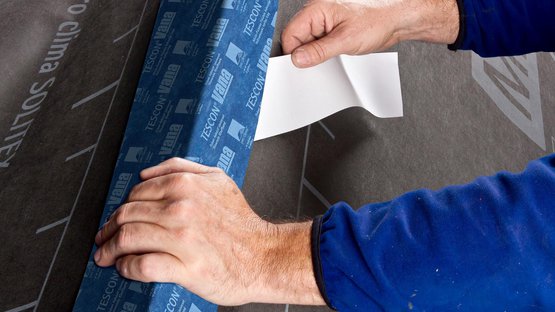
5b. Ridge / hip formation
Then stick in an airtight manner using the TESCON VANA system adhesive tape. Alternatively, stick a wide strip of TESCON VANA onto the ridge. Rub the tape firmly using the PRESSFIX to secure the adhesive bond. Ensure that there is sufficient resistance pressure.
5b. Ridge / hip formation
Then stick in an airtight manner using the TESCON VANA system adhesive tape. Alternatively, stick a wide strip of TESCON VANA onto the ridge. Rub the tape firmly using the PRESSFIX to secure the adhesive bond. Ensure that there is sufficient resistance pressure.

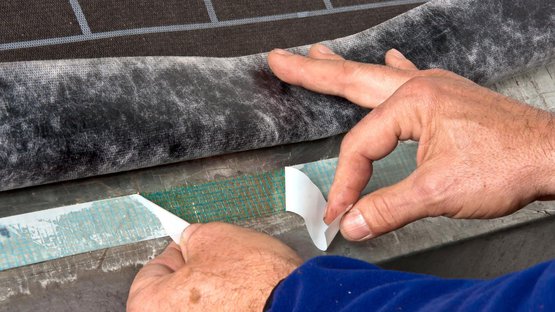
6. Sealing at eaves
Position the membrane on the eave flashing or eave strip and stick in place using the integrated self-adhesive strip (for 'connect' membranes), double-sided DUPLEX adhesive tape or single-sided TESCON VANA system adhesive tape, ensuring that there are no folds or creases.
6. Sealing at eaves
Position the membrane on the eave flashing or eave strip and stick in place using the integrated self-adhesive strip (for 'connect' membranes), double-sided DUPLEX adhesive tape or single-sided TESCON VANA system adhesive tape, ensuring that there are no folds or creases.

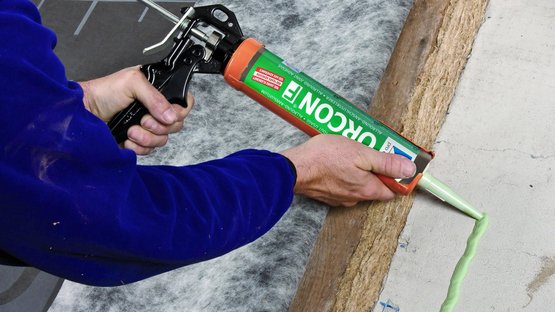
7a. Sealing to rough or mineral subsurfaces
First create a smooth finish on rough wall caps. Clean the subsurface. Apply a line of ORCON F adhesive sealant with a thickness of at least 5 mm (³⁄₁₆″) (more in the case of rough subsurfaces, if necessary).
7a. Sealing to rough or mineral subsurfaces
First create a smooth finish on rough wall caps. Clean the subsurface. Apply a line of ORCON F adhesive sealant with a thickness of at least 5 mm (³⁄₁₆″) (more in the case of rough subsurfaces, if necessary).

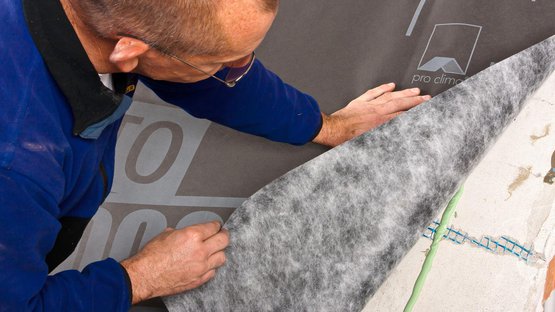
7b. Sealing to rough or mineral subsurfaces
Apply the membrane, leaving slack to allow for expansion, and do not press the adhesive completely flat.
7b. Sealing to rough or mineral subsurfaces
Apply the membrane, leaving slack to allow for expansion, and do not press the adhesive completely flat.

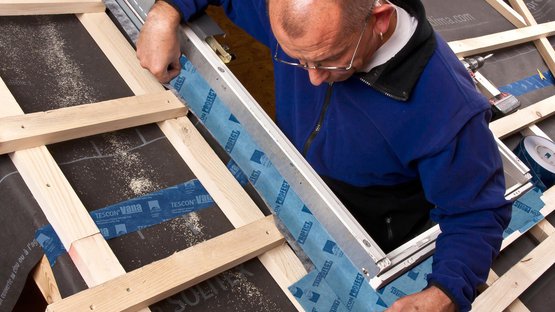
8. Sealing at skylights
MENTO membranes can be bonded to smooth surfaces such as skylights, chimneys, pipes and other roof elements using the TESCON PROFECT system adhesive tape.
8. Sealing at skylights
MENTO membranes can be bonded to smooth surfaces such as skylights, chimneys, pipes and other roof elements using the TESCON PROFECT system adhesive tape.

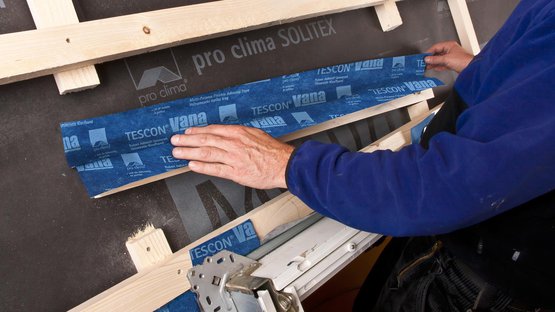
9. Installation of a water deflector
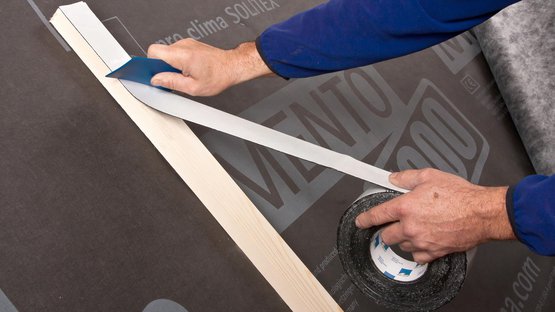
Install a batten with a lateral fall above the integrated roof element and stick it to the membrane using TESCON VANA. Create the water deflector in such a way that moisture is guided by a continuous counter batten into the next adjacent field that does not have an integrated roof element.

10. Sealing nail perforations
When installing temporary covering, TESCON NAIDECK nail-sealing tape must be installed between the counter battens and the MENTO membrane in order to create a seal.
10. Sealing nail perforations
When installing temporary covering, TESCON NAIDECK nail-sealing tape must be installed between the counter battens and the MENTO membrane in order to create a seal.
