
SOLITEX WELDANO 3000
Installation steps on the building site
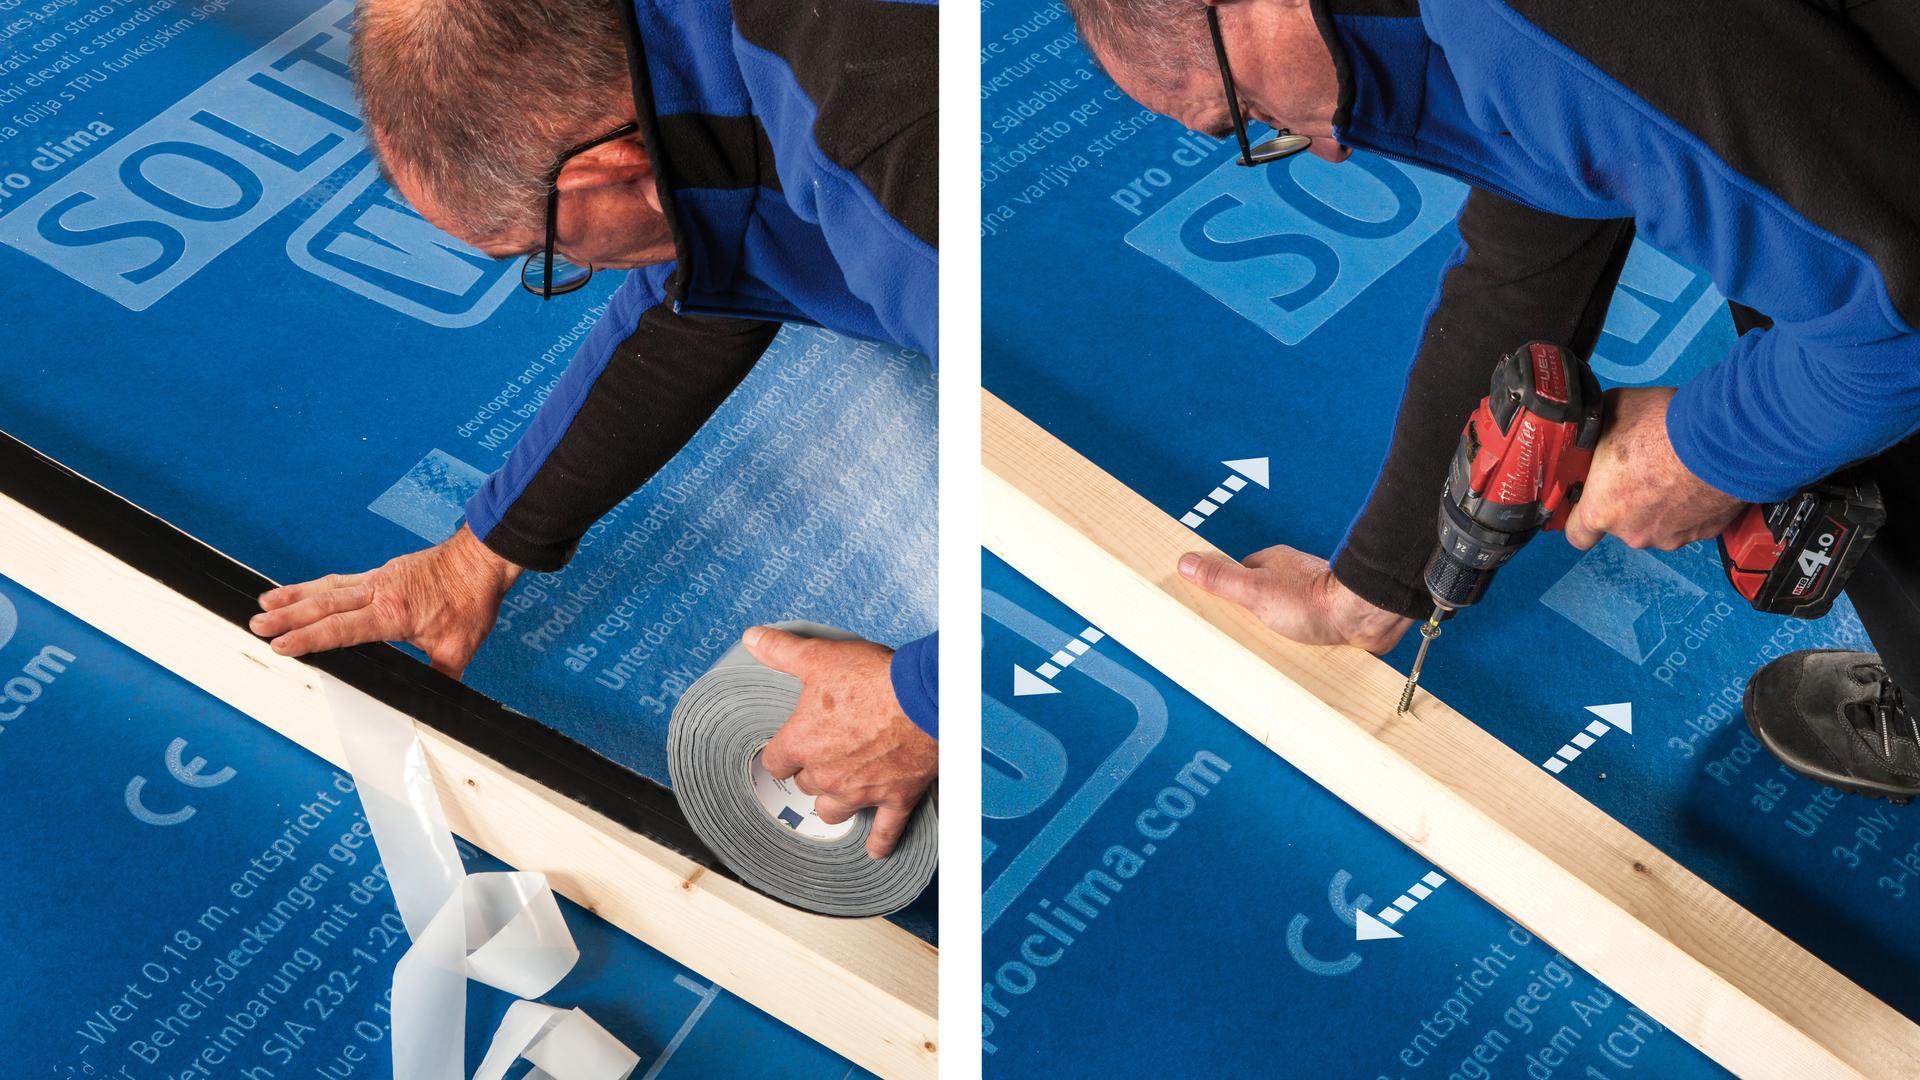
1a. Fit the flashing
If there are longitudinal joints with the eave flashing, first install SOLITEX WELDANO-S 3000 sealing strips parallel to the eave (lower edge flush with the edge of the sheathing).
1a. Fit the flashing
If there are longitudinal joints with the eave flashing, first install SOLITEX WELDANO-S 3000 sealing strips parallel to the eave (lower edge flush with the edge of the sheathing).
1b. Fit the flashing
1b. Fit the flashing
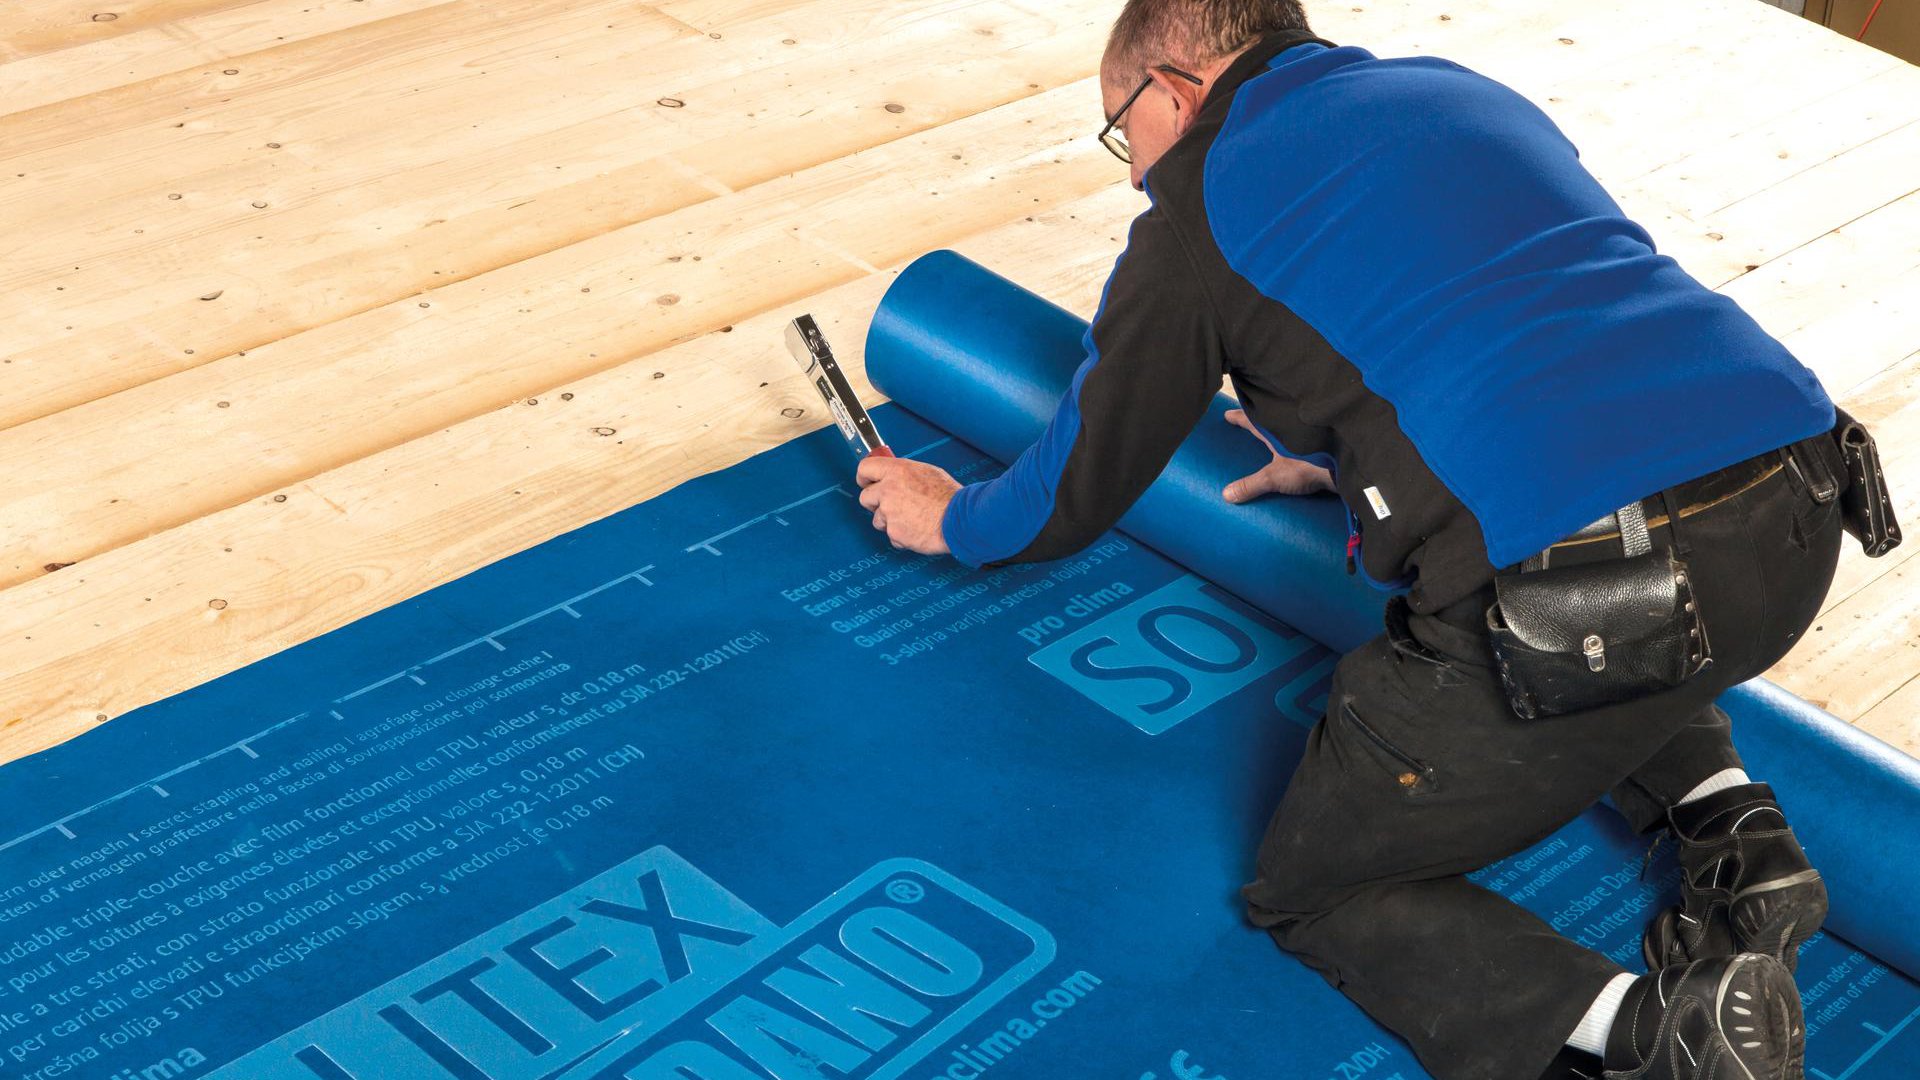
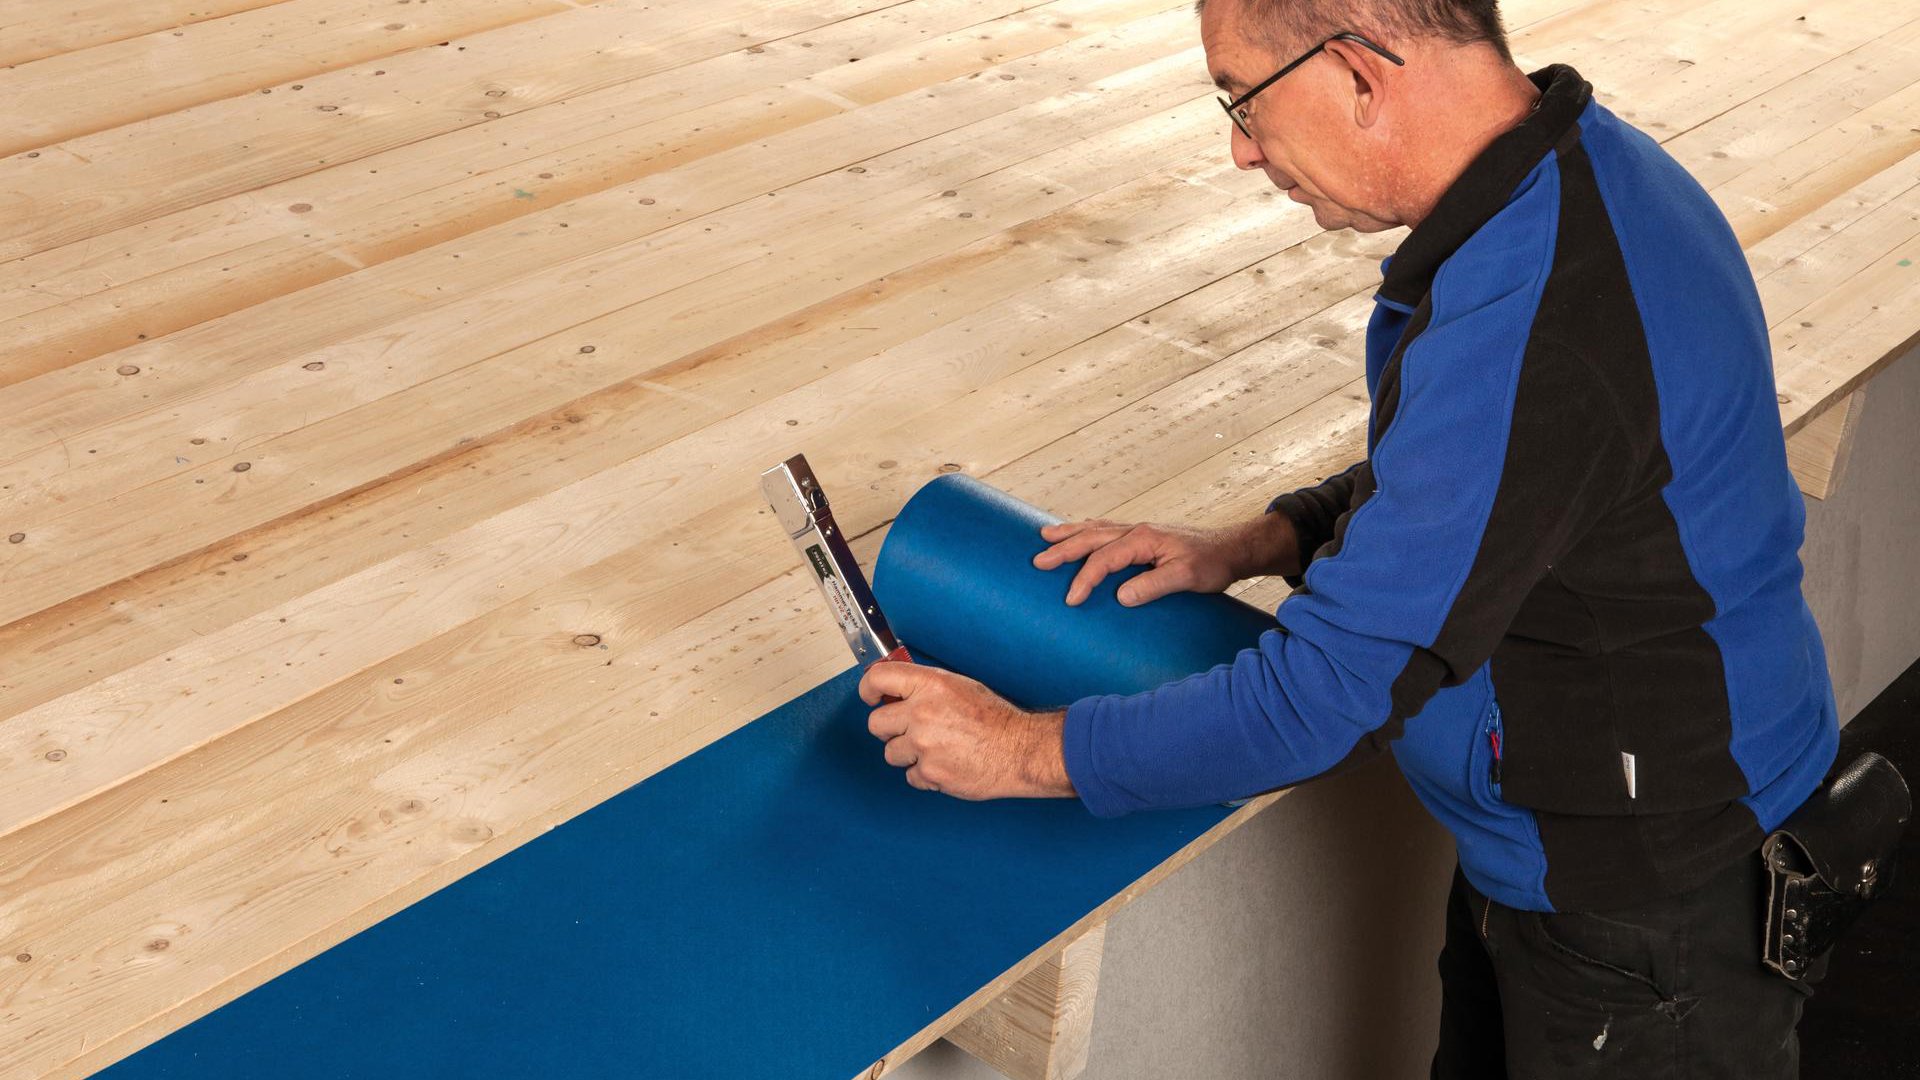
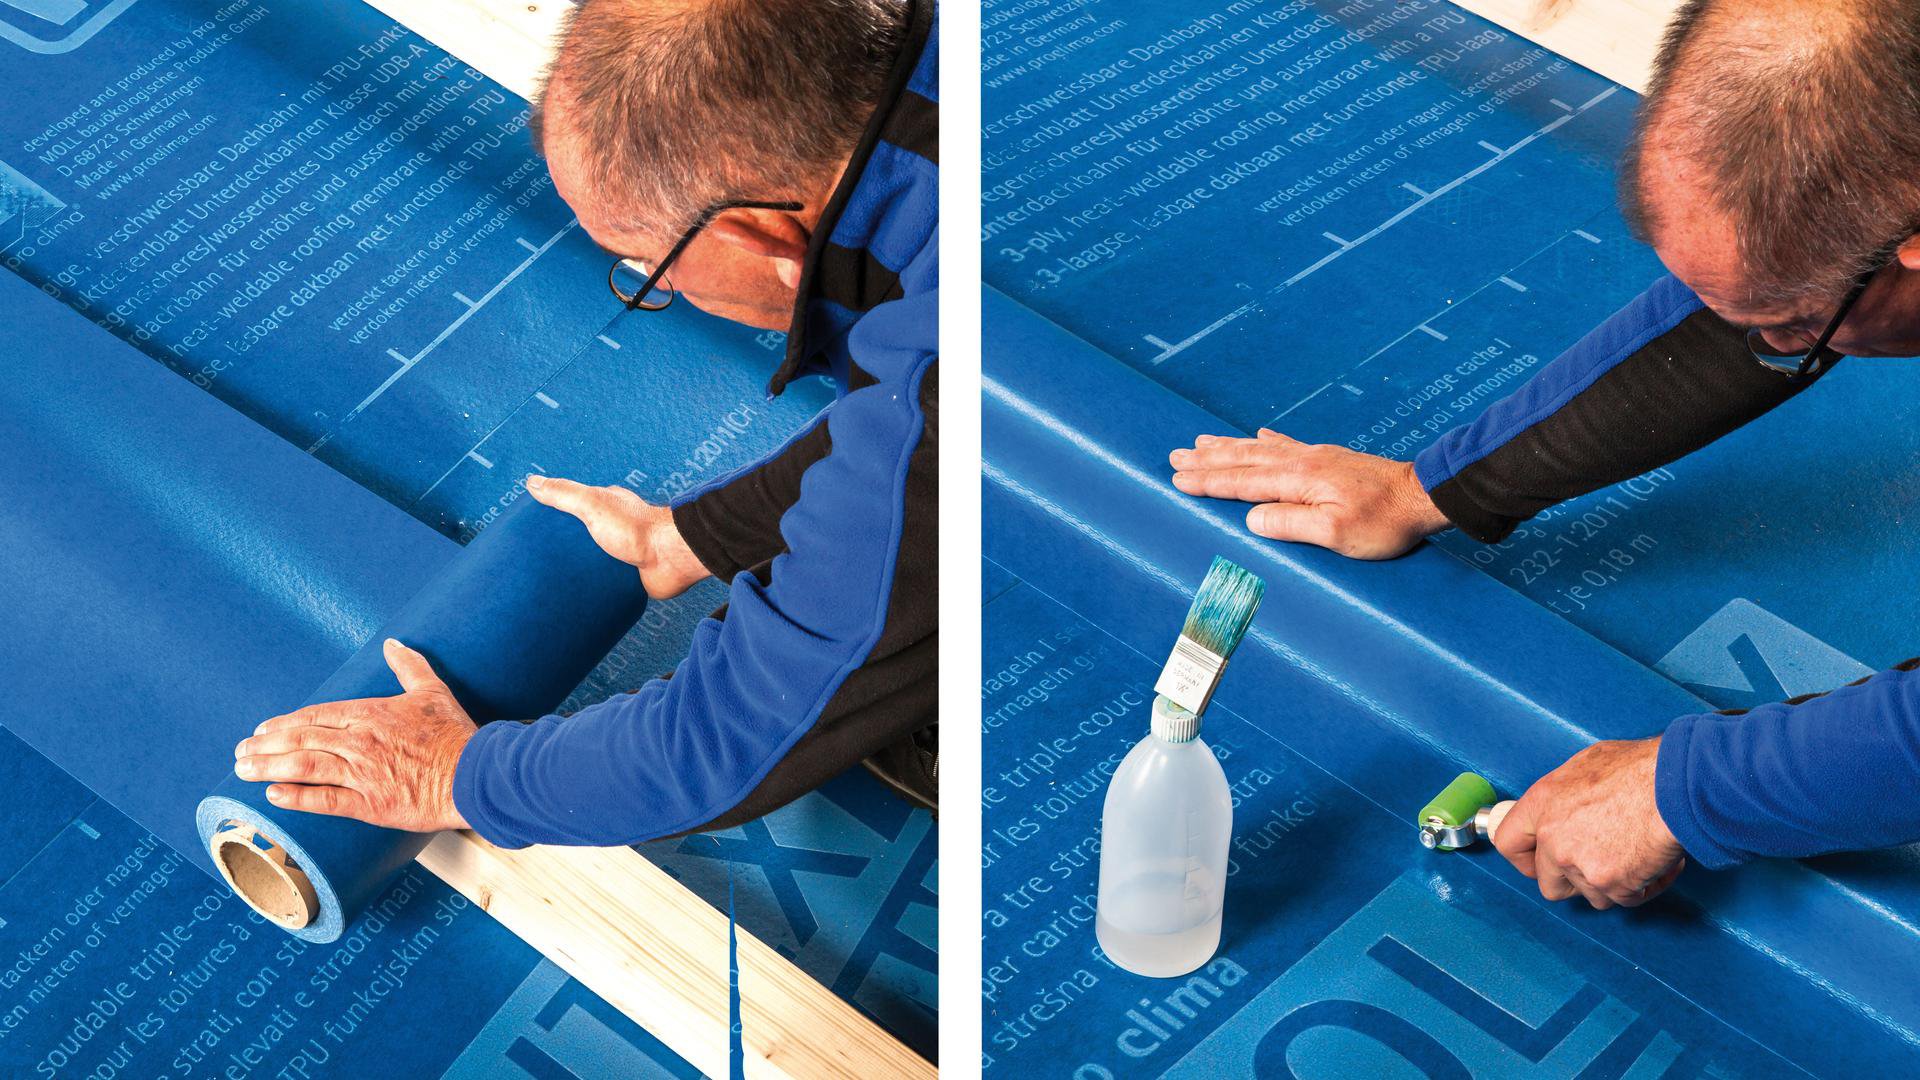
2a. Install the membrane and overlap
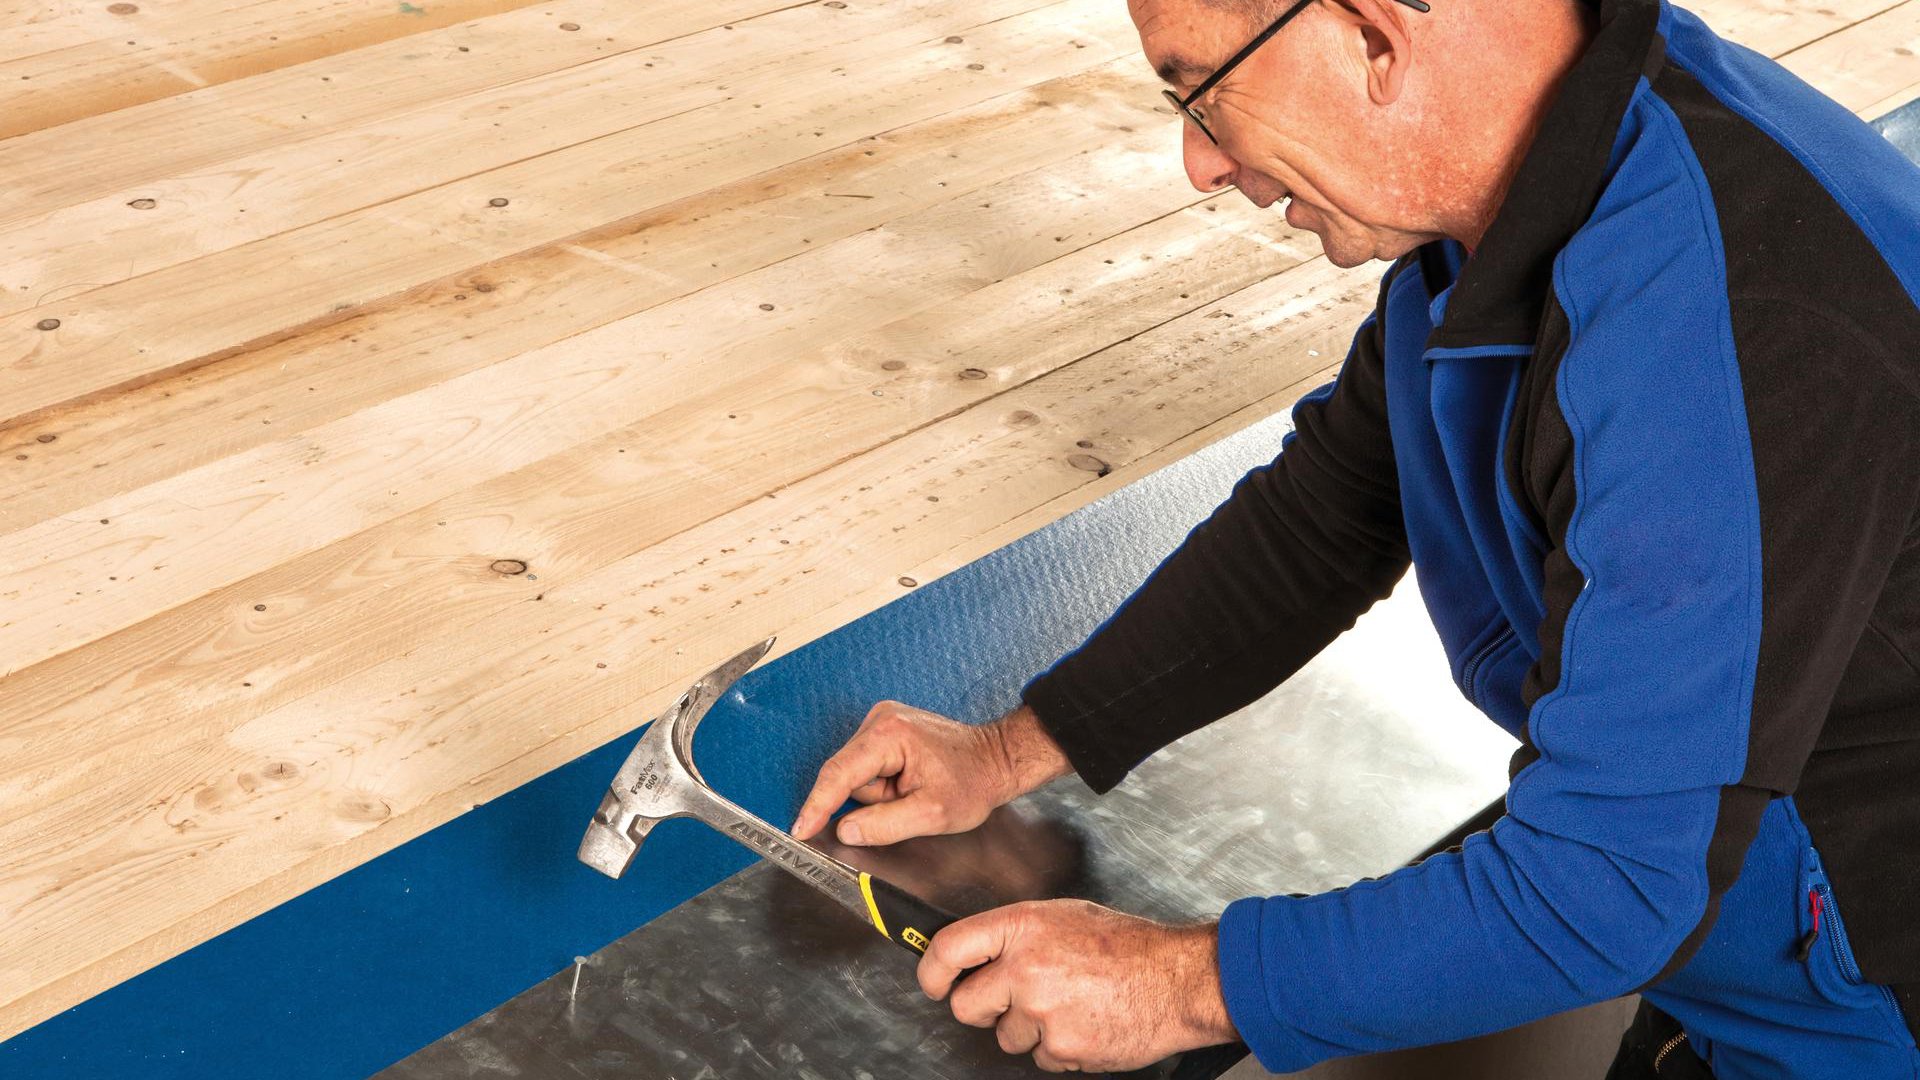
Roll out the membrane parallel to the eave and use clout nails or fastening staples that are at least 10 mm (⅜″) wide by 8 mm (⁵⁄₁₆″) long approximately 2 cm (¾″) away from the edge of the membrane to fasten the membrane in the overlap area in a manner that protects against moisture entry. At the bargeboard, guide the membrane up to the upper edge of the counter batten or the bargeboard itself.
2a. Install the membrane and overlap
Roll out the membrane parallel to the eave and use clout nails or fastening staples that are at least 10 mm (⅜″) wide by 8 mm (⁵⁄₁₆″) long approximately 2 cm (¾″) away from the edge of the membrane to fasten the membrane in the overlap area in a manner that protects against moisture entry. At the bargeboard, guide the membrane up to the upper edge of the counter batten or the bargeboard itself.

2b. Install the membrane and overlap
Allow for an overlap of at least 10 cm (4″) between the membranes. The marking that is printed onto the membrane will serve as a guide here.
2b. Install the membrane and overlap
Allow for an overlap of at least 10 cm (4″) between the membranes. The marking that is printed onto the membrane will serve as a guide here.
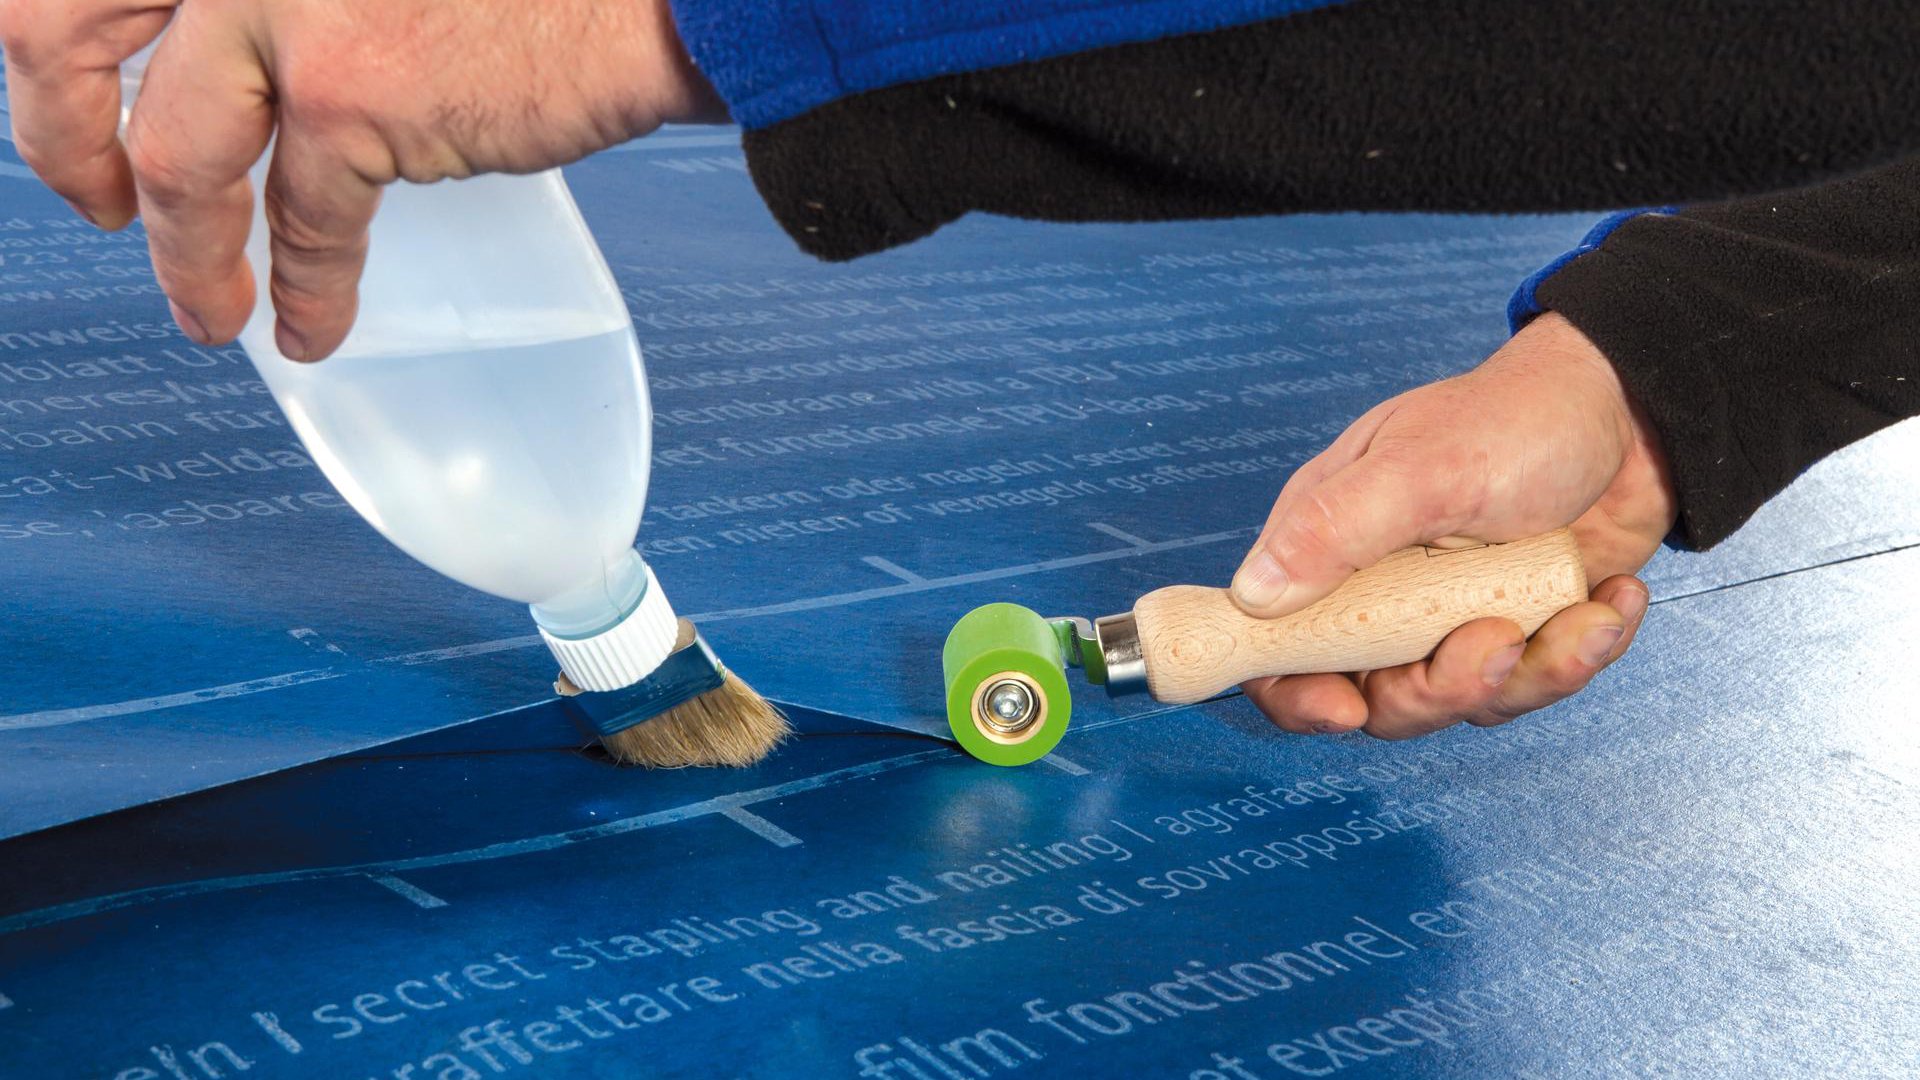
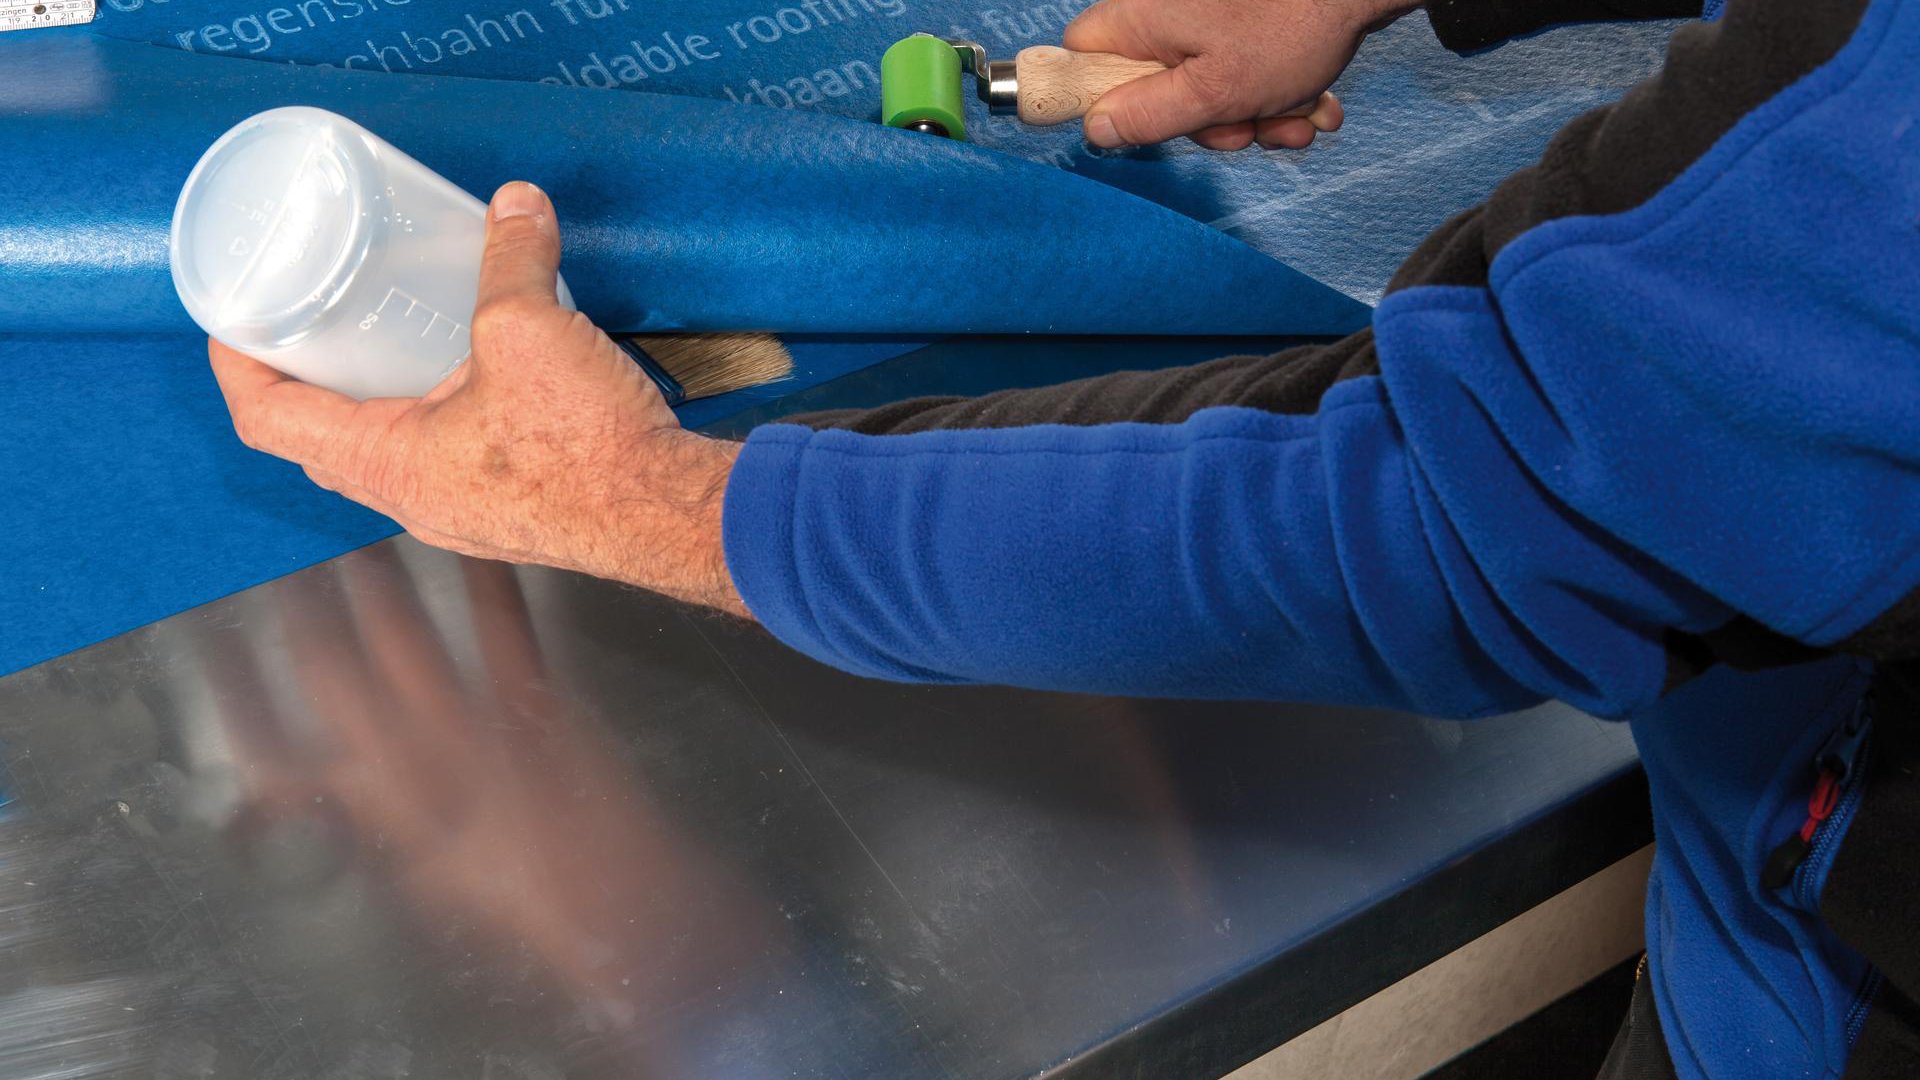
3a. Overlap with WELDANO TURGA (HS) solvent welding agent
Use the brush provided in the bottle to apply solvent welding agent inside the overlap at the welded
joint. Press the bottle lightly here.
The effective joint width (area covered with solvent welding agent) must be at least 5 cm (2″) wide and must extend as far as the edge of the overlapping membrane.
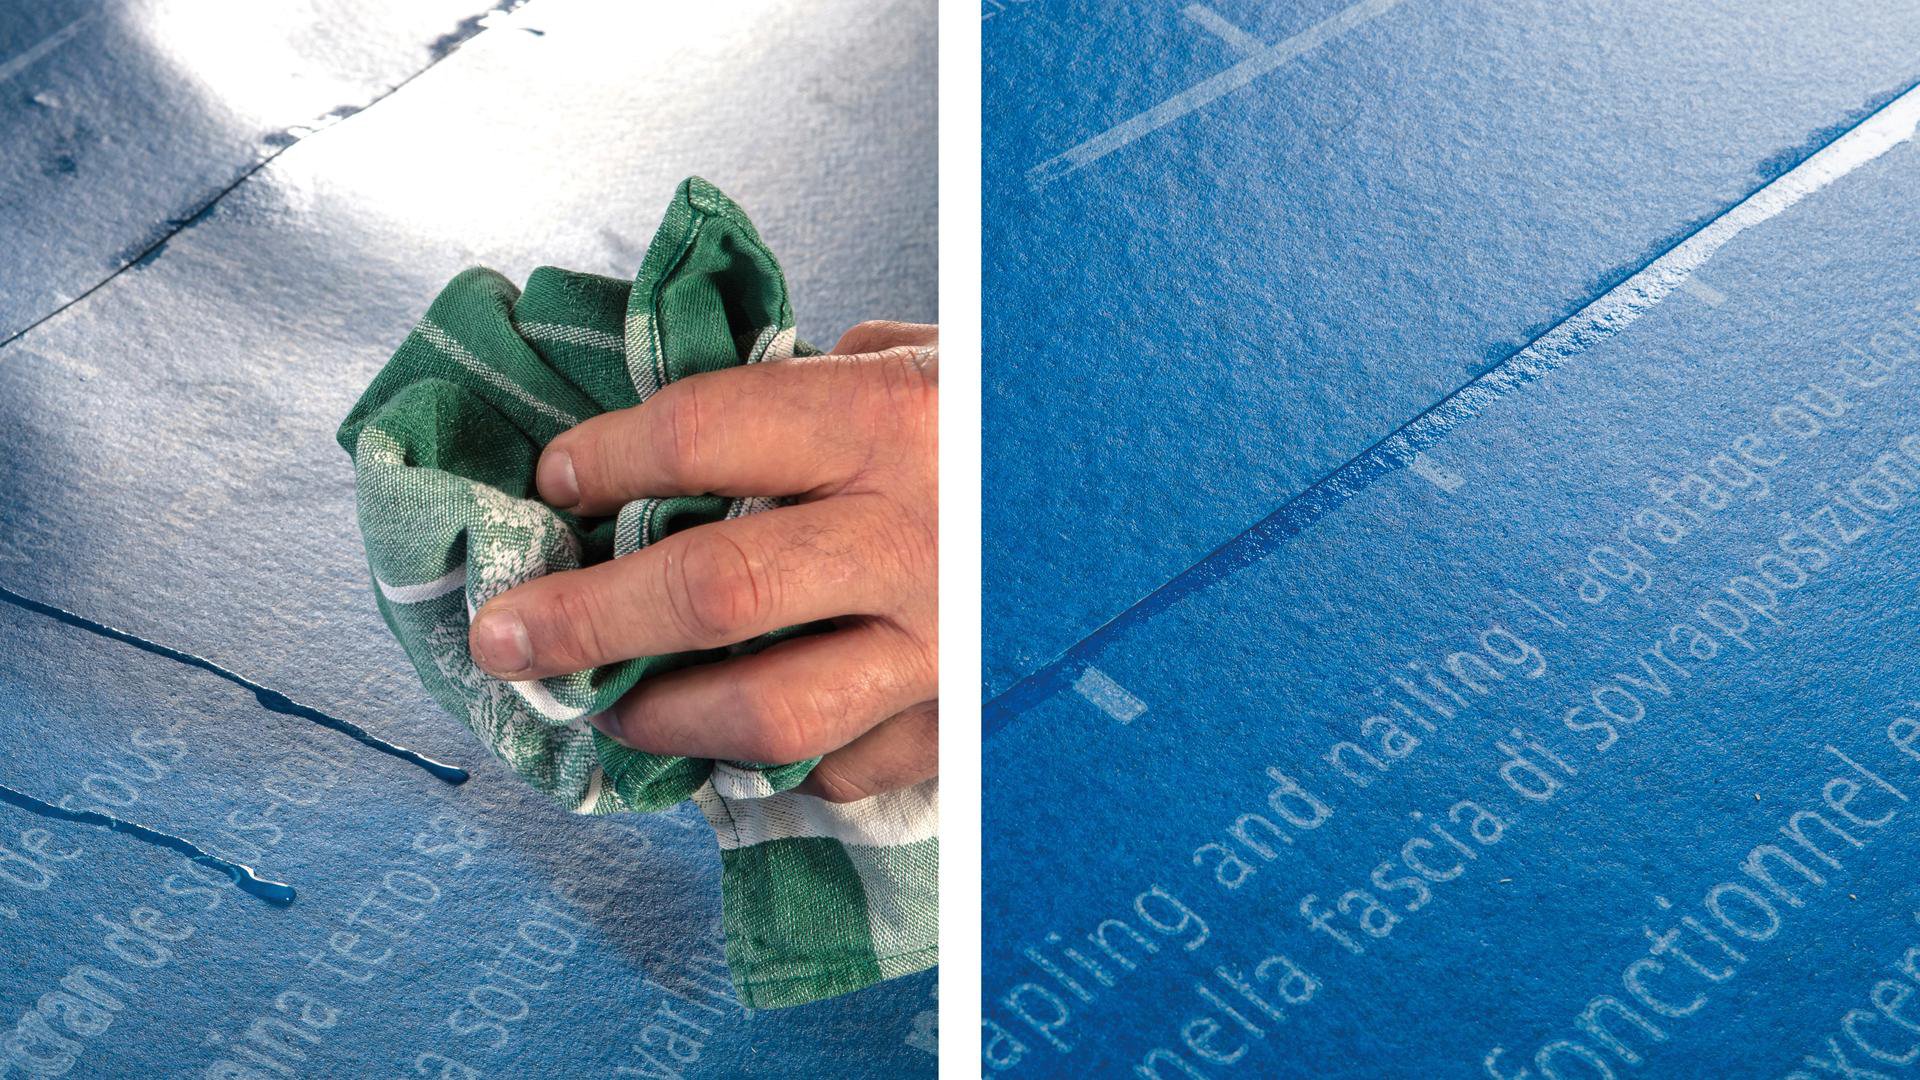
3b. Overlap with WELDANO TURGA (HS) solvent welding agent
The solvent welding agent should flow out slightly from the edge of the welded joint to ensure that the edge is welded too. Remove any other excess solvent welding agent with a cloth.
3b. Overlap with WELDANO TURGA (HS) solvent welding agent
The solvent welding agent should flow out slightly from the edge of the welded joint to ensure that the edge is welded too. Remove any other excess solvent welding agent with a cloth.
4. Rub the overlap into place and check it
Place one membrane on top of the other immediately, ensuring there are no folds or creases, and press into place (e.g. using a pro clima ROLLFIX silicone roller).
4. Rub the overlap into place and check it
Place one membrane on top of the other immediately, ensuring there are no folds or creases, and press into place (e.g. using a pro clima ROLLFIX silicone roller).
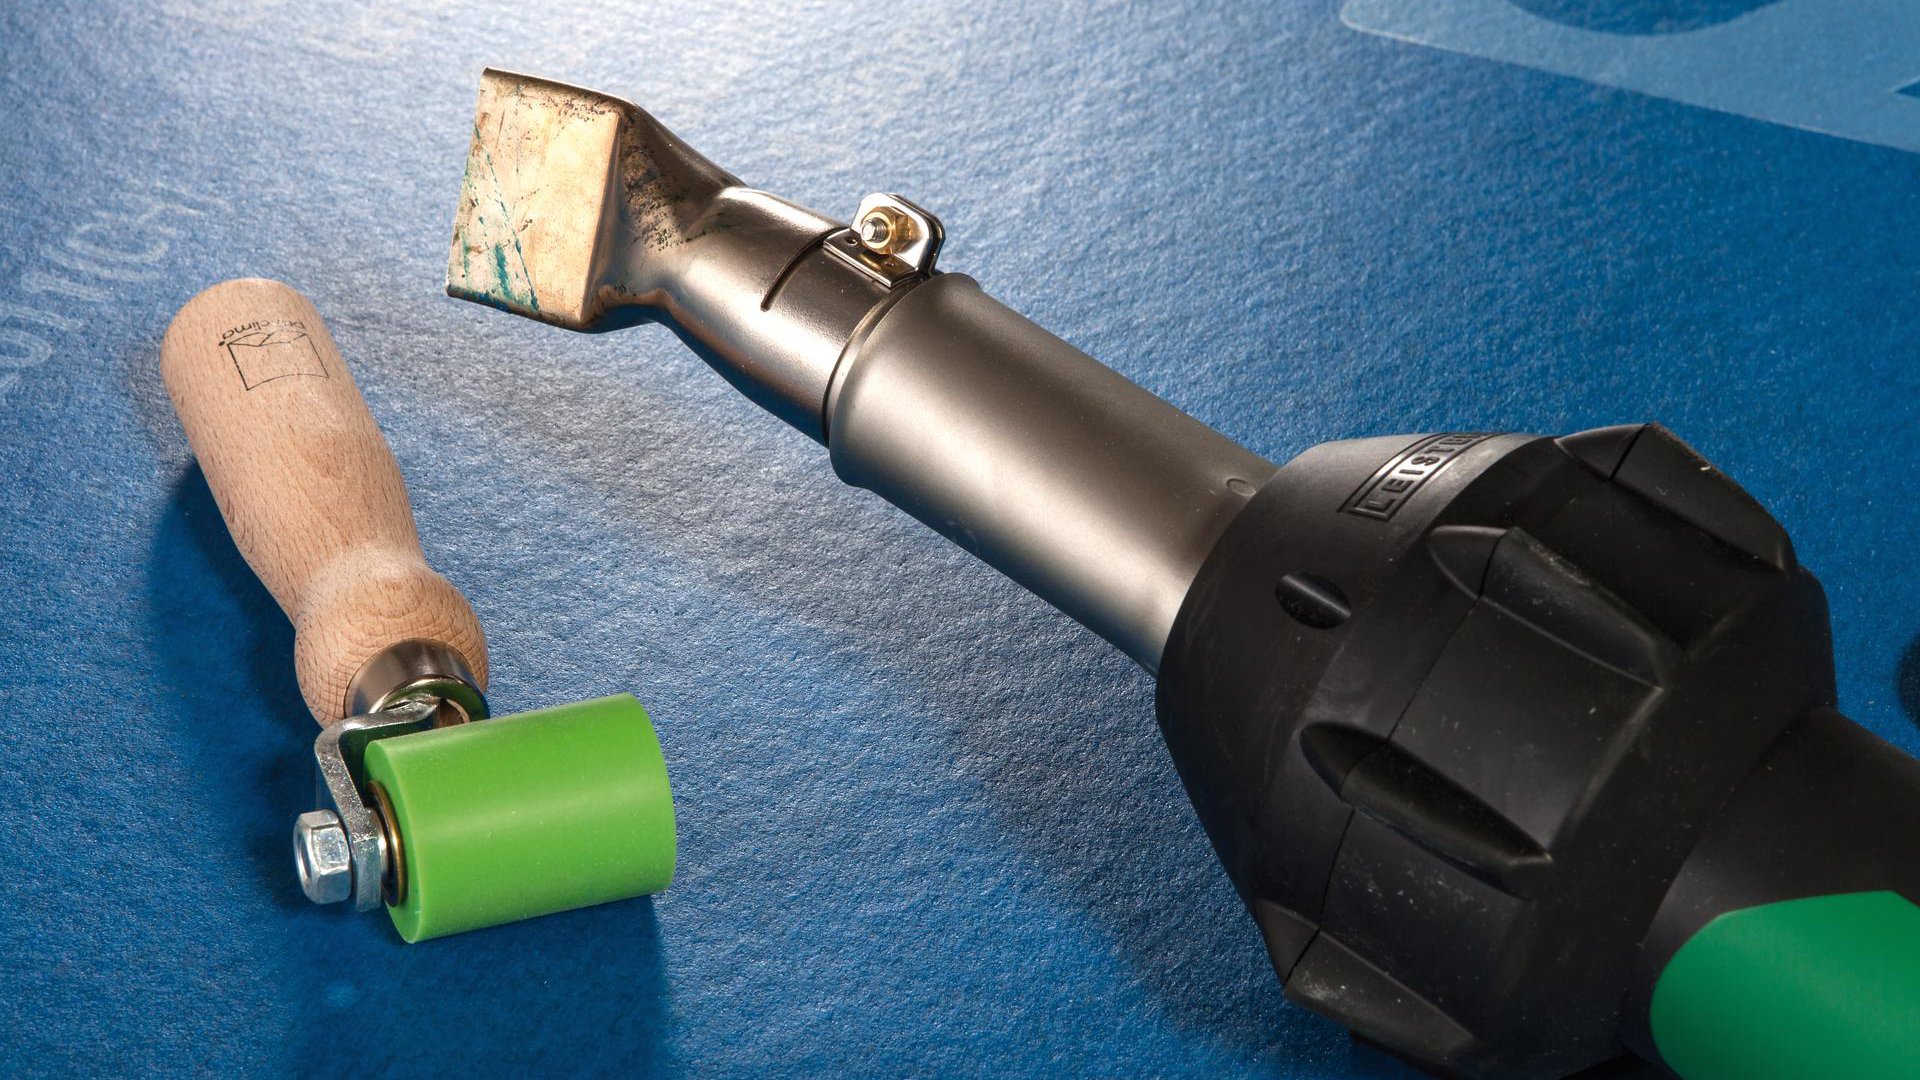
5a. Alternative: Heat-welding the overlap using a hot air gun
Place the hot air nozzle into the overlap of the welded joint and move it along the edge. The effective joint width must be at least 3 cm (1¼″) wide and must extend as far as the edge of the overlapping membrane.
5a. Alternative: Heat-welding the overlap using a hot air gun
Place the hot air nozzle into the overlap of the welded joint and move it along the edge. The effective joint width must be at least 3 cm (1¼″) wide and must extend as far as the edge of the overlapping membrane.

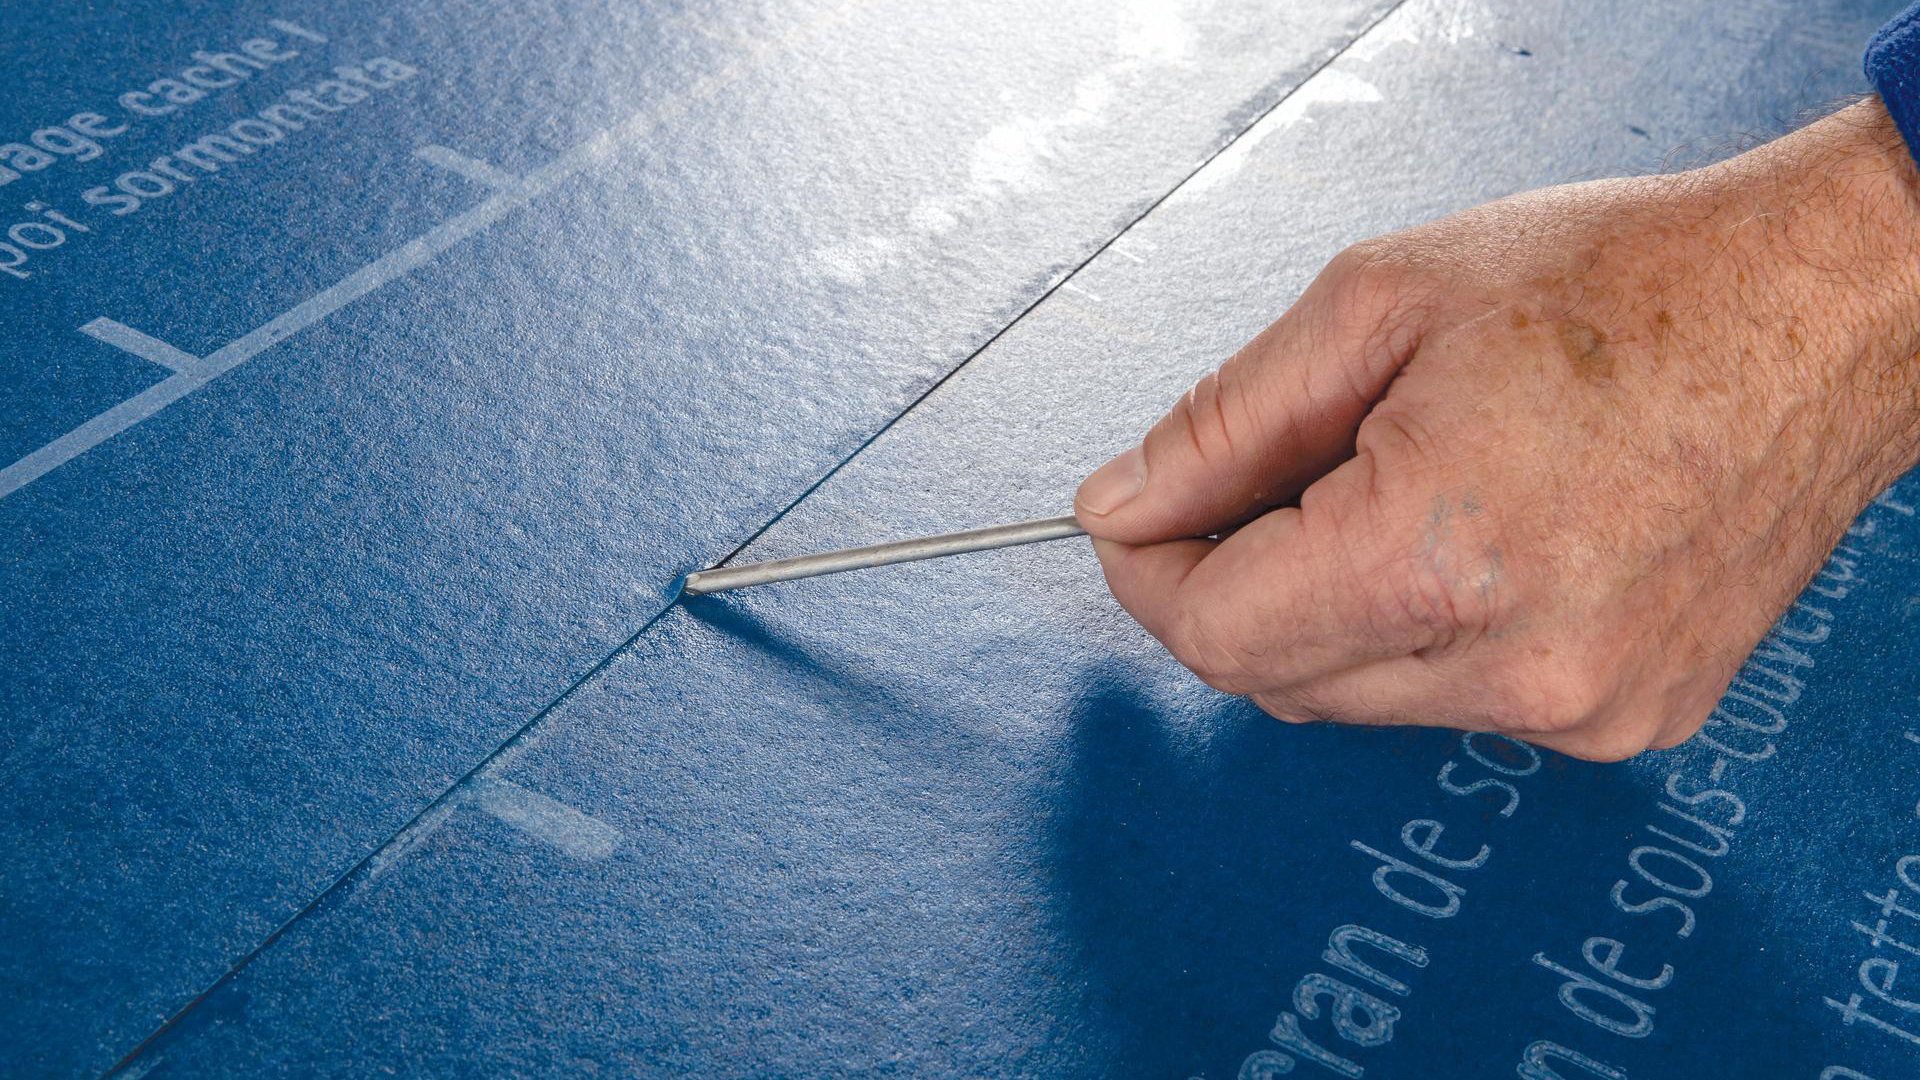
5b. Alternative: Heat-welding the overlap using a hot air gun
Place one membrane on top of the other immediately, ensuring there are no folds or creases, and press into place (e.g. using a pro clima ROLLFIX silicone roller). The heat-welded joint should be checked subsequently for leaks (e.g. using a nail or the tip of a pencil).
6a. Sealing at eaves
Install the membrane and weld it above the eave flashing using WELDANO-S 3000.
6a. Sealing at eaves
Install the membrane and weld it above the eave flashing using WELDANO-S 3000.

6b. Sealing at eaves
Clean the eave flashing and stick the lower edge of the membrane with ORCON CLASSIC or DUPLEX.
If a PVC-coated eave flashing is used, it may be possible to homogeneously weld the roofing underlay membrane directly to the flashing. This should be checked in advance.
6b. Sealing at eaves
Clean the eave flashing and stick the lower edge of the membrane with ORCON CLASSIC or DUPLEX.
If a PVC-coated eave flashing is used, it may be possible to homogeneously weld the roofing underlay membrane directly to the flashing. This should be checked in advance.
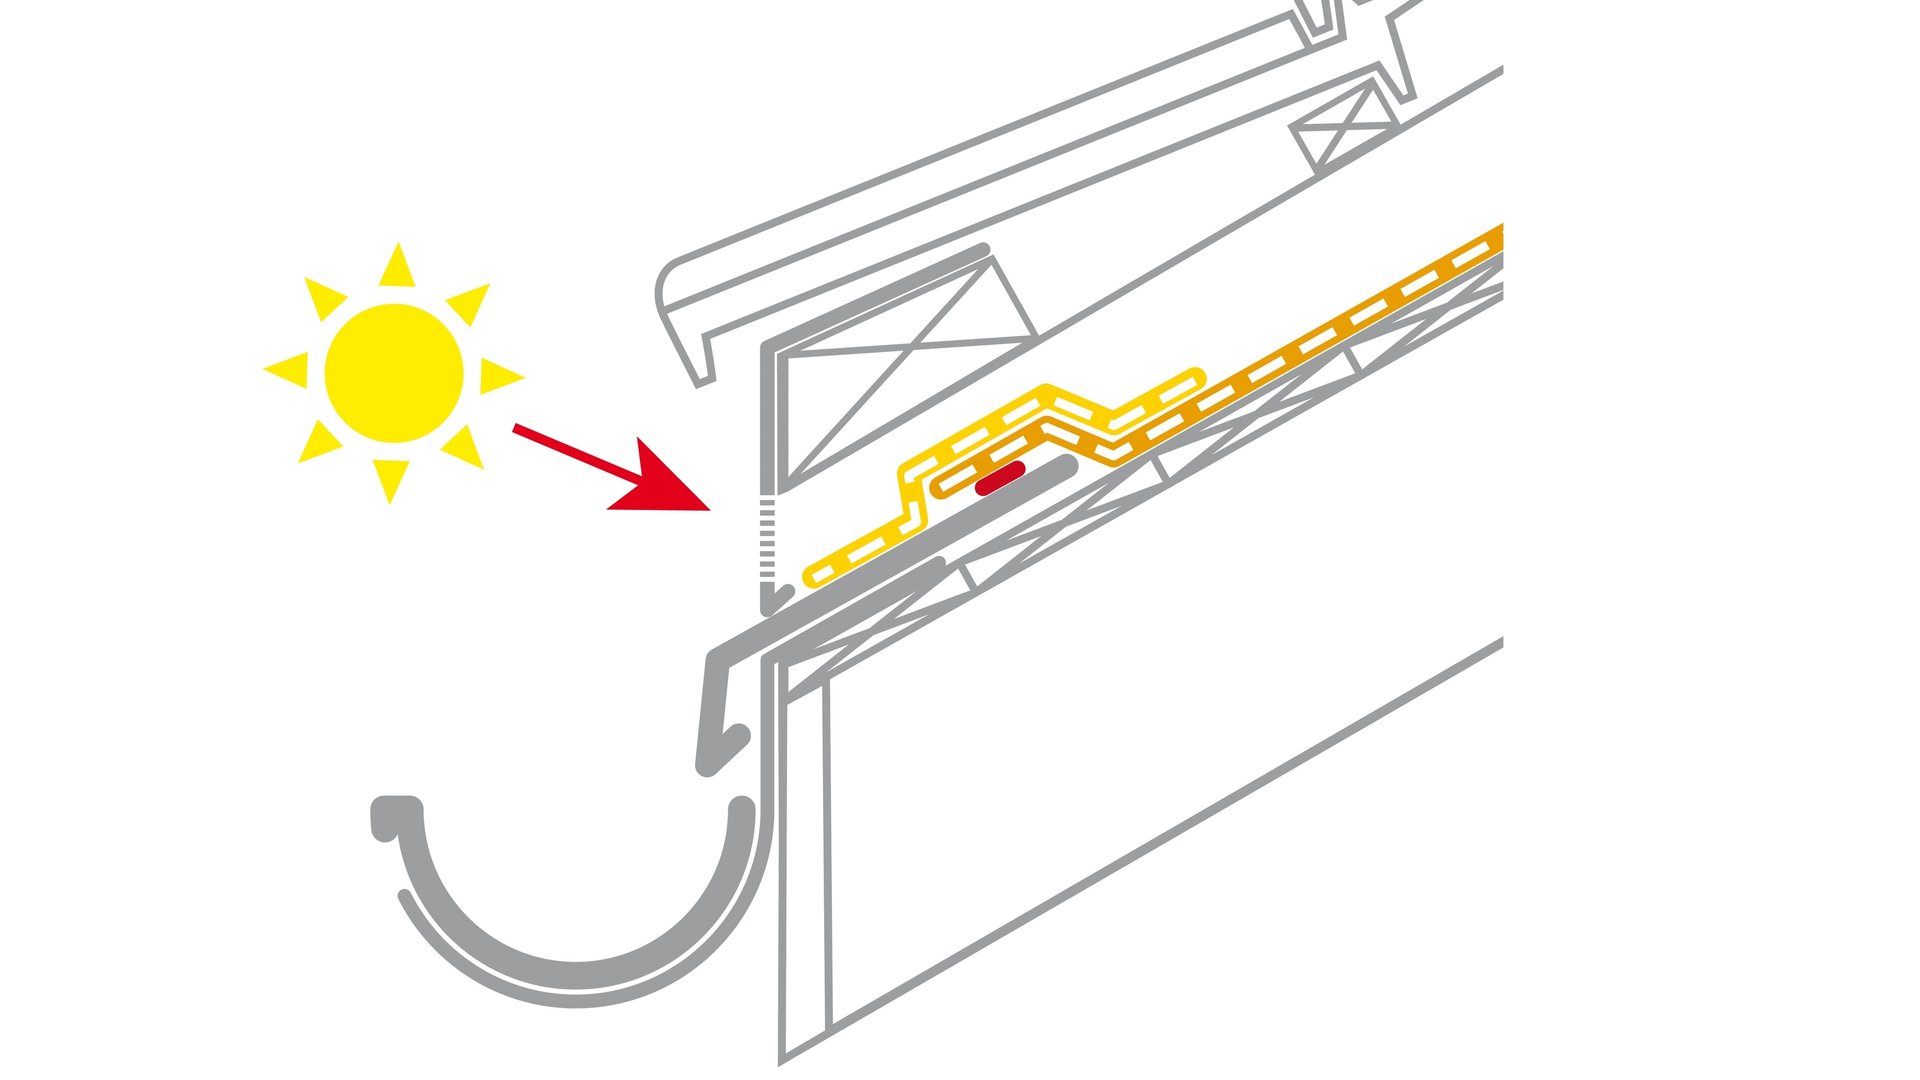
6c. UV protection for the membrane at the eave
Sealing at eaves: Apply the SOLTEMPA full-surface self-adhesive strip over the eave transition.
6c. UV protection for the membrane at the eave
Sealing at eaves: Apply the SOLTEMPA full-surface self-adhesive strip over the eave transition.

7. Installation in roof valleys
First install a membrane into the valley longitudinally. Then weld the horizontal membranes to the valley membrane in a windtight and waterproof manner, allowing 10 cm (4″) of an overlap.
7. Installation in roof valleys
First install a membrane into the valley longitudinally. Then weld the horizontal membranes to the valley membrane in a windtight and waterproof manner, allowing 10 cm (4″) of an overlap.
8. Counter battens not covered over
If a counter batten is to be fitted on top of the membrane and/or if the membrane is used as a temporary covering/seal during the construction phase, TESCON NAIDECK mono system nail sealing tape should generally be applied under the counter battens.
8. Counter battens not covered over
If a counter batten is to be fitted on top of the membrane and/or if the membrane is used as a temporary covering/seal during the construction phase, TESCON NAIDECK mono system nail sealing tape should generally be applied under the counter battens.
9. Counter battens covered over
Apply WELDANO-S 3000 sealing strips over the counter battens and weld them to the roofing underlay membrane on both sides. The counter battens must be dry.
Alternatively, the roofing underlay membrane can also be installed directly over the counter battens.
9. Counter battens covered over
Apply WELDANO-S 3000 sealing strips over the counter battens and weld them to the roofing underlay membrane on both sides. The counter battens must be dry.
Alternatively, the roofing underlay membrane can also be installed directly over the counter battens.
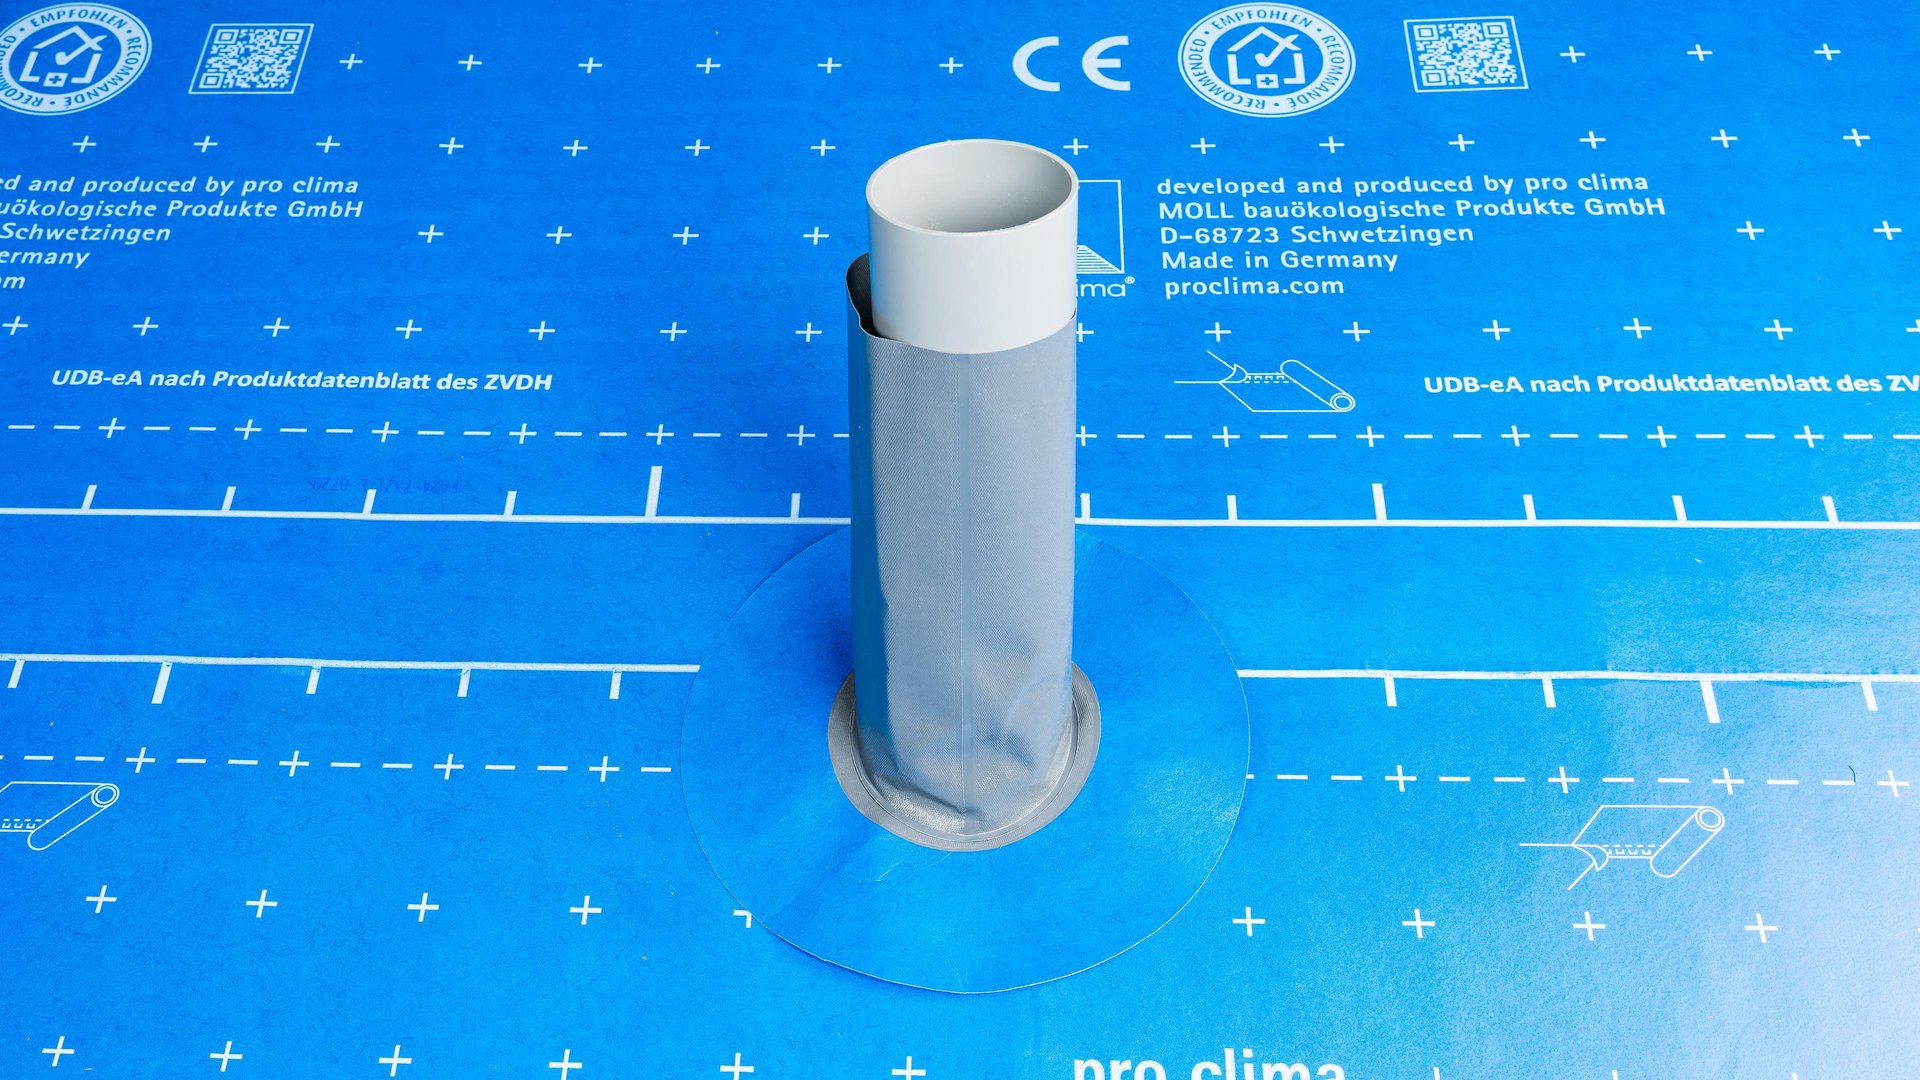
10a. Joint at pipe feed-throughs
Clean the pipe that is to be sealed.
Guide WELDANO ROFLEX MODI over the pipe.
10a. Joint at pipe feed-throughs
Clean the pipe that is to be sealed.
Guide WELDANO ROFLEX MODI over the pipe.
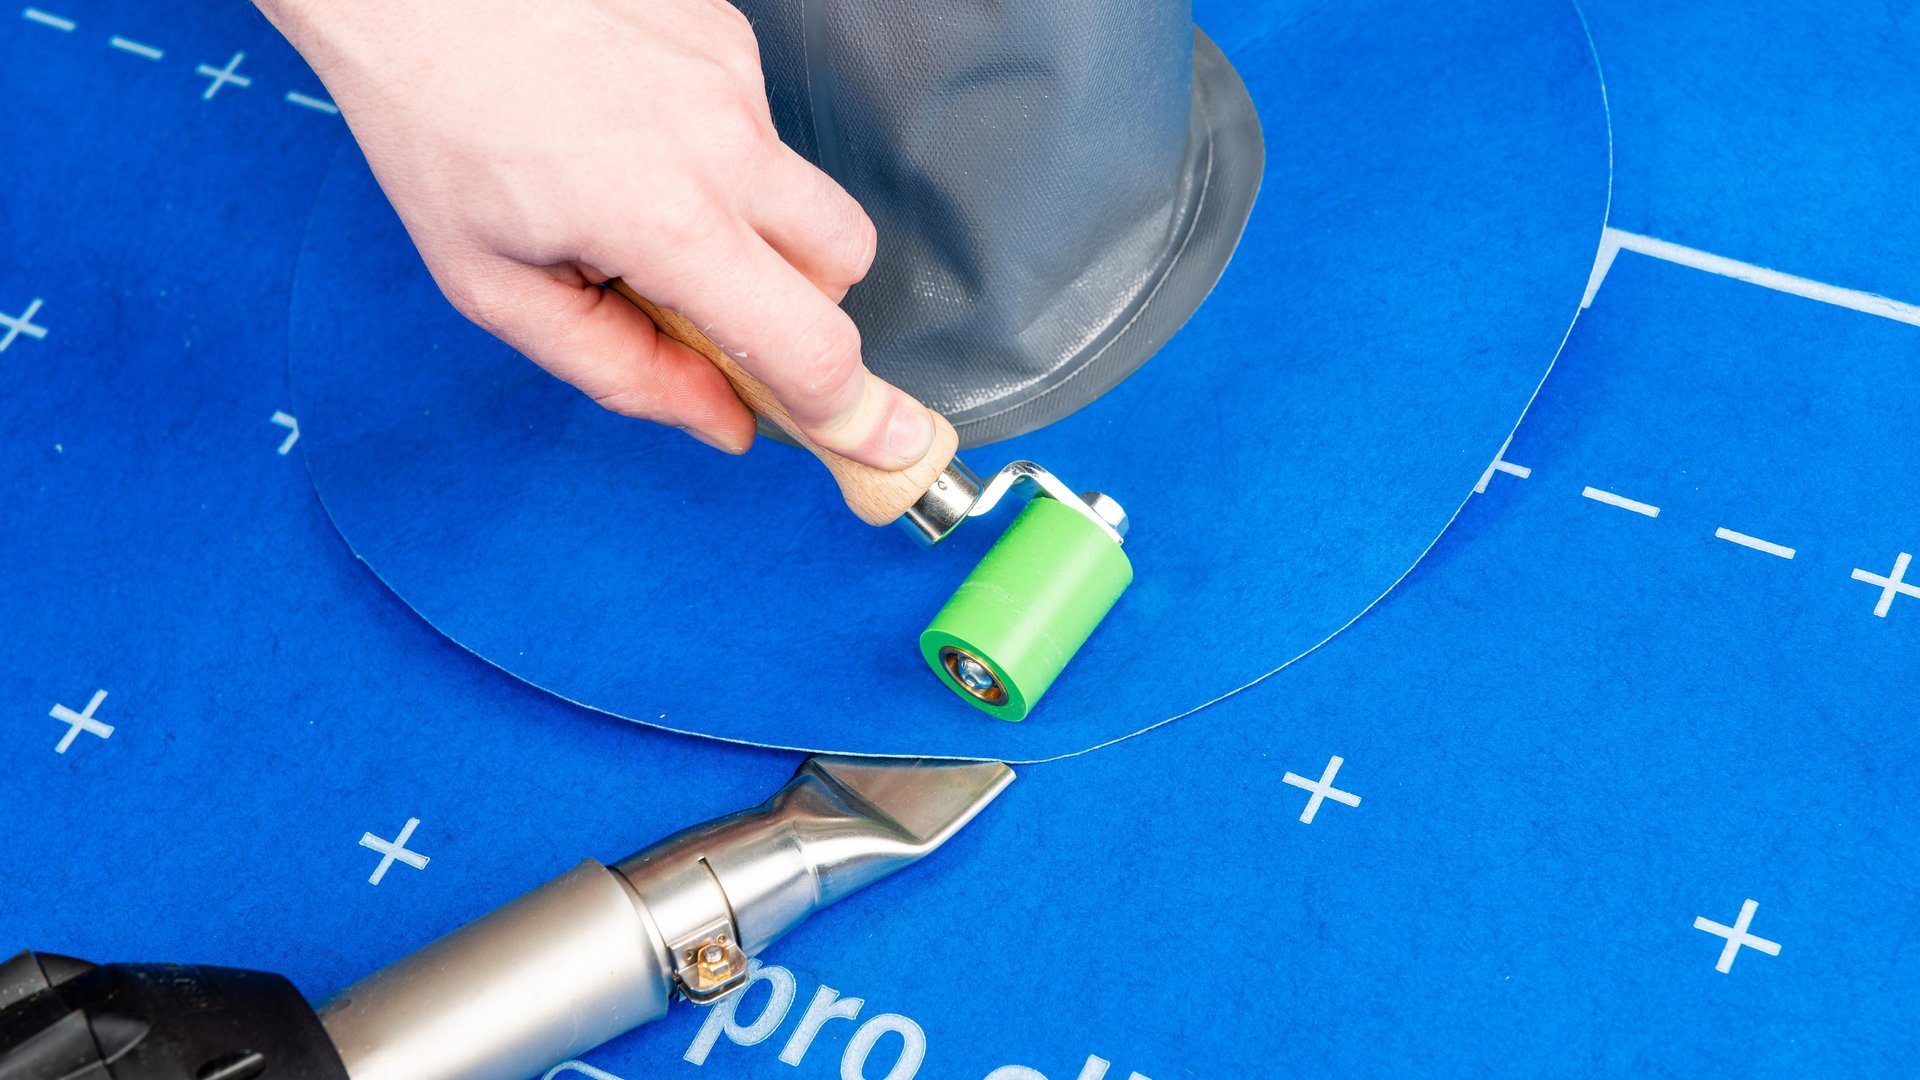
10b. Weld the gasket to the membrane
Weld the grommet around the edges using the WELDANO TURGA (HS) solvent welding agent or hot air.
The effective joint width (area covered with solvent welding agent) must be at least 5 cm (2″) wide and must extend as far as the edge of WELDANO ROFLEX MODI.
Use a roller to secure the welded joints.
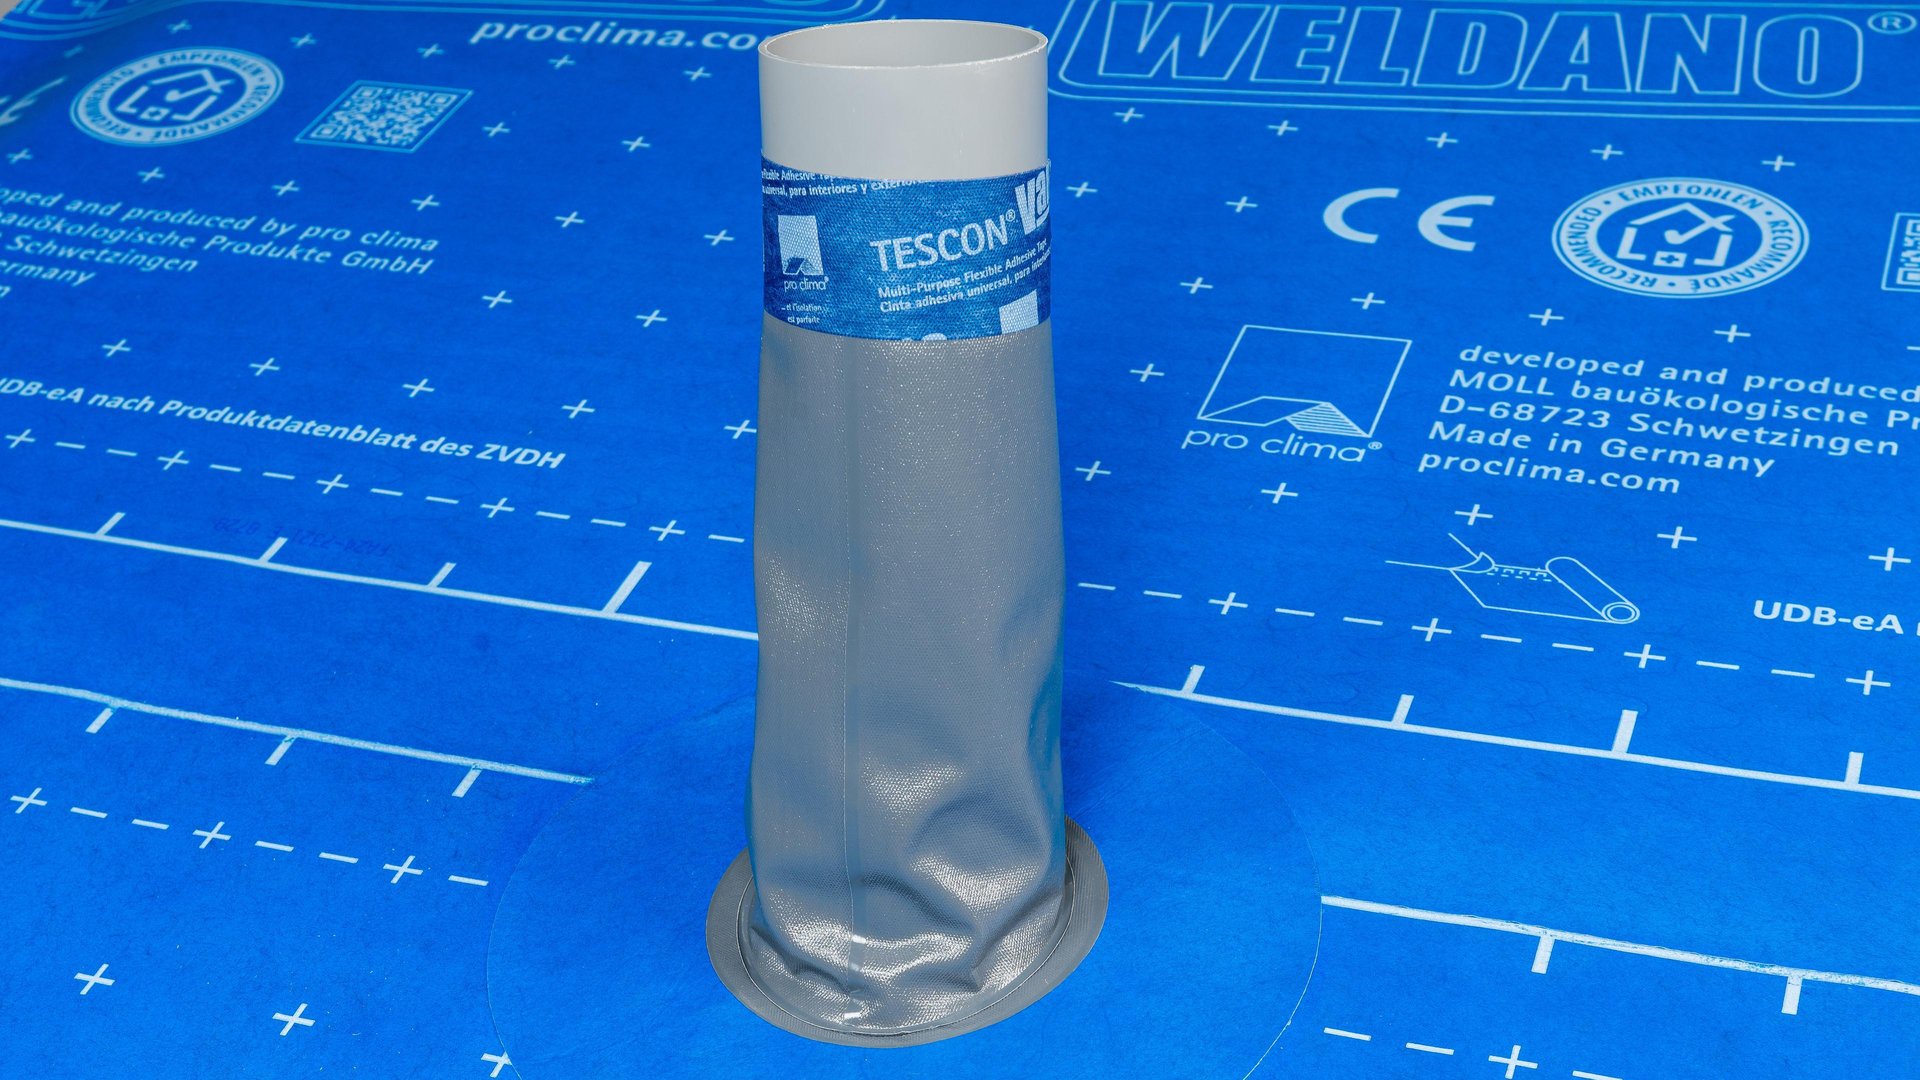
10c. Seal the end of the sleeve
Tape the top of the pipe grommet to the pipe using TESCON VANA.
10c. Seal the end of the sleeve
Tape the top of the pipe grommet to the pipe using TESCON VANA.
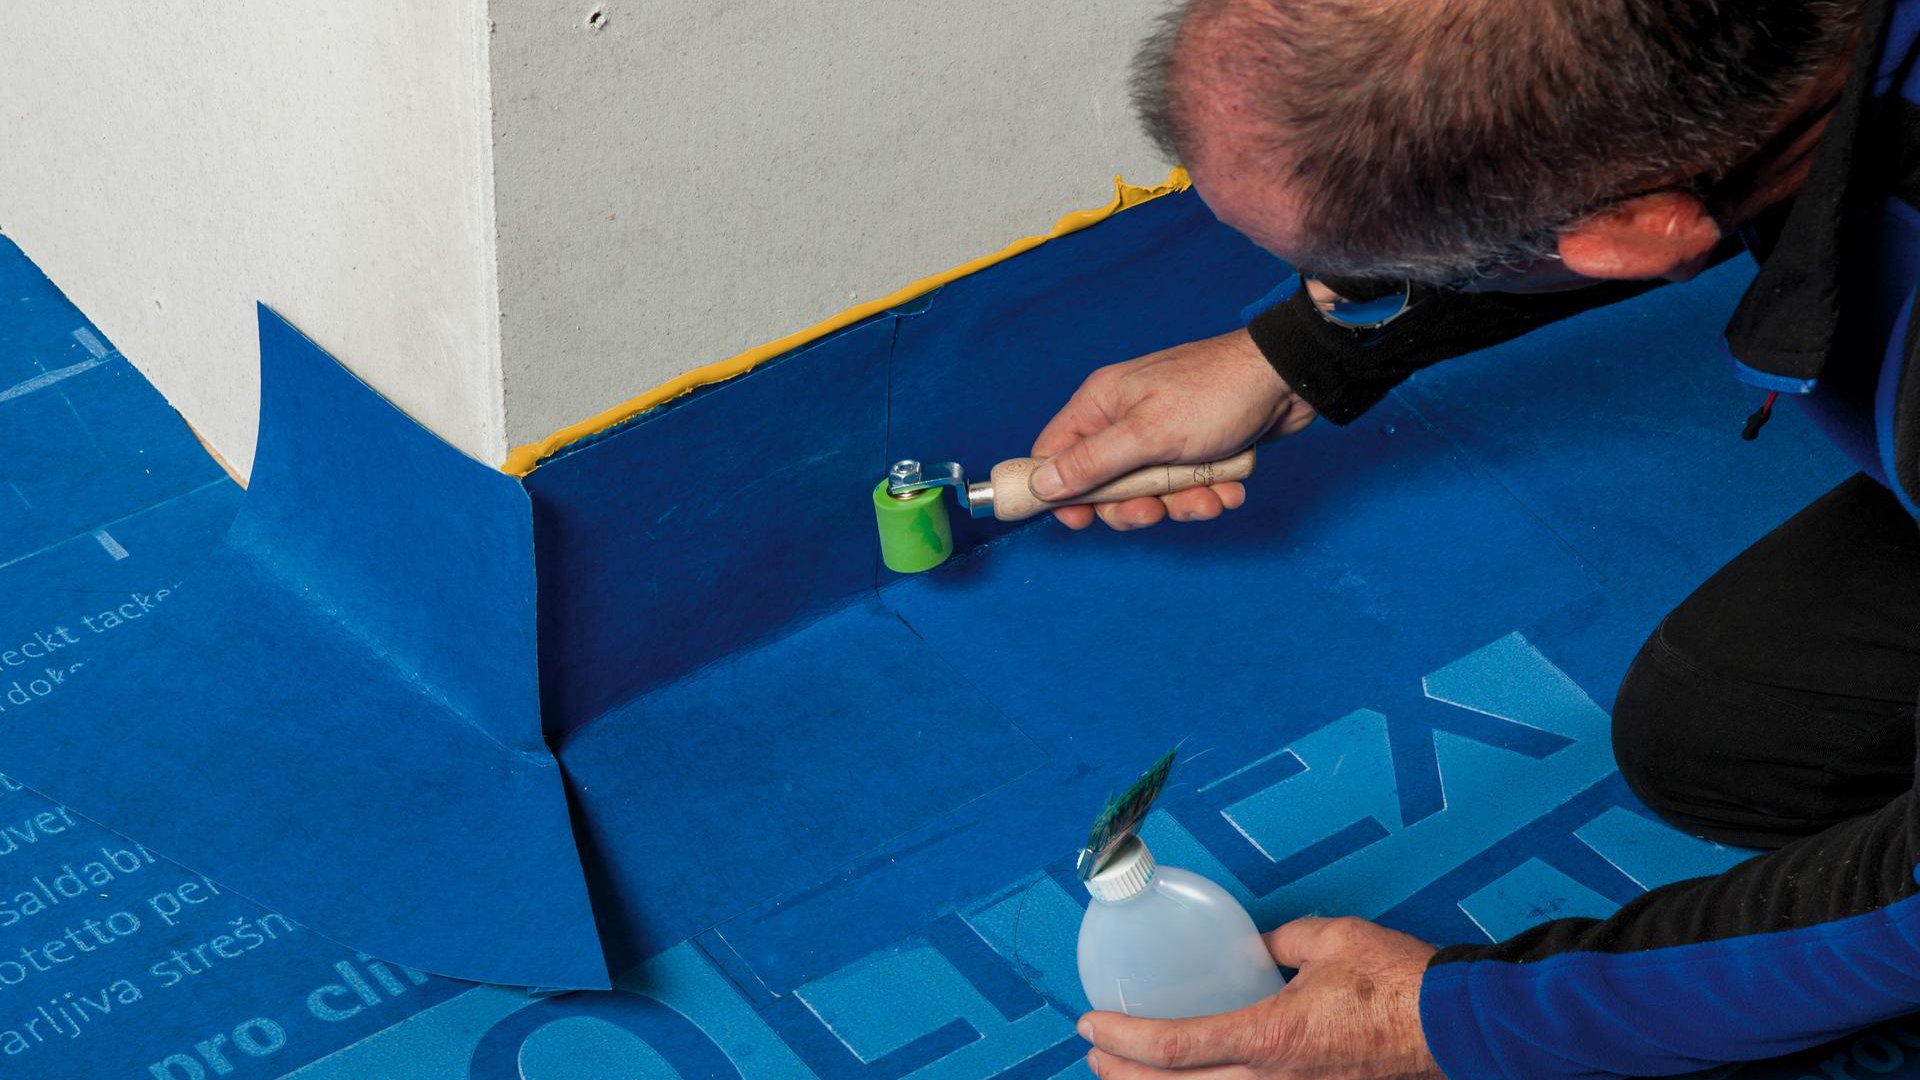
11. On slightly slanted roofs: Joints with protruding building structures (e.g. chimneys)
Clean the subsurface. Weld the component to the roofing underlay membrane using a strip of SOLITEX WELDANO-S 3000 on each side and the WELDANO INVEX system shaped element (using solvent welding agent or a hot air gun) in a waterproof manner, ensuring there are no folds or creases. Press the joint firmly into place and check for leaks.
Form the inner corners in an analogous manner using the WELDANO INCAV system shaped element.
11b. On slightly slanted roofs: Joints with protruding building structures (e.g. chimneys)
Cover to a height of at least 15 cm (6″) on the protruding building structure and stick using ORCON CLASSIC.
11b. On slightly slanted roofs: Joints with protruding building structures (e.g. chimneys)
Cover to a height of at least 15 cm (6″) on the protruding building structure and stick using ORCON CLASSIC.
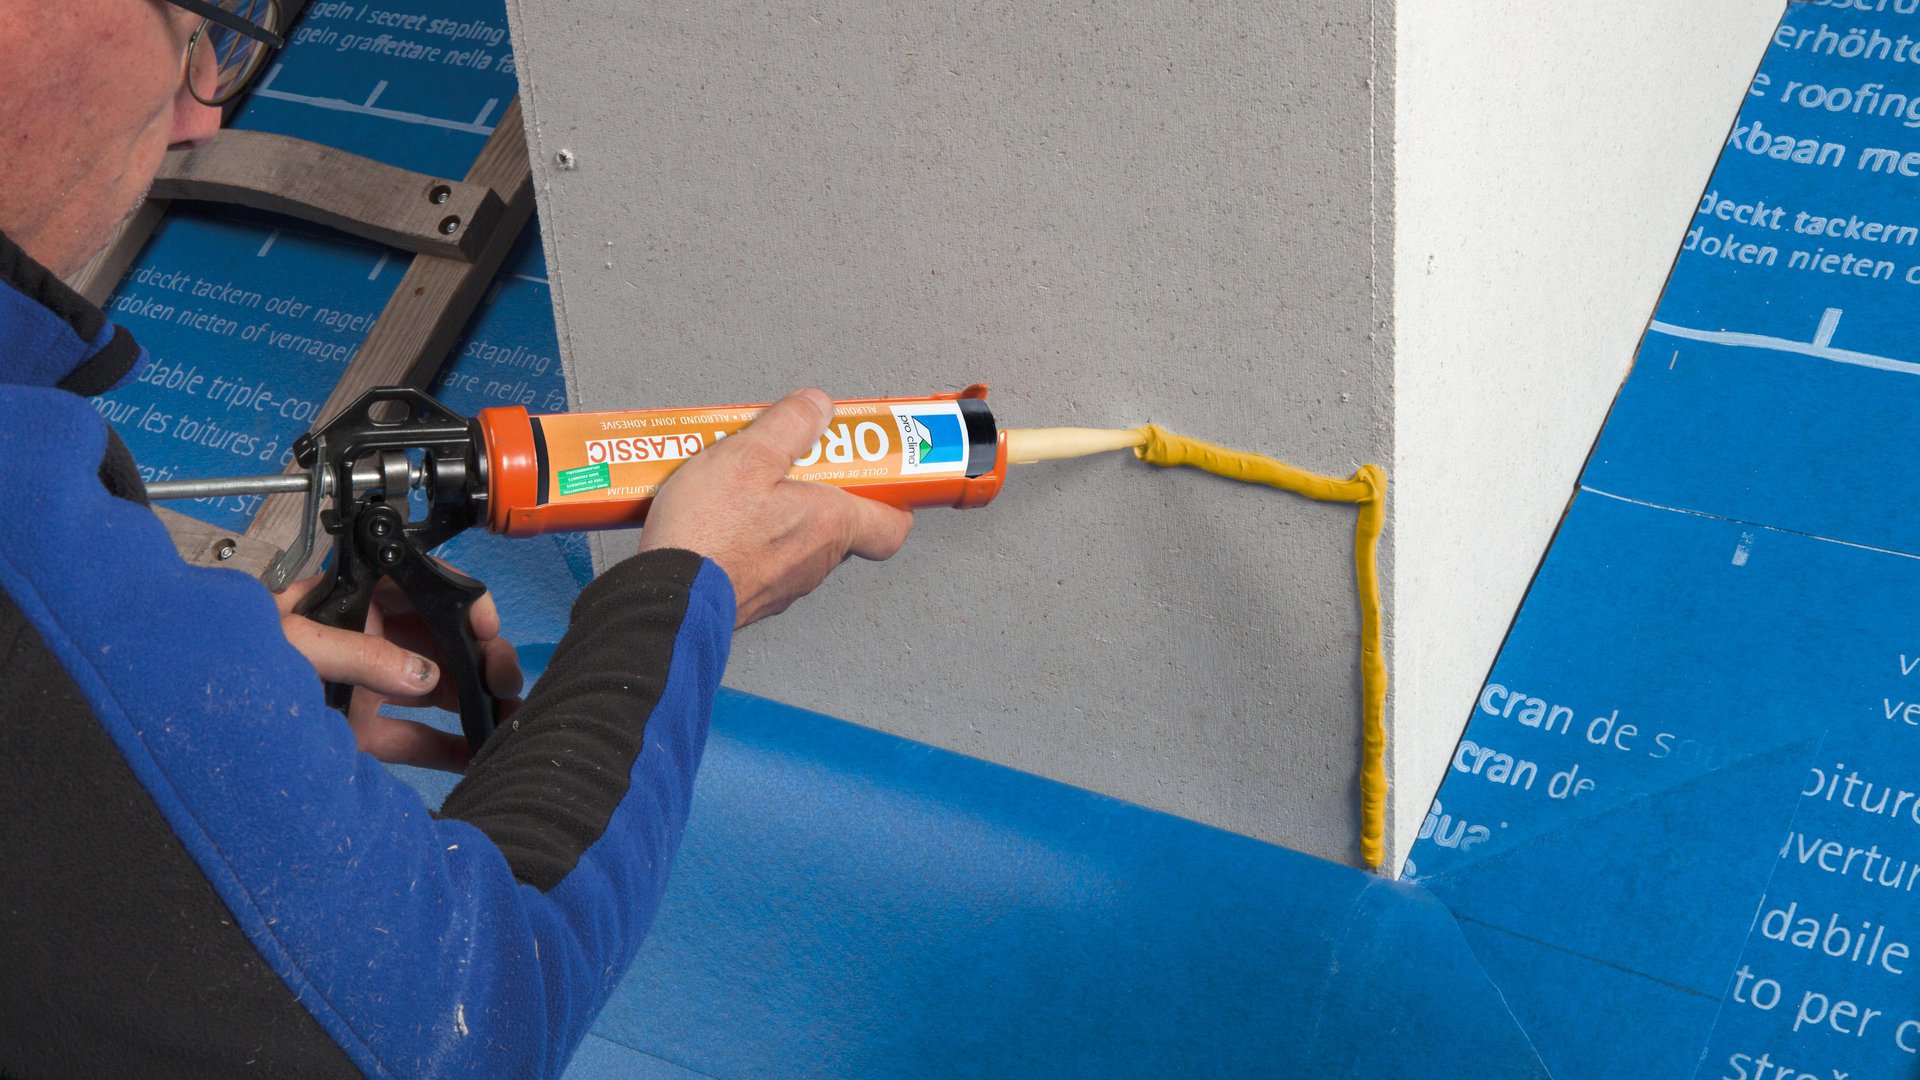
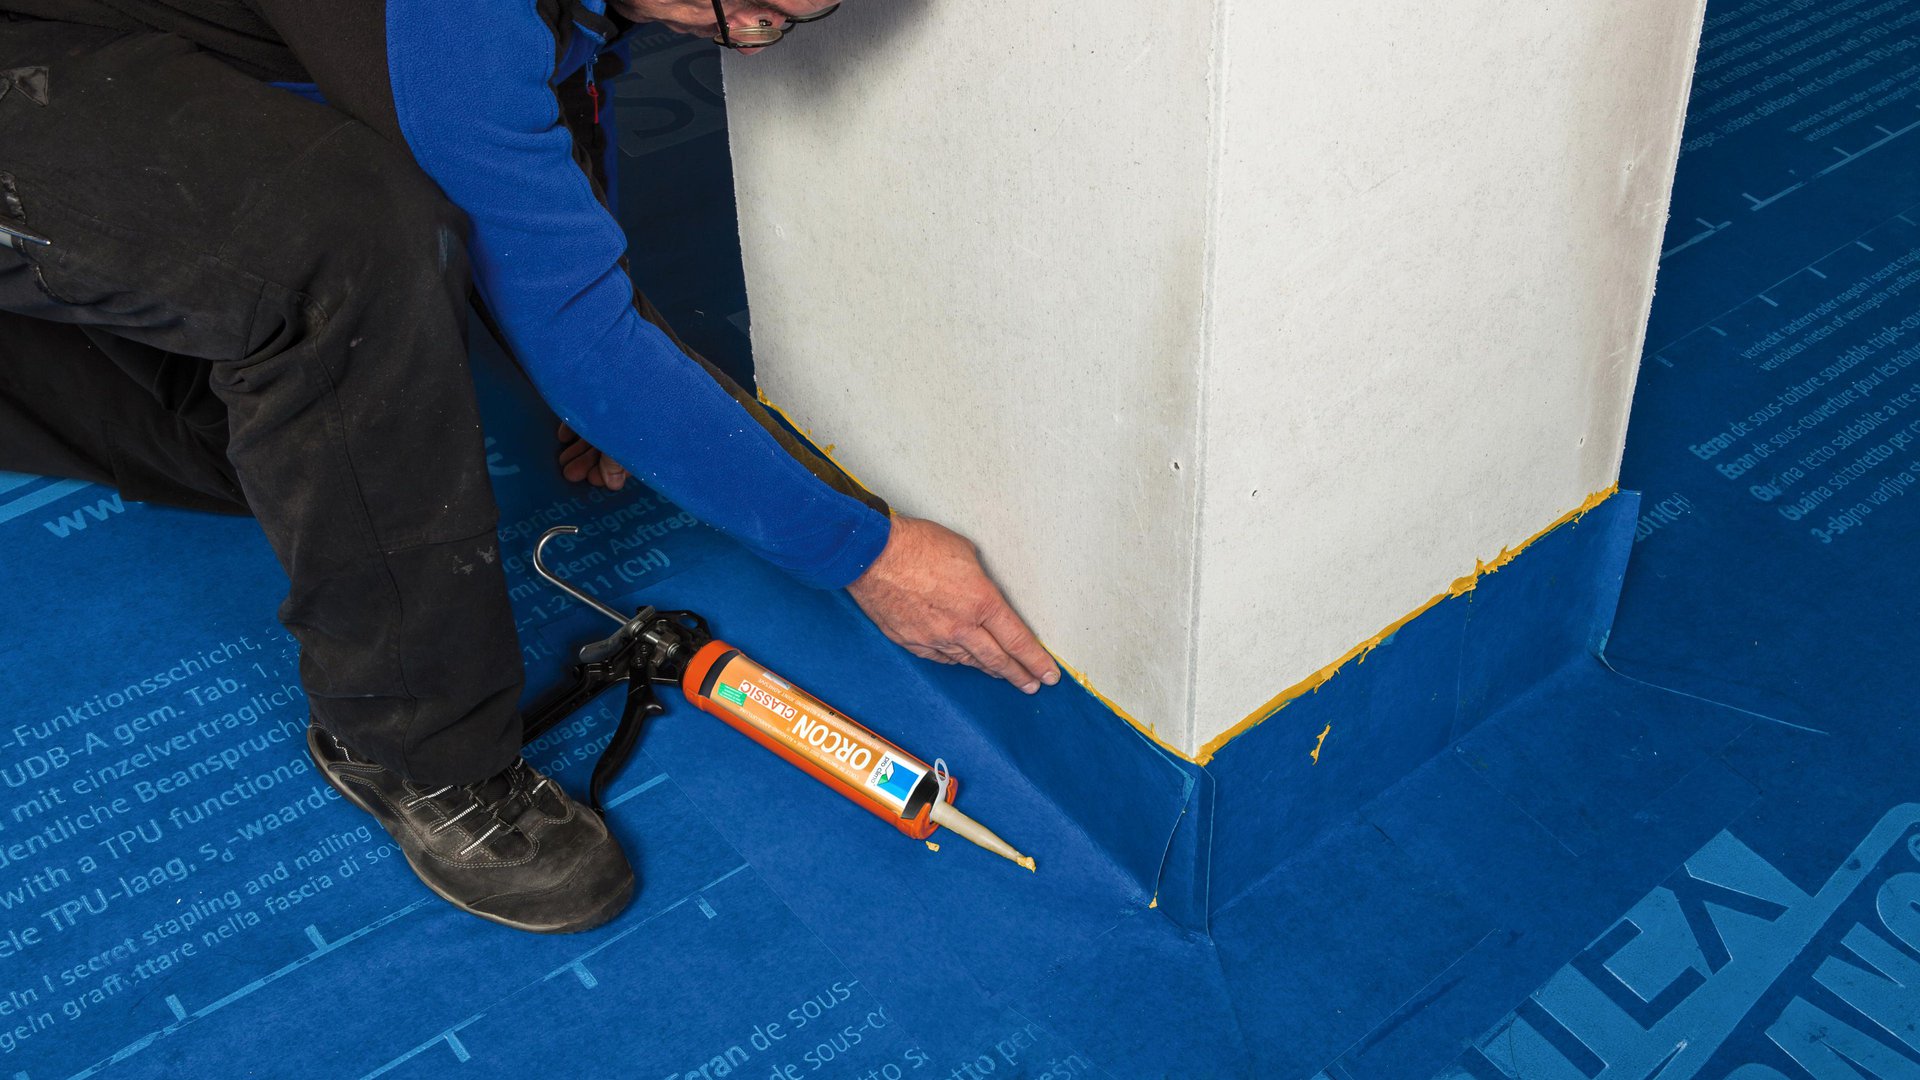
12a. On pitched roofs: Joints with protruding building structures (e.g. chimneys)
Apply a line of ORCON CLASSIC with a diameter of at least 6 mm (¼″) to the mineral subsurface (more in the case of rough subsurfaces, if necessary).
12a. On pitched roofs: Joints with protruding building structures (e.g. chimneys)
Apply a line of ORCON CLASSIC with a diameter of at least 6 mm (¼″) to the mineral subsurface (more in the case of rough subsurfaces, if necessary).
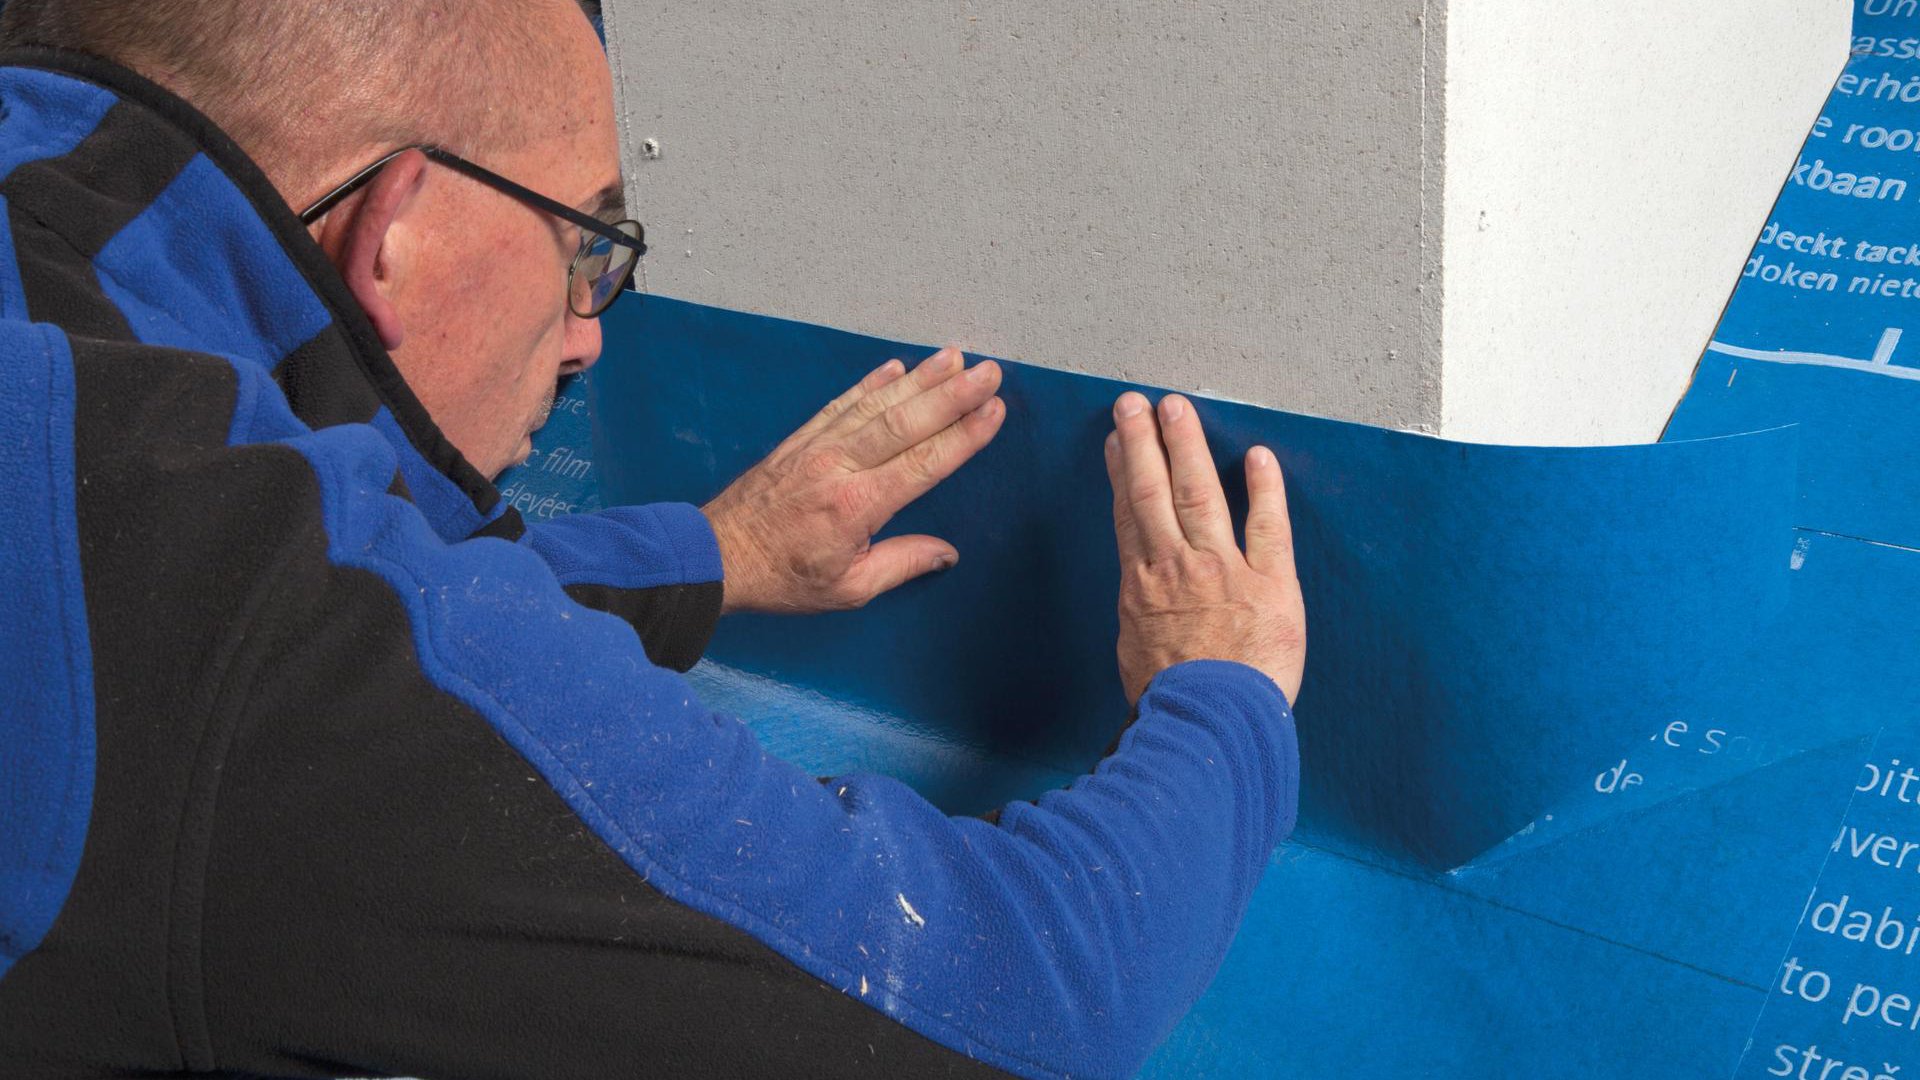
12b. On pitched roofs: Joints with protruding building structures (e.g. chimneys)
Put the membrane in place on the adhesive bed, leaving slack to allow for expansion. Do not press the adhesive completely flat so as to allow for relative motion between components.
12b. On pitched roofs: Joints with protruding building structures (e.g. chimneys)
Put the membrane in place on the adhesive bed, leaving slack to allow for expansion. Do not press the adhesive completely flat so as to allow for relative motion between components.
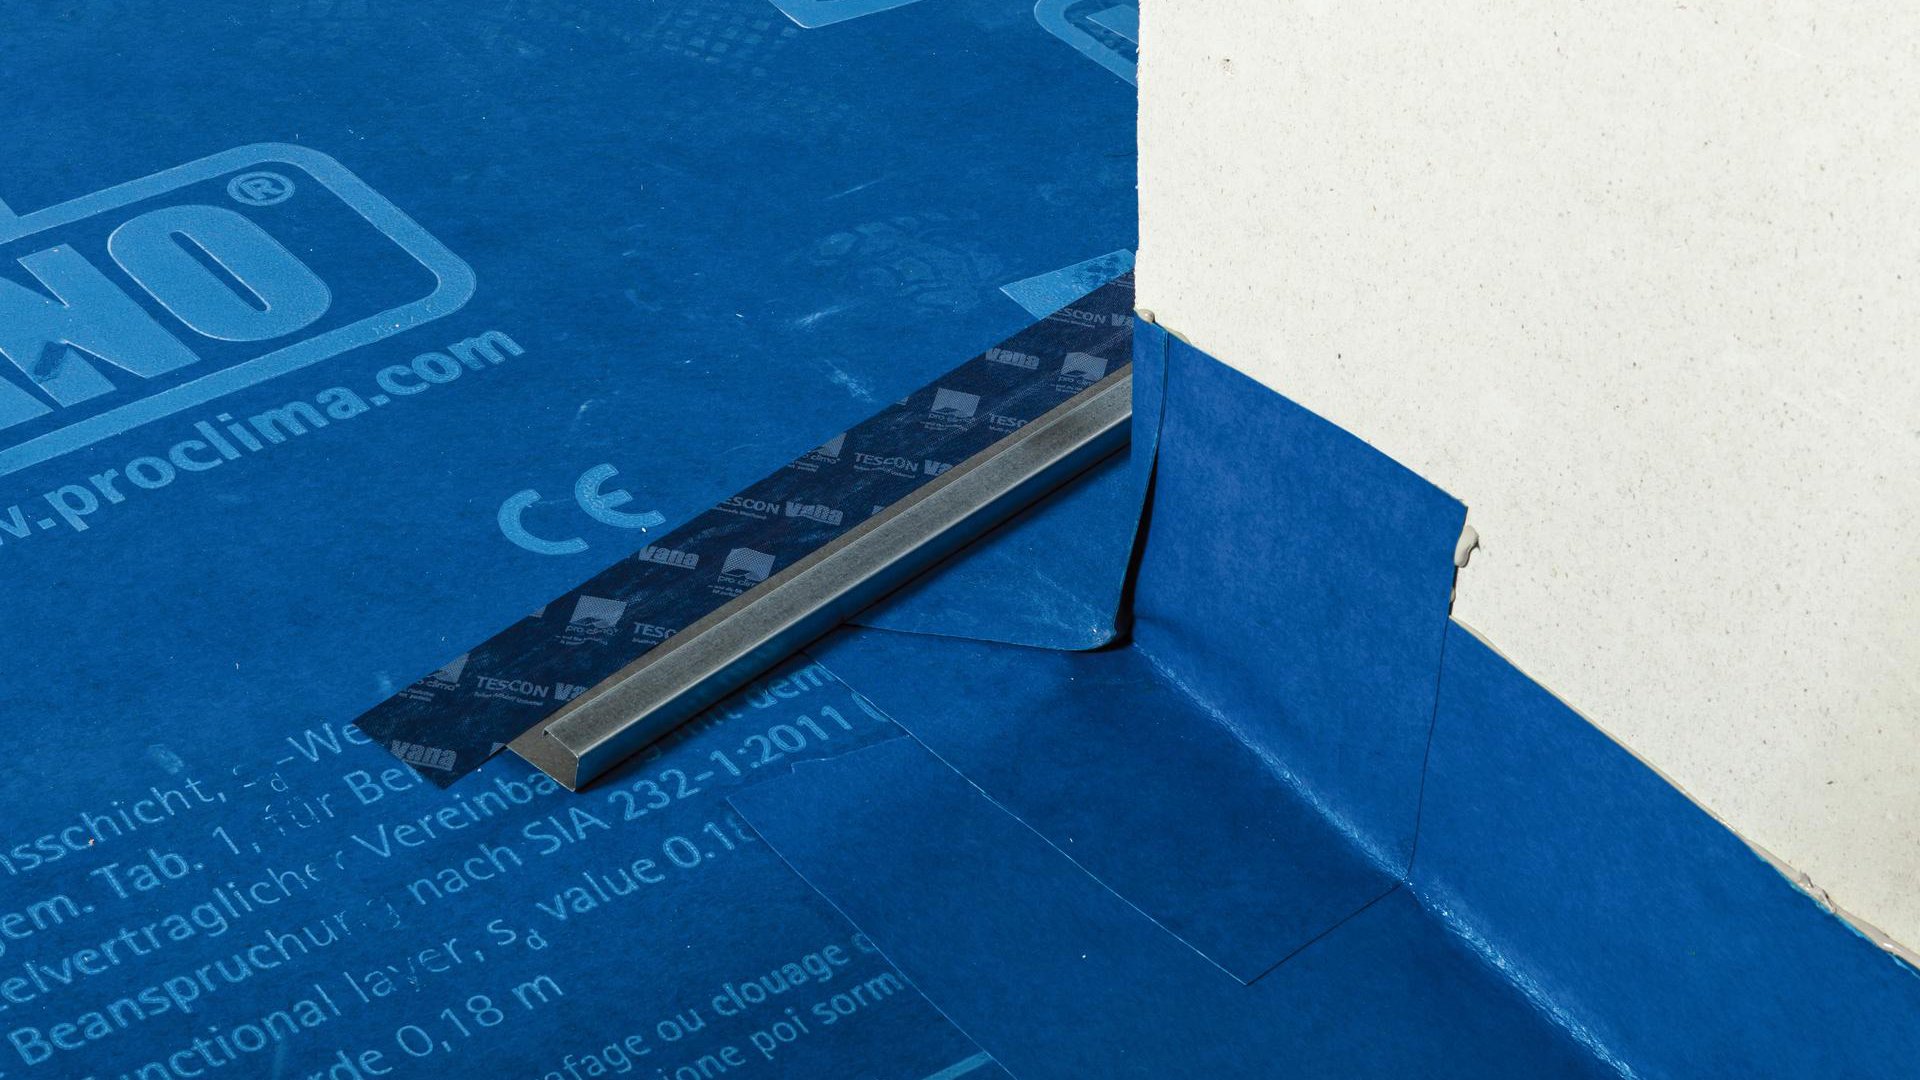
13. Installation of a water deflector
Create a water deflector with a lateral fall above the integrated roof element and stick it to the membrane. Form the water deflector in such a way that moisture is guided through a gap in a counter batten into the next adjacent field that does not have an integrated roof element.
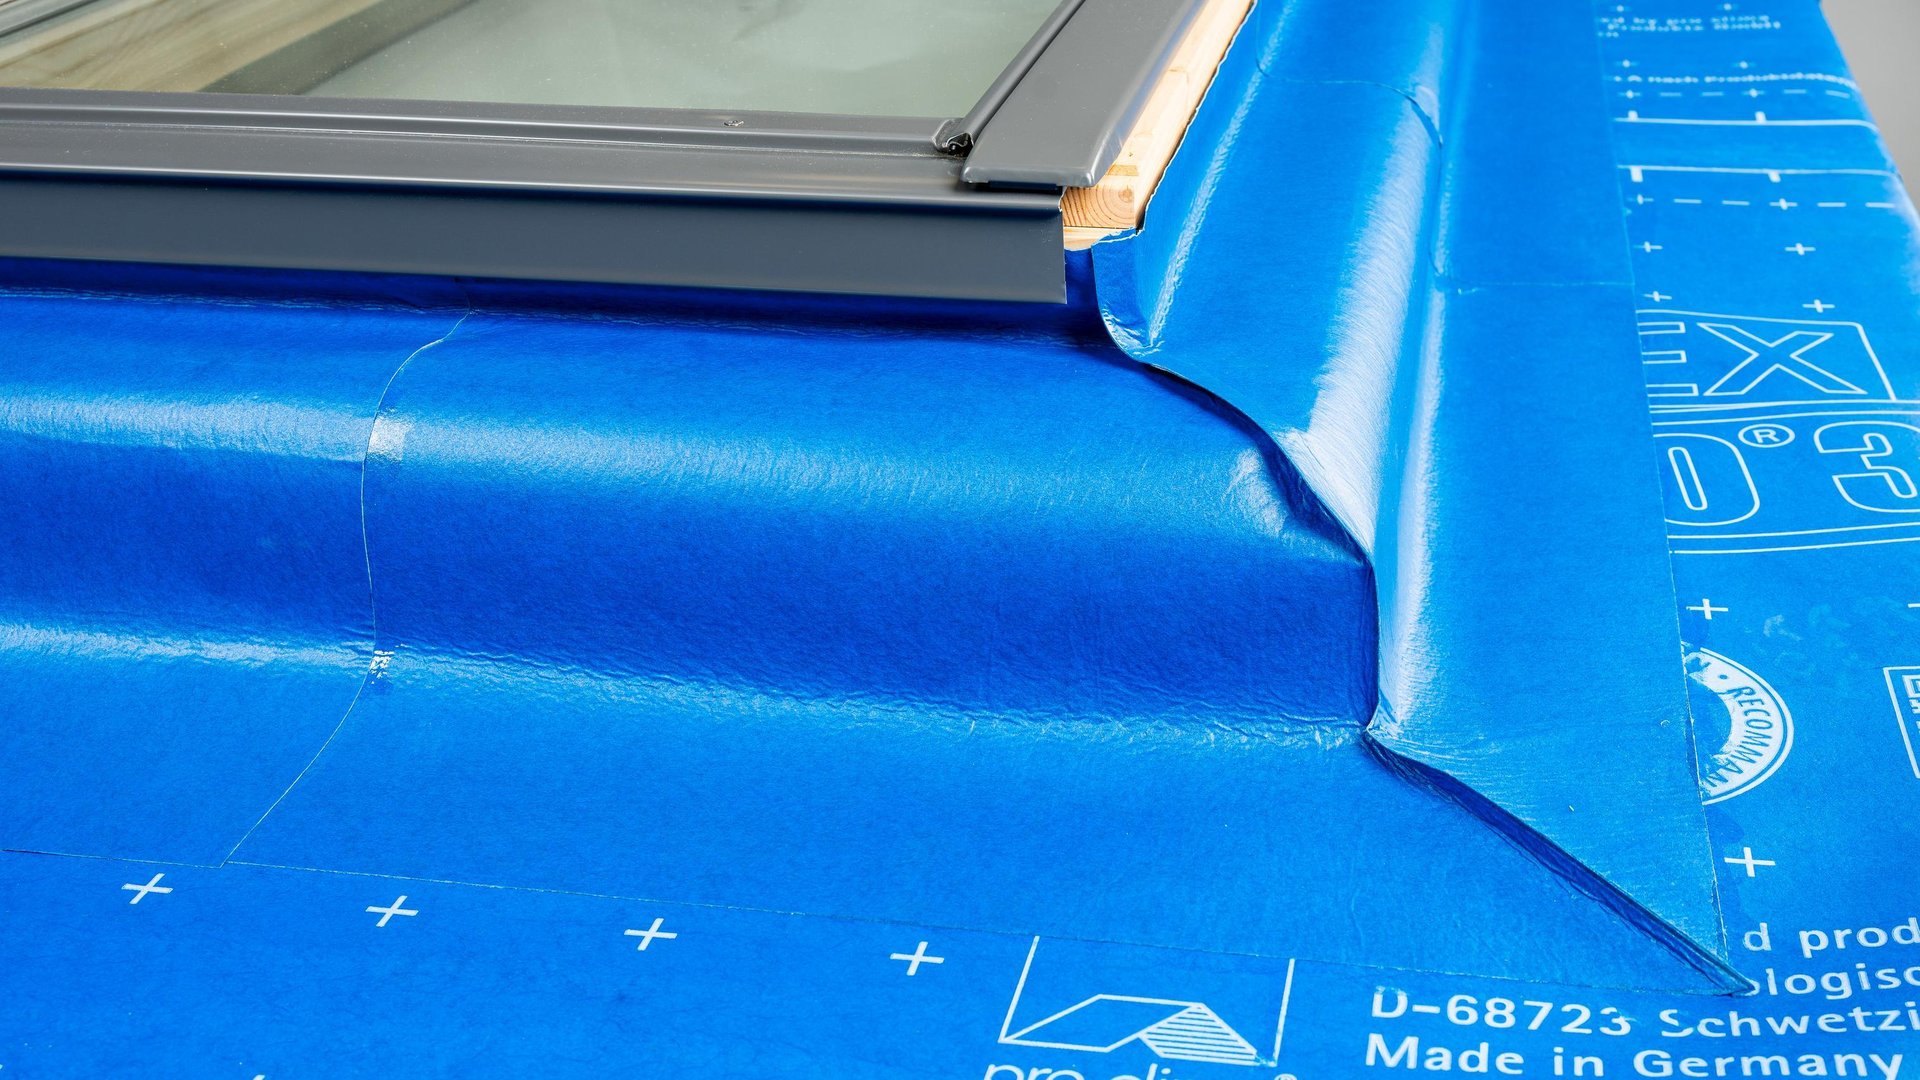
14. Sealing at skylights
For more information, see WELDANO INVEX 3D
14. Sealing at skylights
For more information, see WELDANO INVEX 3D