
EXTOSEAL ENCORS
Installation steps: Retrofitting to sub-sill flashing

1. Apply tape at the window frame
Measure out the required length of tape (width of opening + 2 x additional allowance) and cut to size. Gradually remove the narrow release film and stick the tape onto the window frame in the window sill recess.
1. Apply tape at the window frame
Measure out the required length of tape (width of opening + 2 x additional allowance) and cut to size. Gradually remove the narrow release film and stick the tape onto the window frame in the window sill recess.

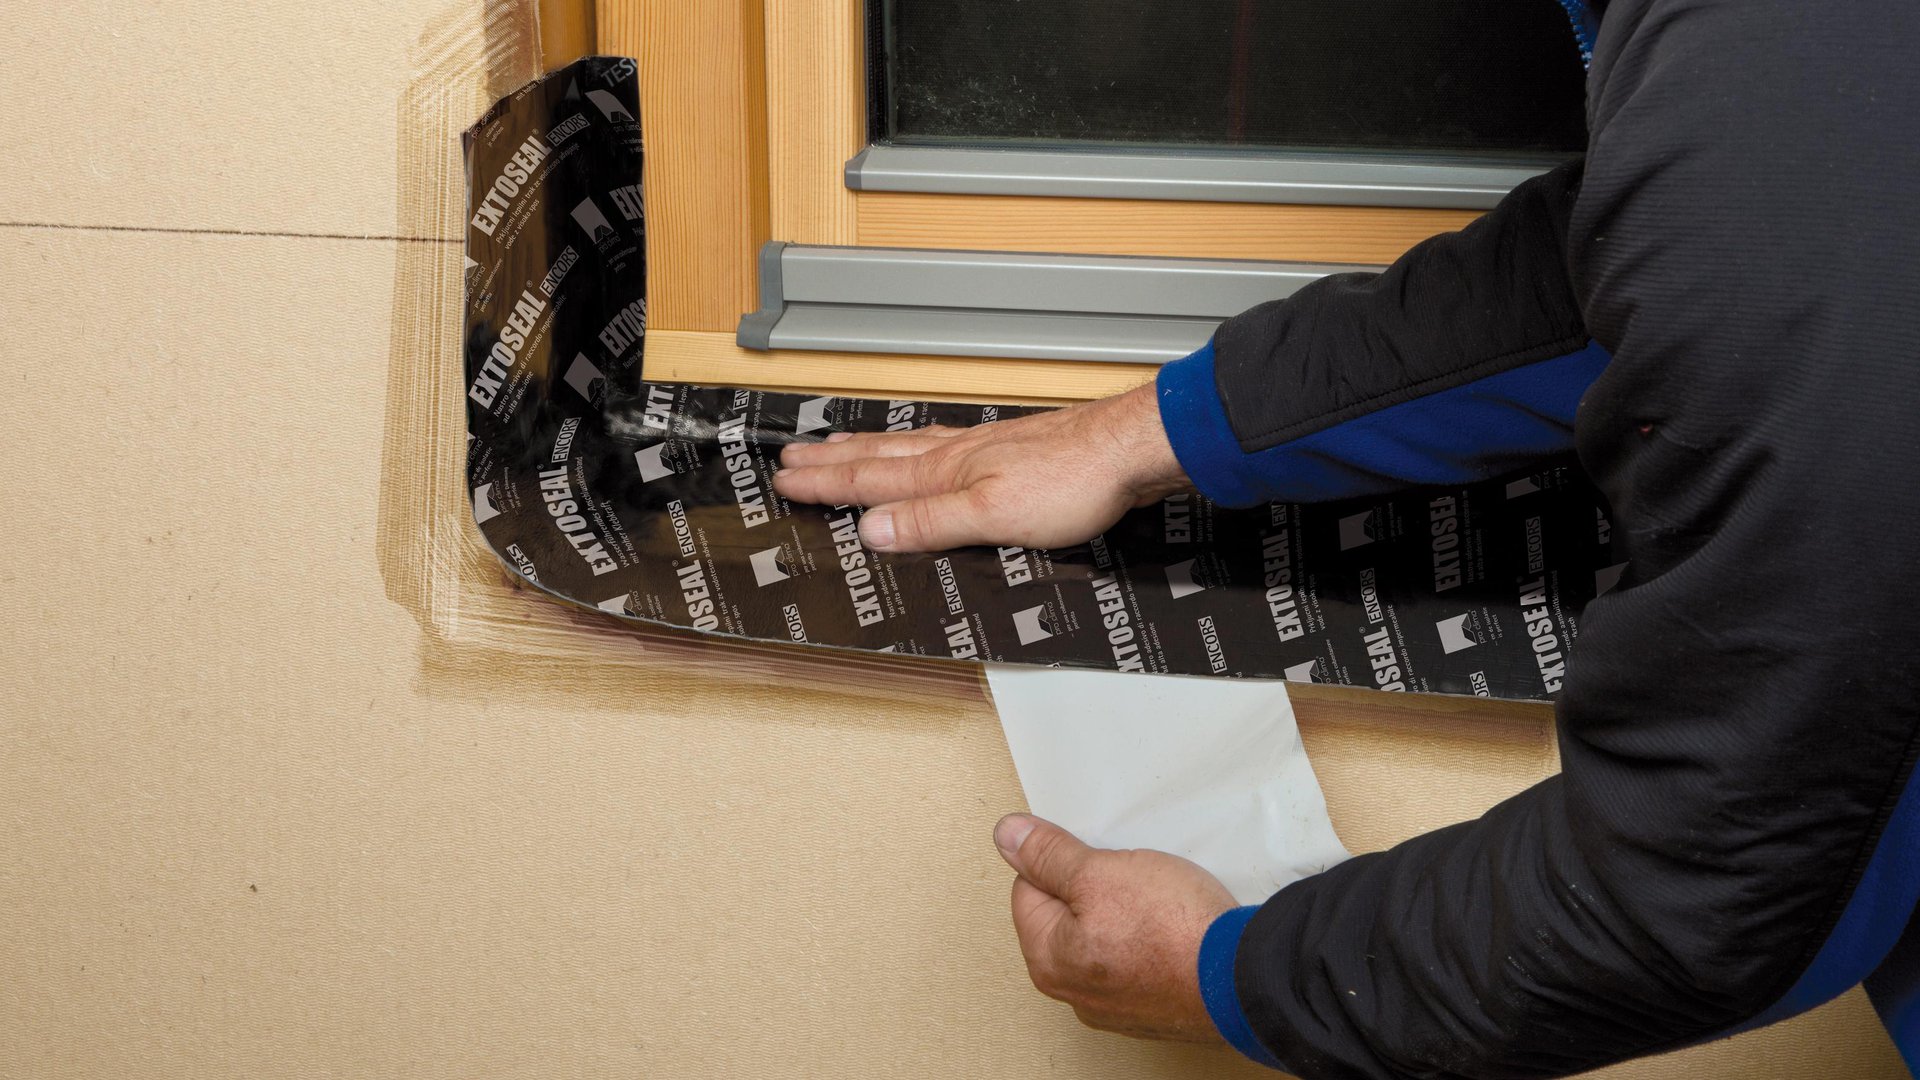
2. Fold up onto the reveals
Seal the transition between the areas of responsibility of different trades using a suitable sealant. Fold the tape up onto the reveals in the corners and stick it to the window frame. The additional allowance (excess length) for the tape depends on the subsequent procedure: approx. 10-15 cm (4" to 6") in the case of covering with a reveal plate or for a back-ventilated structure; or approx. 6 cm (2 3/8") (from upper edge of window sill profile) for a directly plastered window reveal.
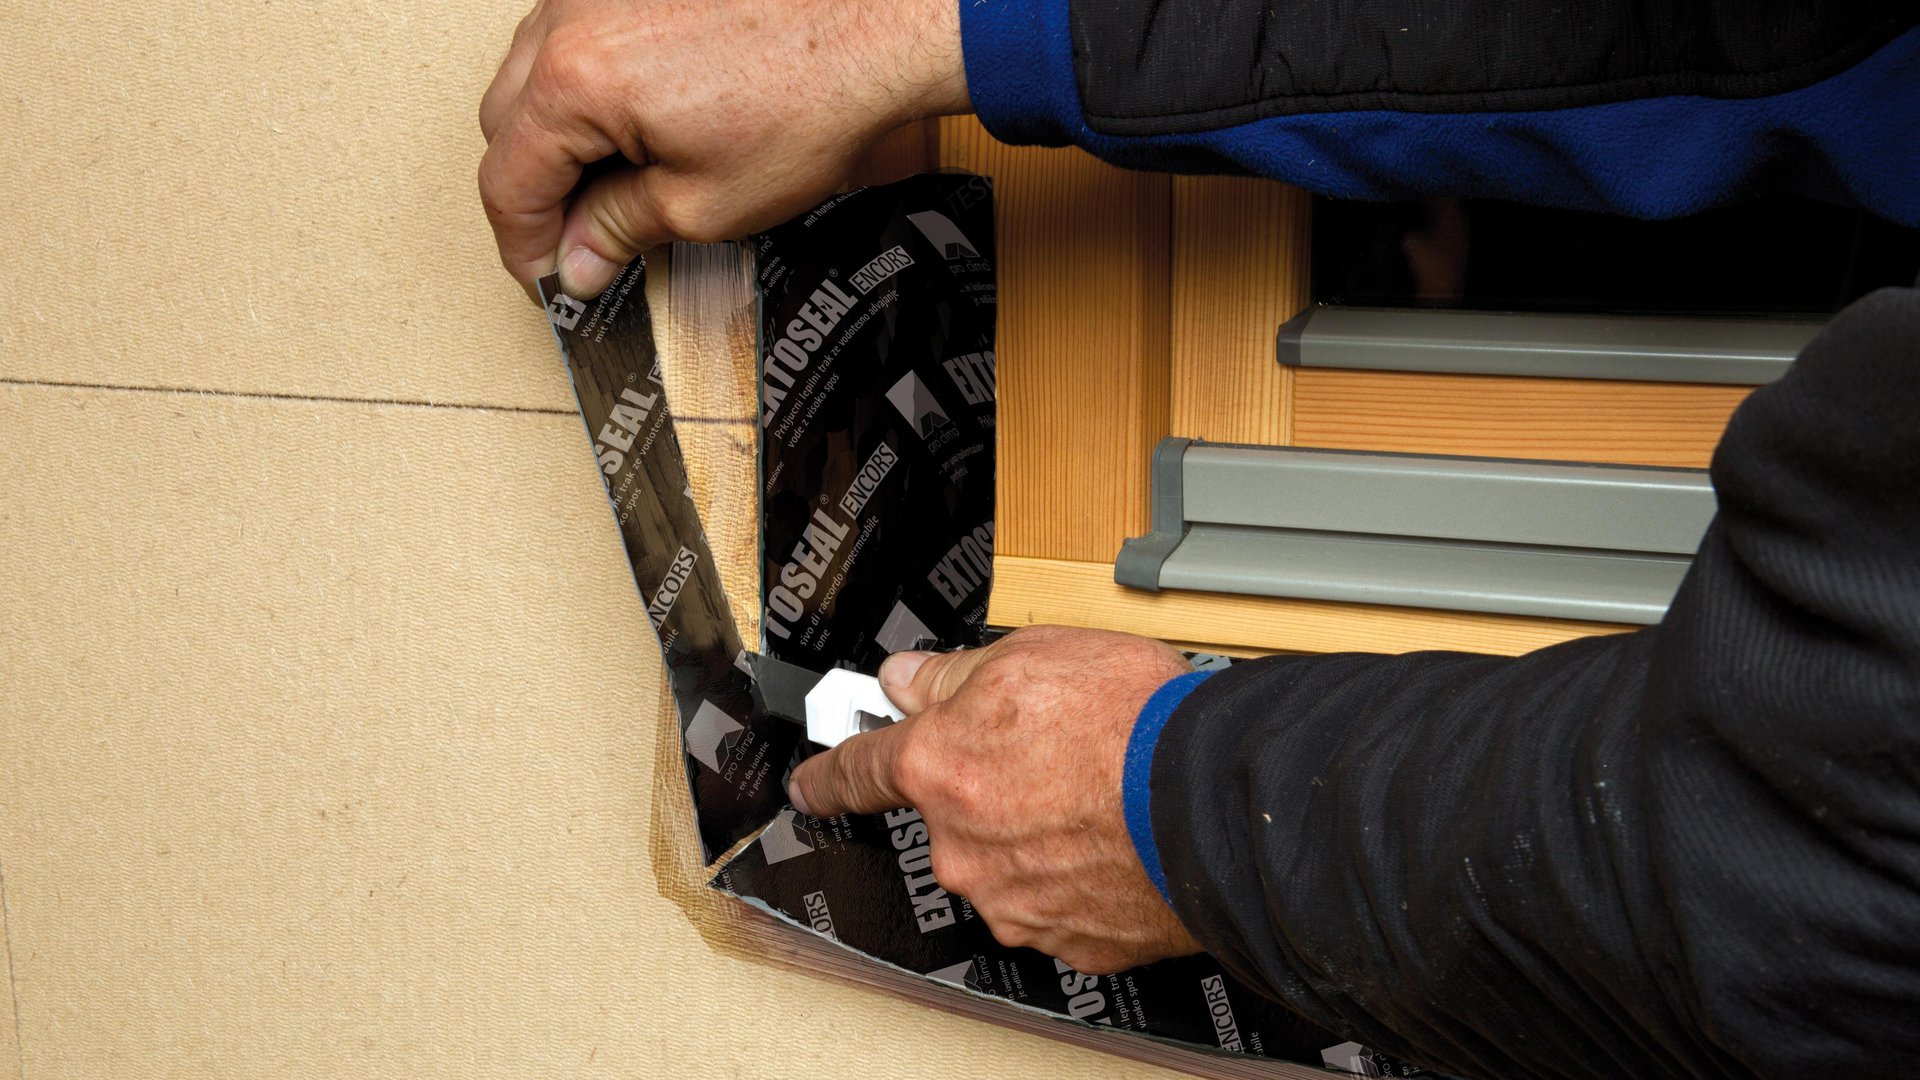
3. Apply tape to the reveals
Gradually remove the release film and stick the tape onto the reveal. Ensure that the tape is guided right into the corners. Rub the tape firmly to secure the adhesive bond everywhere (PRESSFIX).
3. Apply tape to the reveals
Gradually remove the release film and stick the tape onto the reveal. Ensure that the tape is guided right into the corners. Rub the tape firmly to secure the adhesive bond everywhere (PRESSFIX).
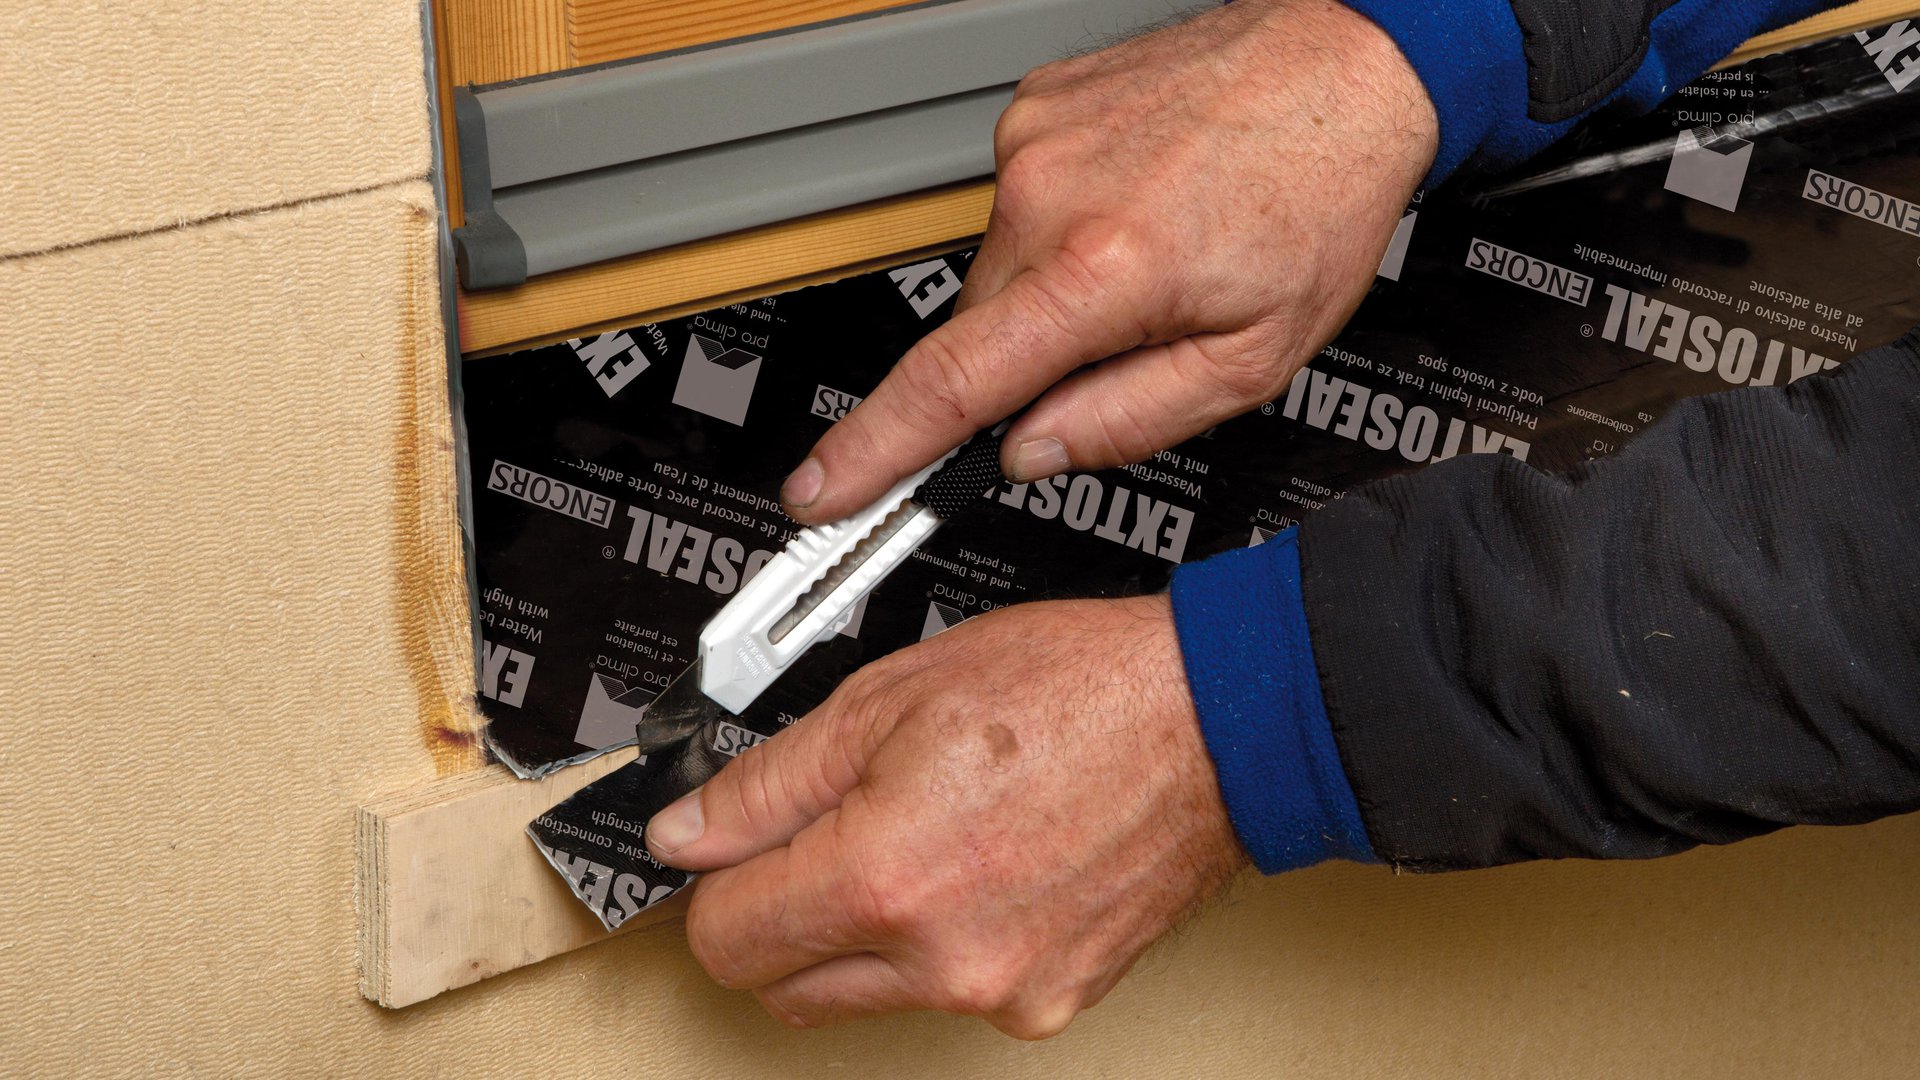
4. Cut off excess tape at window reveals
Cut off any excess tape on the vertical window reveals so that it is flush with the front edge of the wood-fibre insulating panels. Note: Plaster reinforcement is necessary if layers of plaster are subsequently applied to this vertical edge.
4. Cut off excess tape at window reveals
Cut off any excess tape on the vertical window reveals so that it is flush with the front edge of the wood-fibre insulating panels. Note: Plaster reinforcement is necessary if layers of plaster are subsequently applied to this vertical edge.
5. Cut off horizontal excess tape
Cut off any horizontal excess tape using a spacer, allowing 15 mm (5/8") so that the tape can be applied to the plaster later on.
5. Cut off horizontal excess tape
Cut off any horizontal excess tape using a spacer, allowing 15 mm (5/8") so that the tape can be applied to the plaster later on.

6. Install the window sill
You now have a finished lower sub-sill flashing using EXTOSEAL ENCORS! In a subsequent step, the plasterer will stick the plaster-sealing strip to the protruding tape. The fitting of a window sill provides long-term protection for the reveal.
6. Install the window sill
You now have a finished lower sub-sill flashing using EXTOSEAL ENCORS! In a subsequent step, the plasterer will stick the plaster-sealing strip to the protruding tape. The fitting of a window sill provides long-term protection for the reveal.