
SOLITEX FRONTA QUATTRO
Installation steps

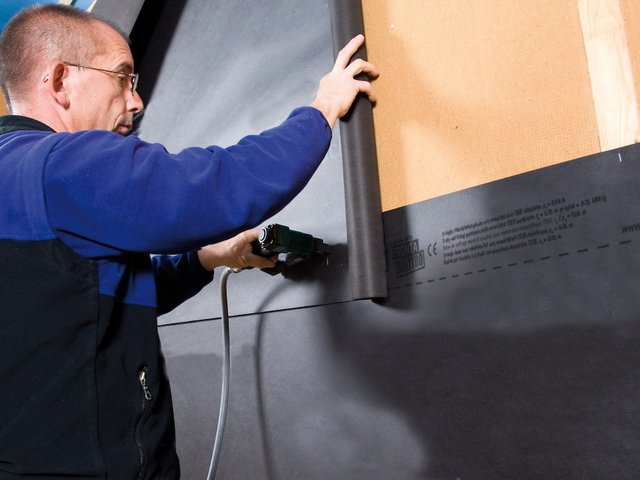
1. Install the membrane
Roll out the membrane and use galvanised staples that are at least 10 mm (⅜″) wide by 8 mm (⁵⁄₁₆″) long to fasten the membrane in the overlap area at intervals of 10-15 cm (4″-6″) in a manner that protects against moisture entry. Install the membrane leaving an additional 4 cm (1⅝″) overlap at adjacent building structures so that a windtight bond can be applied here subsequently.
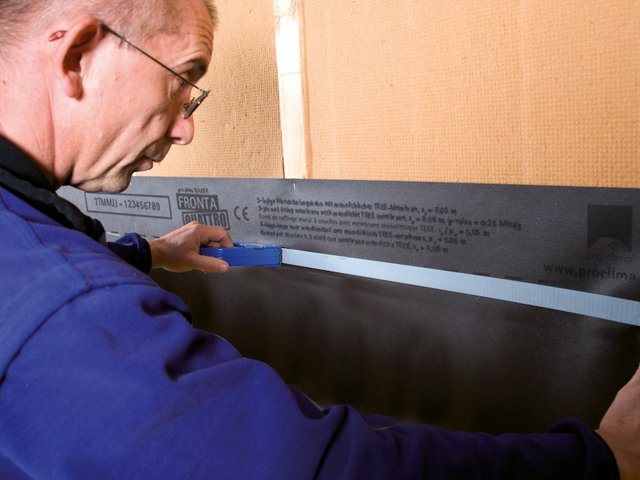
2. Apply double-sided adhesive tape
Clean the subsurface (dry and free of dust, silicone and grease), stick DUPLEX double-sided adhesive tape to the lower third of the subsequent overlap in a manner that protects against moisture. Rub the tape firmly using the PRESSFIX to secure the adhesive bond. Ensure that there is sufficient resistance pressure.
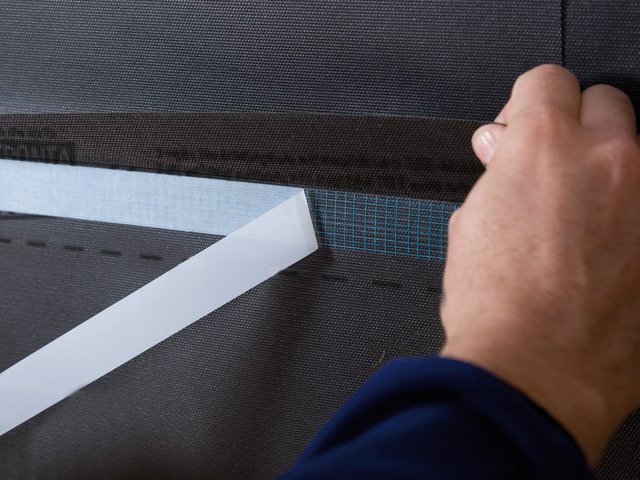
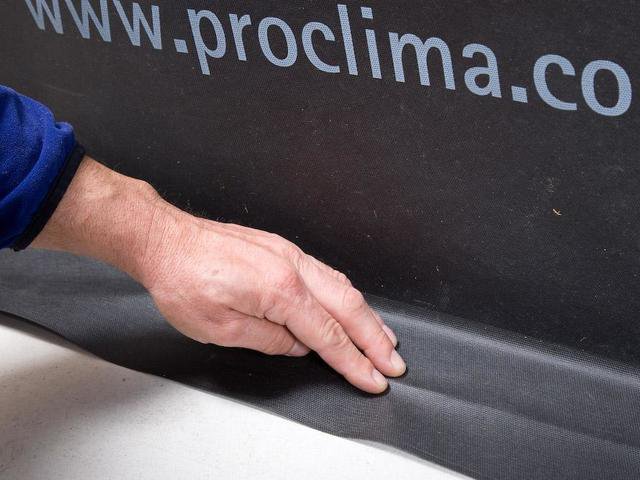
3. Overlap the membranes
Overlap the membranes for at least 10 cm (4″) so that they are watertight. The printed markings on the membrane serve as a guide here.
3. Overlap the membranes
Overlap the membranes for at least 10 cm (4″) so that they are watertight. The printed markings on the membrane serve as a guide here.
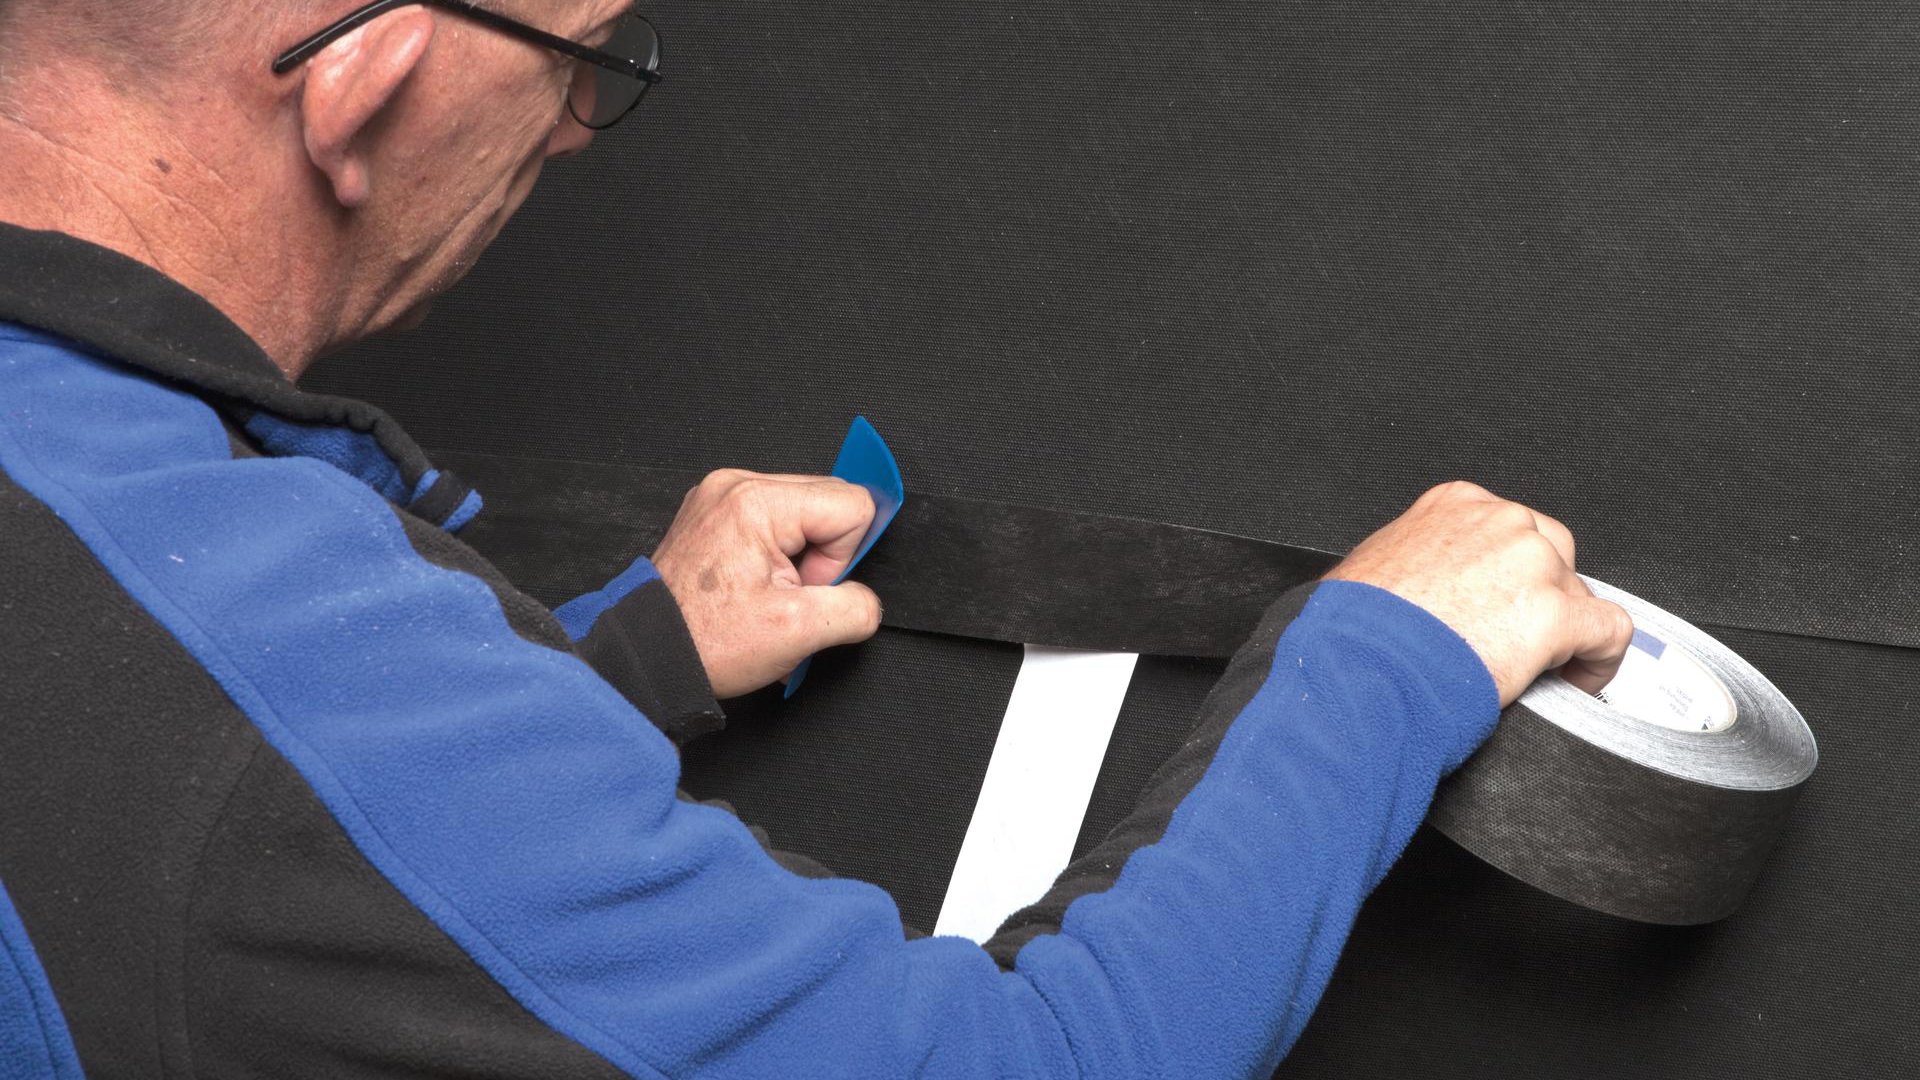
4. Taping over the overlaps
Gradually remove the release film from DUPLEX and stick the overlapping membrane, ensuring that there are no folds or tension. Rub the tape firmly using the PRESSFIX to secure the adhesive bond. Ensure that there is sufficient resistance pressure.
4. Taping over the overlaps
Gradually remove the release film from DUPLEX and stick the overlapping membrane, ensuring that there are no folds or tension. Rub the tape firmly using the PRESSFIX to secure the adhesive bond. Ensure that there is sufficient resistance pressure.

5a. Alternatively: Taping over the overlaps with TESCON INVIS
Tape TESCON INVIS system adhesive tape centrally to the overlap and stick it down bit by bit so that it is load and wrinkle free.
5a. Alternatively: Taping over the overlaps with TESCON INVIS
Tape TESCON INVIS system adhesive tape centrally to the overlap and stick it down bit by bit so that it is load and wrinkle free.
5b. Alternatively: Taping over the overlaps with TESCON INVIS
Rub the tape firmly using the PRESSFIX to secure the adhesive bond. Ensure that there is sufficient resistance pressure.
5b. Alternatively: Taping over the overlaps with TESCON INVIS
Rub the tape firmly using the PRESSFIX to secure the adhesive bond. Ensure that there is sufficient resistance pressure.
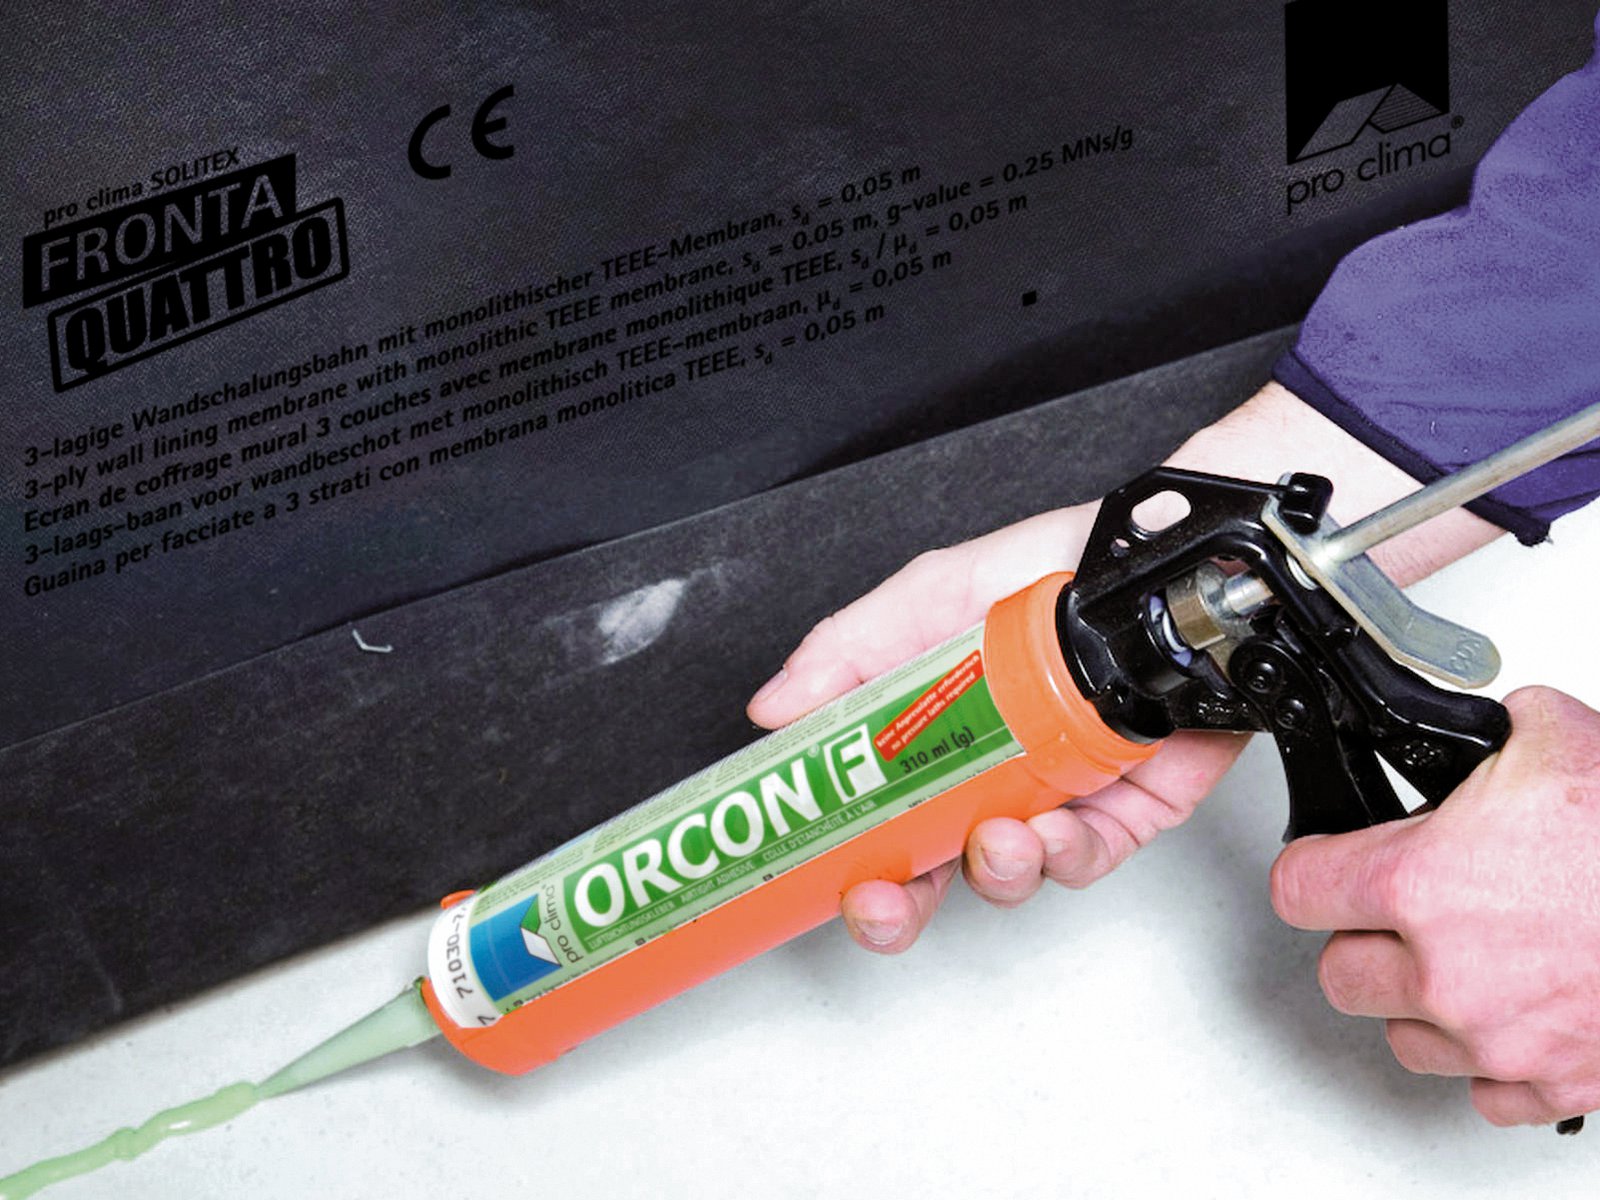
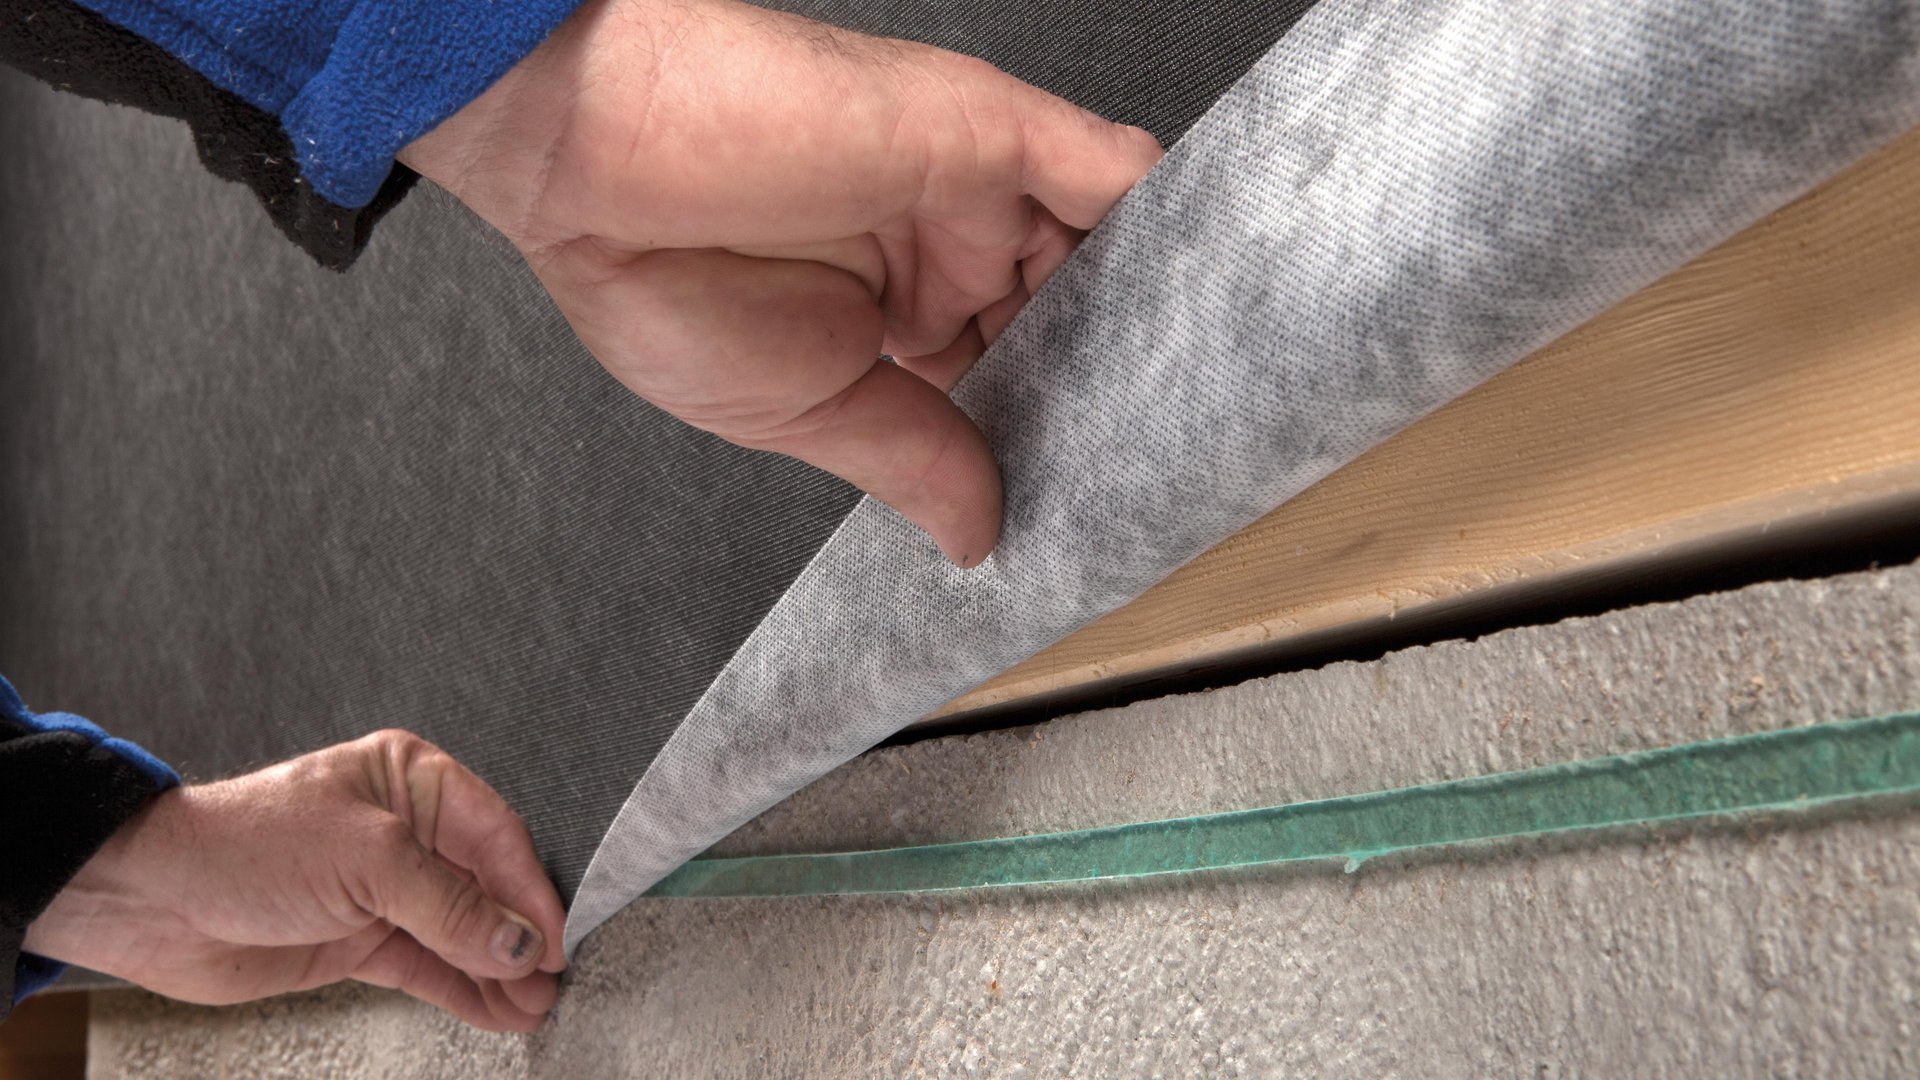
6a. Sealing to rough or mineral surfaces (e.g. floorboard)
Clean the surface. Apply a bead of ORCON F adhesive sealant – at least 5 mm (³⁄₁₆″) thick (more in the case of very rough surfaces).
6a. Sealing to rough or mineral surfaces (e.g. floorboard)
Clean the surface. Apply a bead of ORCON F adhesive sealant – at least 5 mm (³⁄₁₆″) thick (more in the case of very rough surfaces).
6b. Sealing to rough or mineral surfaces (e.g. floorboard)
Apply the membrane, leaving slack to allow for expansion, and do not press the adhesive completely flat to allow for relative motion between components.
6b. Sealing to rough or mineral surfaces (e.g. floorboard)
Apply the membrane, leaving slack to allow for expansion, and do not press the adhesive completely flat to allow for relative motion between components.
7. Alternatively: Sticking to rough or mineral surfaces (e.g. floorboard)
Stick line of adhesive to the subsurface, remove release film and stick the membrane in place, leaving slack to allow for expansion.
7. Alternatively: Sticking to rough or mineral surfaces (e.g. floorboard)
Stick line of adhesive to the subsurface, remove release film and stick the membrane in place, leaving slack to allow for expansion.
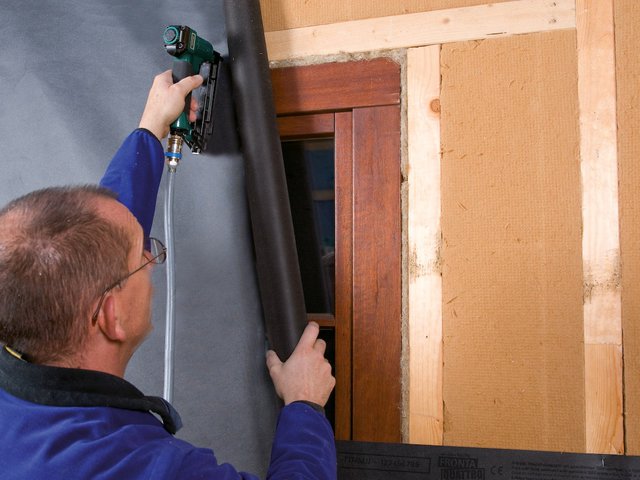
8a. Sealing around windows
Install membranes continuously over window openings and attach them all around the window using a stapler.
Then cut open the opening using a utility knife.
8a. Sealing around windows
Install membranes continuously over window openings and attach them all around the window using a stapler.
Then cut open the opening using a utility knife.
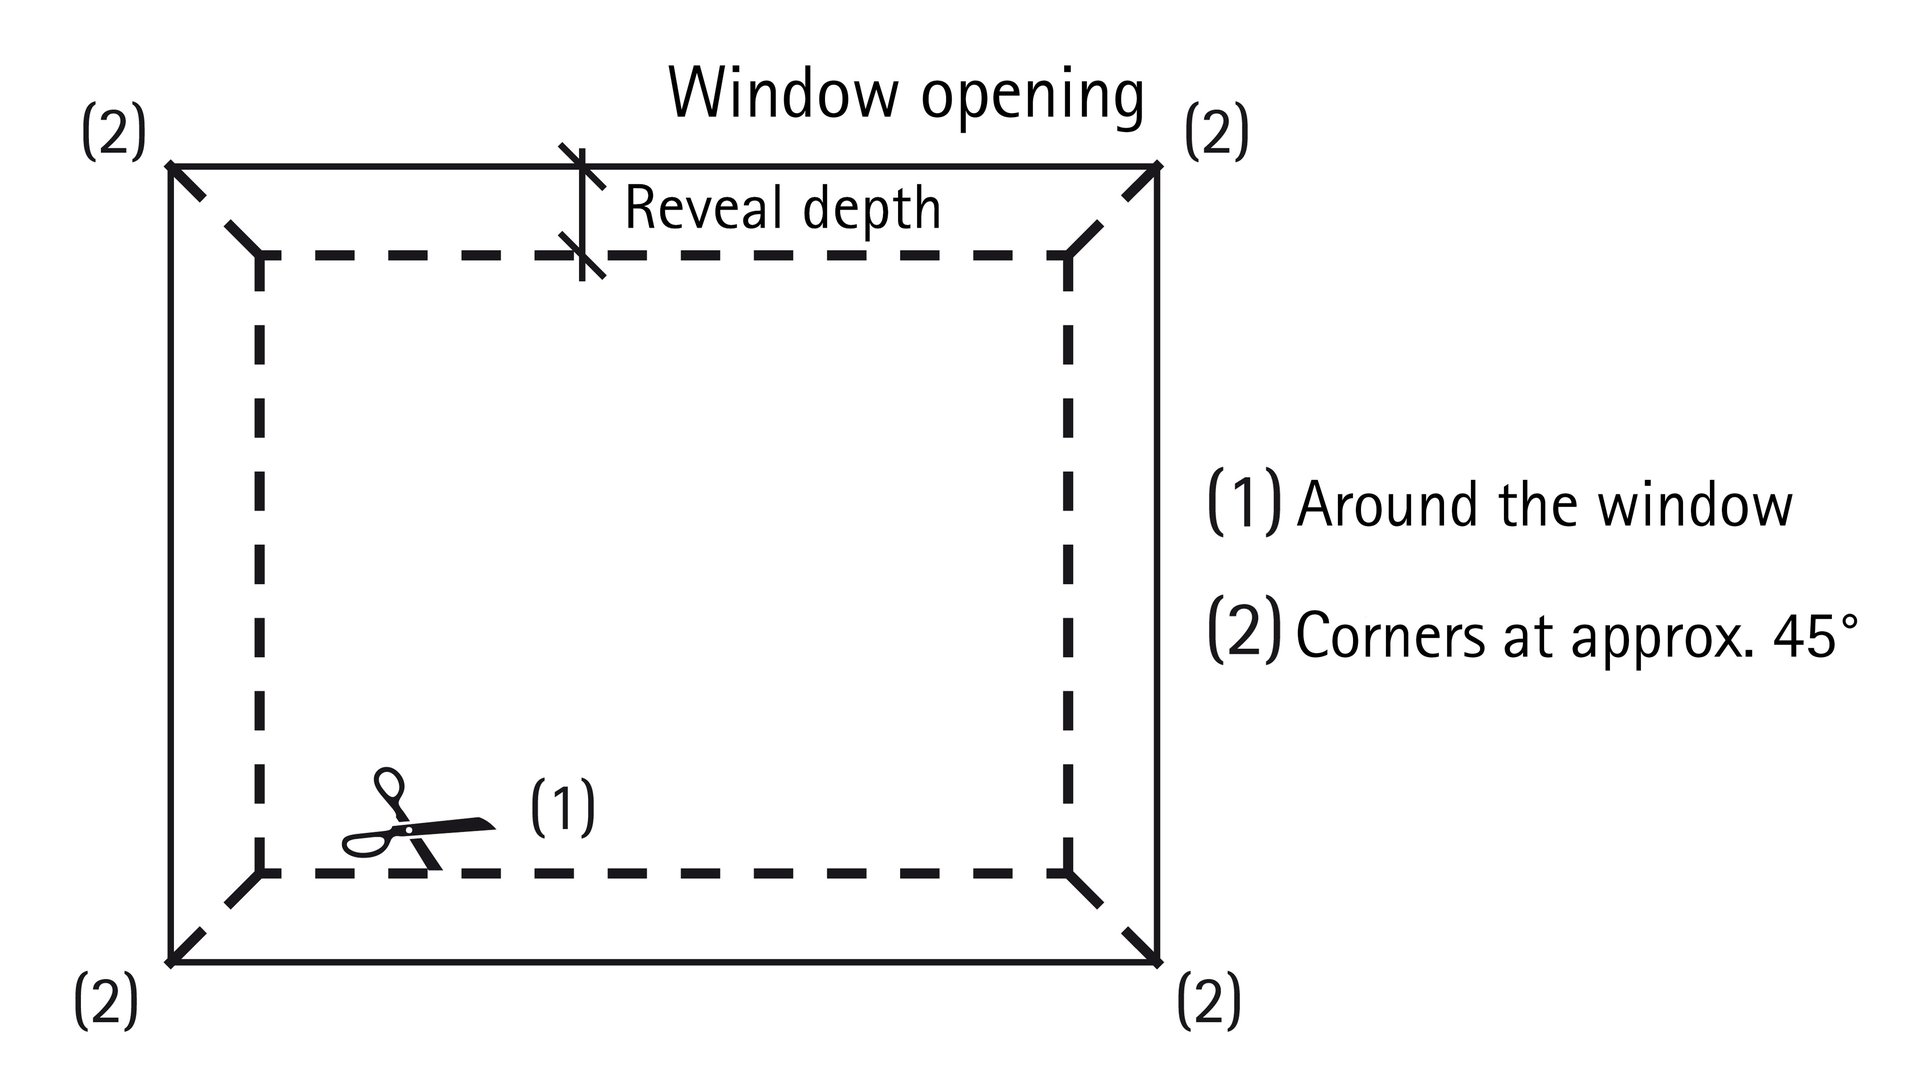
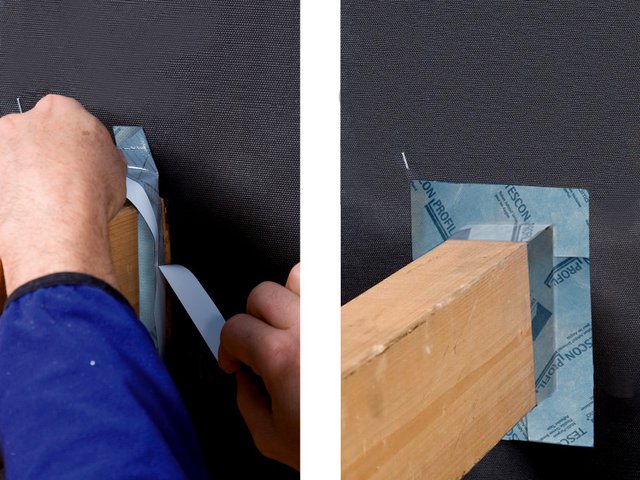
8b. Sealing around windows
In the case of recessed windows, cut into the membrane as shown in the sketch and guide into the reveal as far as the window frame.
8b. Sealing around windows
In the case of recessed windows, cut into the membrane as shown in the sketch and guide into the reveal as far as the window frame.
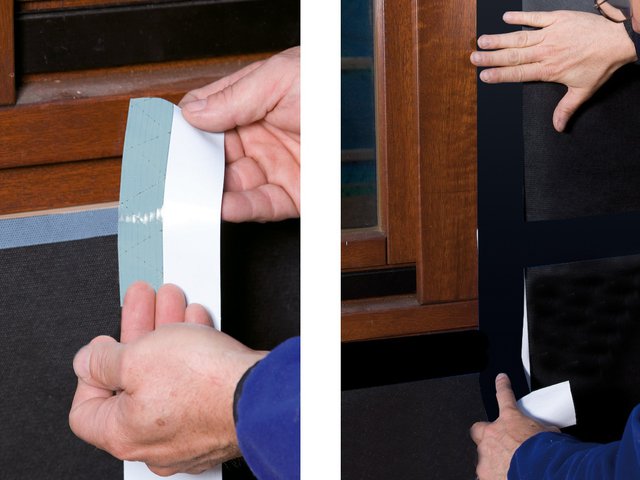
9. Sealing around windows
Tape the membrane to the window frame using TESCON PROFECT to ensure a windtight seal. Thanks to the split release paper it is possible to stick the tape first to the membrane and then, subsequently, to the window. Alternatively use TESCON VANA or TESCON INVIS.
9. Sealing around windows
Tape the membrane to the window frame using TESCON PROFECT to ensure a windtight seal. Thanks to the split release paper it is possible to stick the tape first to the membrane and then, subsequently, to the window. Alternatively use TESCON VANA or TESCON INVIS.

10. Sealing cable and pipe penetrations
Fit a KAFLEX or ROFLEX 15-30 mm (½″‑1³⁄₁₆″) sealing grommet over the cable or pipe and tape it to the membrane.
The plain black variants of the KAFLEX and ROFLEX sealing grommets are well-suited for open-jointed cladding due to their discreet colour.
Alternative method: use blue grommets and tape over them with TESCON INVIS.
Stick non-self-adhesive pipe grommets to the membrane using TESCON INVIS.
11. Sealing angular penetrations
Slide the TESCON PROFECT pre-folded corner sealing tape into the corner on the release film and stick the first independent adhesive strip. Then remove the remaining release strips and stick the second side. Alternatively, this transition can be sealed using the black TESCON INVIS adhesive tape.

12. Installation of decking
Horizontal or vertical installation of decking –
SOLITEX FRONTA WA: Only for closed decking
SOLITEX FRONTA QUATTRO: For open cladding with gap widths up to max. 35 mm (1⅜″)
SOLITEX FRONTA QUATTRO FB: Flame-resistant
SOLITEX FRONTA PENTA: For open cladding with gap widths up to max. 50 mm (2″)