Installation steps

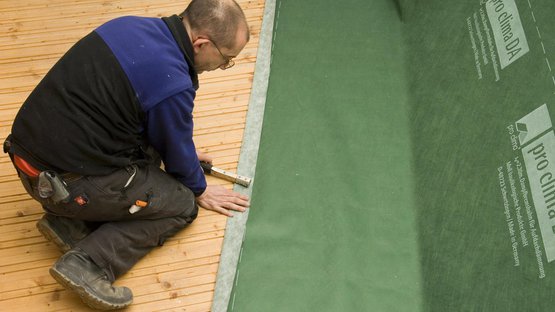
1. Install the membrane
Roll out the membrane and fasten it using galvanised staples that are at least 10 mm (⅜″) wide by 8 mm (⁵⁄₁₆″) long at intervals of 10-15 cm (4″-6″) in the overlap area. Install the membrane leaving an additional 4 cm (1⅝″) overlap at adjacent building structures so that an airtight bond can be applied here subsequently.

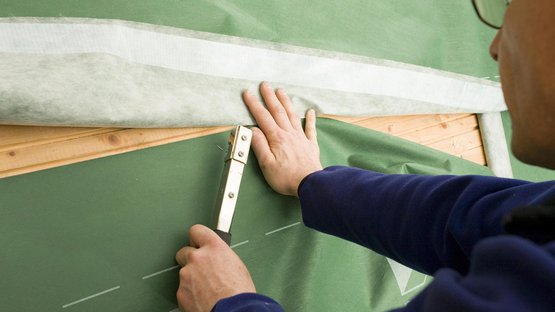
2. Overlap the membranes
Allow for an overlap for at least 10 cm (4″) between the membranes in a waterproof manner. The marking that is printed onto the membrane will serve as a guide here.
2. Overlap the membranes
Allow for an overlap for at least 10 cm (4″) between the membranes in a waterproof manner. The marking that is printed onto the membrane will serve as a guide here.

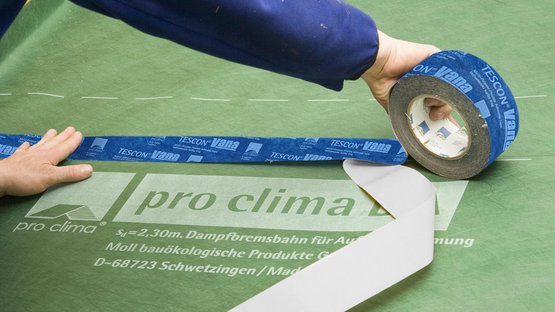
3a. Stick the overlap
Clean the subsurface (dry and free of dust, silicone and grease) and carry out an adhesion test, if necessary. Centre the TESCON VANA system adhesive tape on the overlap and gradually stick it in place, ensuring that there are no folds or tension.
3a. Stick the overlap
Clean the subsurface (dry and free of dust, silicone and grease) and carry out an adhesion test, if necessary. Centre the TESCON VANA system adhesive tape on the overlap and gradually stick it in place, ensuring that there are no folds or tension.

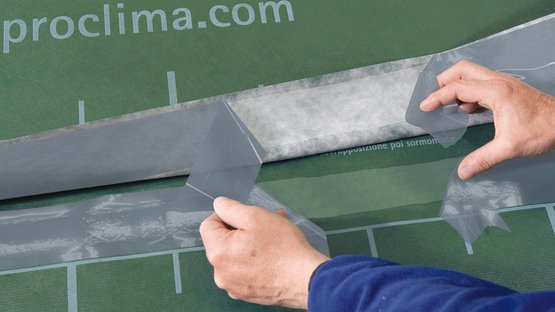
3b. Stick the overlap
In the case of DA connect, stick the membrane overlap using the two integrated self-adhesive strips. Rub firmly using the PRESSFIX application tool to secure the adhesive bond.
3b. Stick the overlap
In the case of DA connect, stick the membrane overlap using the two integrated self-adhesive strips. Rub firmly using the PRESSFIX application tool to secure the adhesive bond.

4. Installation at ridges
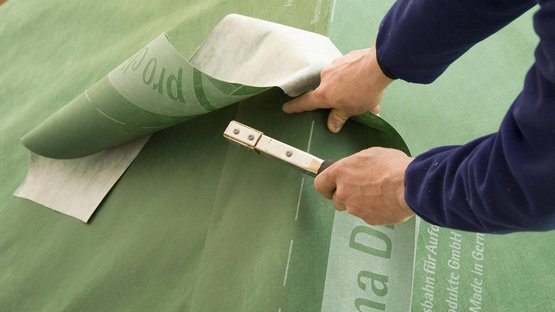
Apply an approx. 40 cm (1’ 4″) wide strip of DA centrally. Affix in the edge area using staples. Then tape in an airtight manner using the TESCON VANA system adhesive tape. Cover over the staples when applying the tape. Rub firmly using the PRESSFIX application tool to secure the adhesive bond. Ensure that there is sufficient resistance pressure.

5. Joint at bargeboard
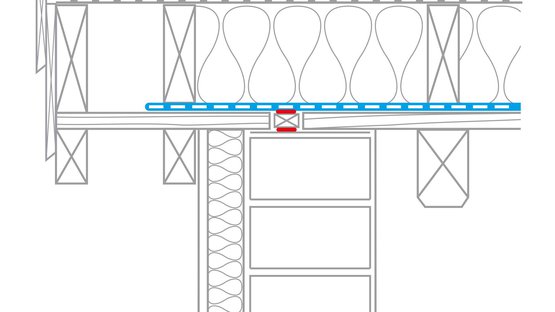
Interruption of the timber sheathing at the top of the wall cap, which has a layer of mortar applied to it. A roof lath is adhesively bonded to the wall cap with ORCON F along its entire length. Sealing of DA to the roof lath using ORCON F.
5. Joint at bargeboard
Interruption of the timber sheathing at the top of the wall cap, which has a layer of mortar applied to it. A roof lath is adhesively bonded to the wall cap with ORCON F along its entire length. Sealing of DA to the roof lath using ORCON F.

6. Joint at bargeboard, alternative 1
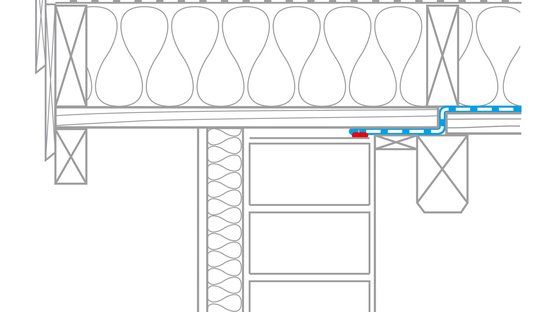
Butt joint between timber sheathing and last rafter. The DA passes through the butt joint and onto the inside of the timber sheathing and is stuck to the top of the wall cap using ORCON F.
6. Joint at bargeboard, alternative 1
Butt joint between timber sheathing and last rafter. The DA passes through the butt joint and onto the inside of the timber sheathing and is stuck to the top of the wall cap using ORCON F.

7. Joint at bargeboard, alternative 2
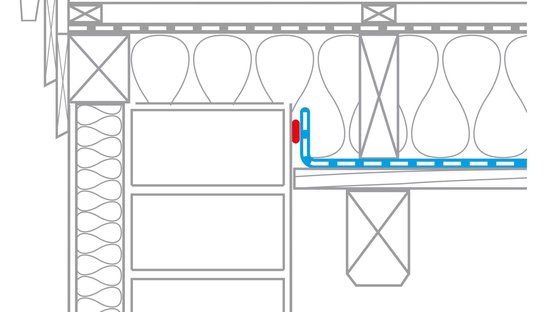
In the case of a plastered gable wall, bond pro clima DA to the plaster using ORCON F.
7. Joint at bargeboard, alternative 2
In the case of a plastered gable wall, bond pro clima DA to the plaster using ORCON F.

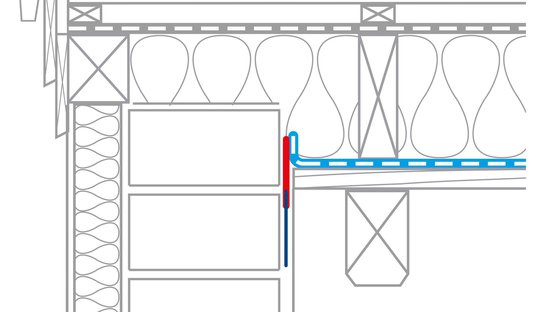
8. Joint at bargeboard, alternative 3
If there is no layer of plaster, affix CONTEGA PV to the wall using adhesive sealant and bond DA to the adhesive strip. At least 1 cm (⅜″) width of the fleece must be embedded into the middle of the layer of plaster.
8. Joint at bargeboard, alternative 3
If there is no layer of plaster, affix CONTEGA PV to the wall using adhesive sealant and bond DA to the adhesive strip. At least 1 cm (⅜″) width of the fleece must be embedded into the middle of the layer of plaster.

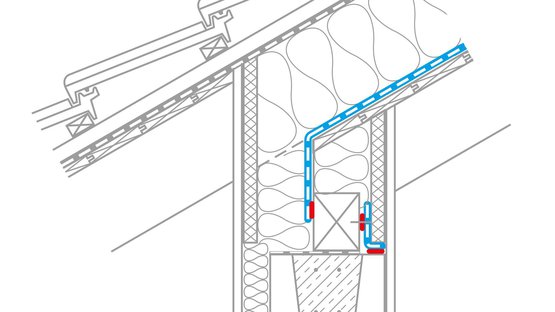
9. Eave joint with exposed rafters without rafter tails
Stick DA to the wallplate in an airtight manner using ORCON F. Seal the joint between the wallplate and the ring beam in an airtight manner using a strip of vapour control membrane (e.g. DA-S) and ORCON F.
9. Eave joint with exposed rafters without rafter tails
Stick DA to the wallplate in an airtight manner using ORCON F. Seal the joint between the wallplate and the ring beam in an airtight manner using a strip of vapour control membrane (e.g. DA-S) and ORCON F.

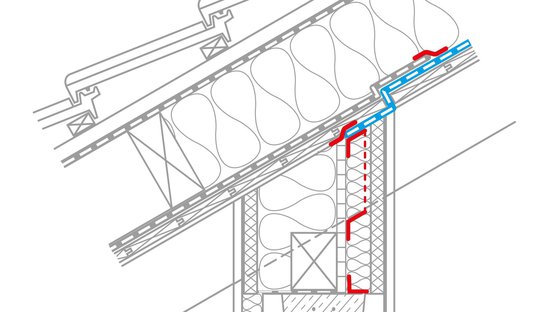
10. Eave joint with exposed rafters with rafter tails
Install an upright positioning board made of wood-based panel on the inside between the rafters and bond it to the ring beam and the rafters using TESCON PROFECT. If necessary, apply ORCON F underneath the tape in the case of rough concrete. Interrupt the sheathing above this positioning board and tape DA to this board.

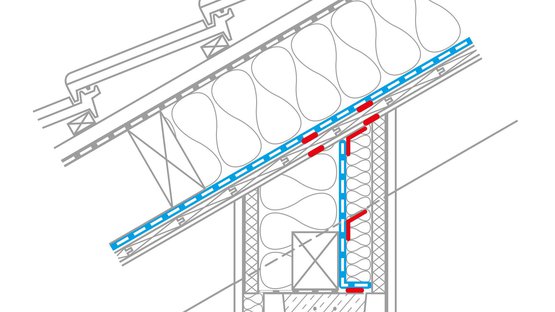
11. Eave joint with exposed rafters with rafter tails, alternative
Install a strip of vapour control membrane, e.g. DA-S, on the inside between the rafters and bond it to the ring beam and the rafters using TESCON PROFECT. If necessary, apply ORCON F underneath the tape in the case of rough concrete. Above the vapour control strip, create seals between the sheathing and both the rafters and the DA membrane using double strips of adhesive.

12. Sealing around pipes and cables
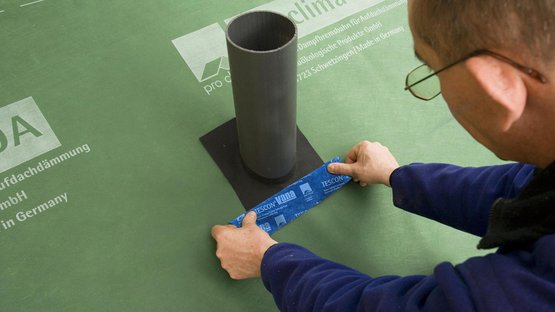
Place a KAFLEX or ROFLEX sealing grommet over the cable or pipe and stick it to DA. The cable grommets are self-adhesive. Tape the pipe grommets to the membrane in a waterproof manner all around using TESCON VANA.
12. Sealing around pipes and cables
Place a KAFLEX or ROFLEX sealing grommet over the cable or pipe and stick it to DA. The cable grommets are self-adhesive. Tape the pipe grommets to the membrane in a waterproof manner all around using TESCON VANA.

13. Quality assurance
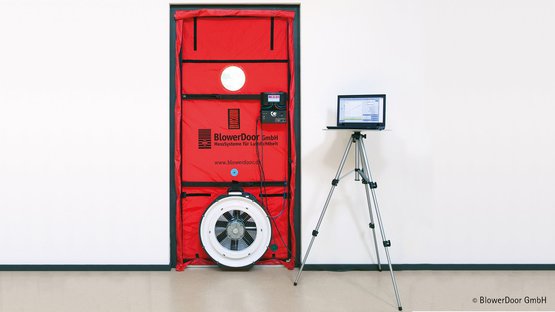
If all joints have been implemented in an airtight manner, the thermal insulation structure will be reliable and permanent. Testing of the airtightness with a Blower Door test is recommended for quality assurance purposes.
13. Quality assurance
If all joints have been implemented in an airtight manner, the thermal insulation structure will be reliable and permanent. Testing of the airtightness with a Blower Door test is recommended for quality assurance purposes.

